/

MacBook Air Models A1237 and A1304 Port Hatch Assembly Replacement

What you need

  1. MacBook Air Models A1237 and A1304 Port Hatch Assembly Replacement, MacBook Air Models A1237 and A1304 Port Hatch Assembly Replacement: step 1, image 1 of 1
    • Remove the following 10 screws securing the lower case to the Air:

    • Six 2.8 mm Phillips screws.

    • Two 3.8 mm Phillips screws.

    • Two 5.4 mm Phillips screws.

  2. MacBook Air Models A1237 and A1304 Port Hatch Assembly Replacement: step 2, image 1 of 2 MacBook Air Models A1237 and A1304 Port Hatch Assembly Replacement: step 2, image 2 of 2
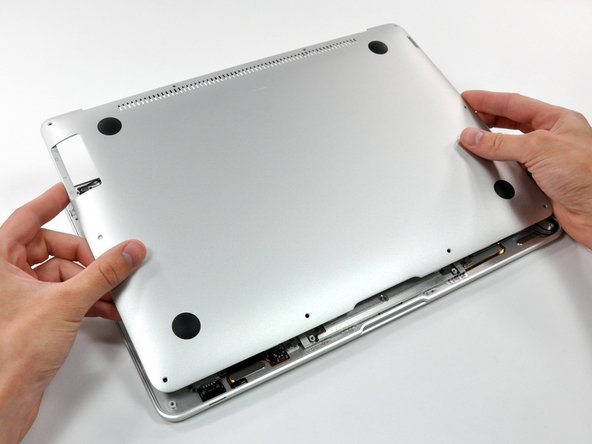
    • Slightly lift the lower case near the vents and push it toward the rear of the computer to free the mounting tabs.

  3. MacBook Air Models A1237 and A1304 Port Hatch Assembly Replacement: step 3, image 1 of 1
    • Disconnect the battery connector by pulling it straight out of its socket.

  4. MacBook Air Models A1237 and A1304 Port Hatch Assembly Replacement: step 4, image 1 of 1
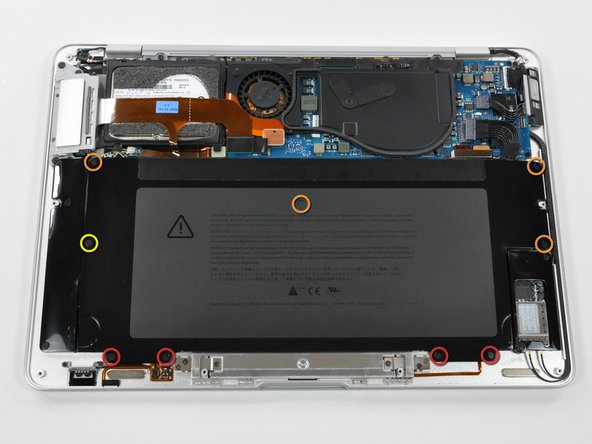
    • Remove the following nine screws securing the battery to the Air:

    • Four 2.9 mm Phillips.

    • Four 3.8 mm Phillips.

    • One 7.2 mm Phillips.

  5. MacBook Air Models A1237 and A1304 Port Hatch Assembly Replacement: step 5, image 1 of 1
    • Lift the battery out of the Air.

  6. MacBook Air Models A1237 and A1304 Port Hatch Assembly Replacement: step 6, image 1 of 1
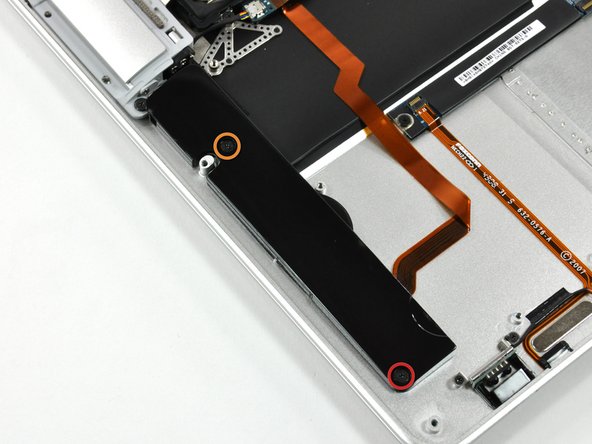
    • Remove the following two screws securing the speaker assembly to the upper case.

    • One 3 mm Phillips.

    • One 5.8 mm Phillips.

  7. MacBook Air Models A1237 and A1304 Port Hatch Assembly Replacement: step 7, image 1 of 2 MacBook Air Models A1237 and A1304 Port Hatch Assembly Replacement: step 7, image 2 of 2
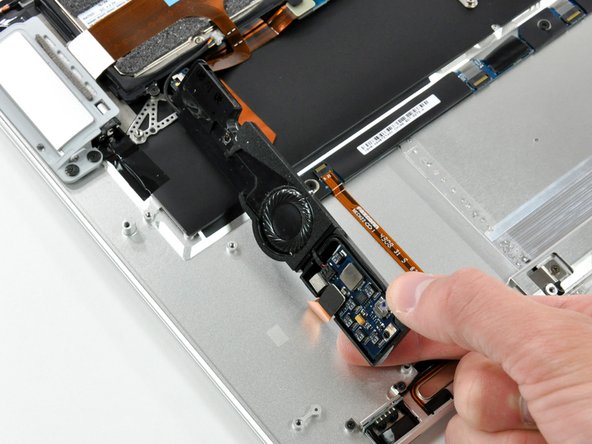
    • Use a spudger to lift the audio-out connector board off the adhesive that secures it to the hard drive bracket.

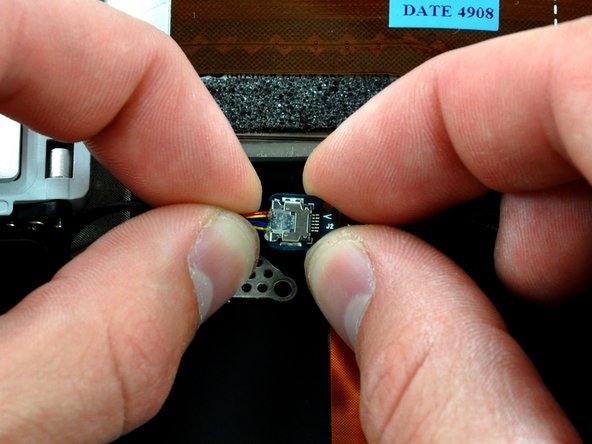
    • Disconnect the audio out connector from its socket.

  8. MacBook Air Models A1237 and A1304 Port Hatch Assembly Replacement: step 8, image 1 of 2 MacBook Air Models A1237 and A1304 Port Hatch Assembly Replacement: step 8, image 2 of 2
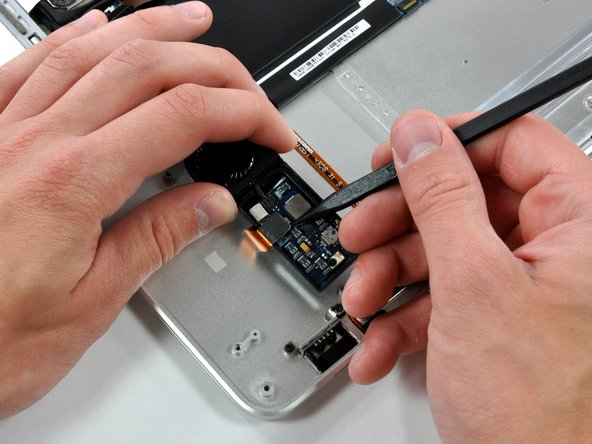
    • Rotate the speaker assembly toward the center of the Air.

    • Use a spudger to pry the speaker cable connector up off the audio board.

  9. MacBook Air Models A1237 and A1304 Port Hatch Assembly Replacement: step 9, image 1 of 2 MacBook Air Models A1237 and A1304 Port Hatch Assembly Replacement: step 9, image 2 of 2
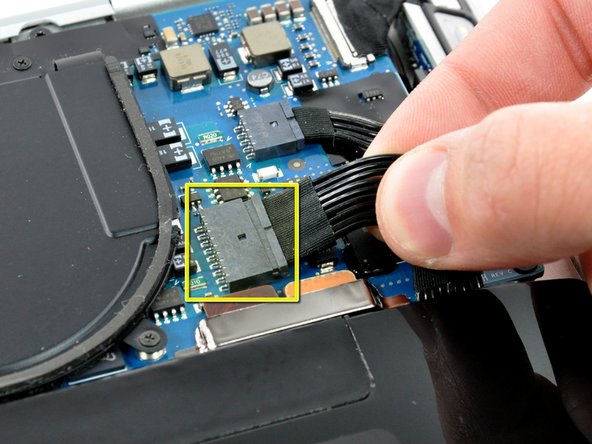
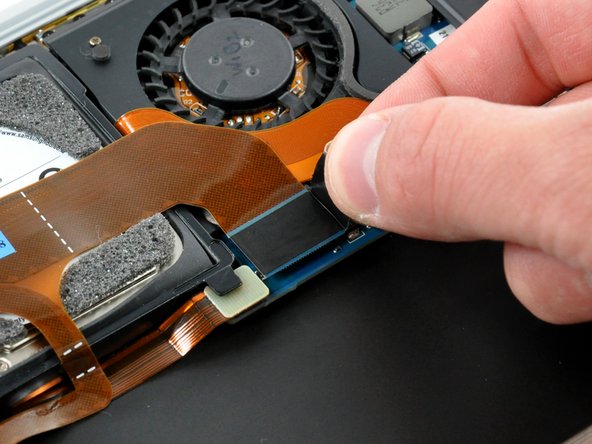
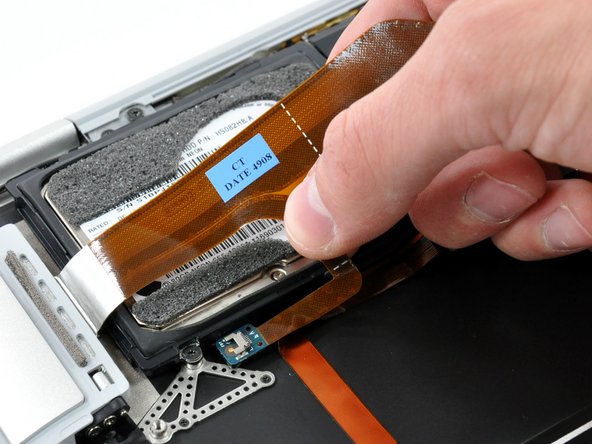
    • Disconnect the port hatch ribbon cable from the logic board by pulling it straight up by its black pull tab.

    • If necessary, pull the audio out ribbon cable off the adhesive securing it to the upper case.

  10. MacBook Air Models A1237 and A1304 Port Hatch Assembly Replacement: step 10, image 1 of 2 MacBook Air Models A1237 and A1304 Port Hatch Assembly Replacement: step 10, image 2 of 2
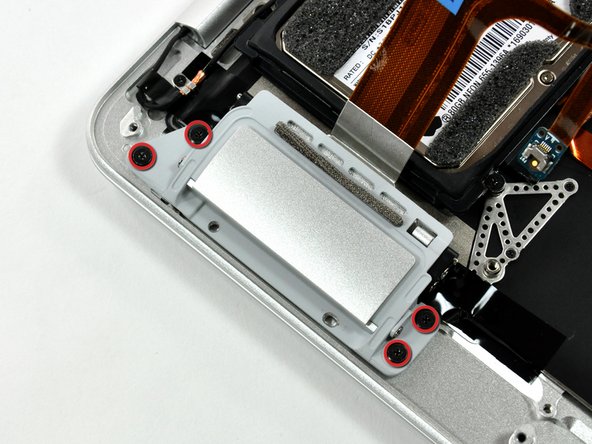
    • Remove the four 3.2 mm Phillips screws securing the port hatch assembly to the upper case.

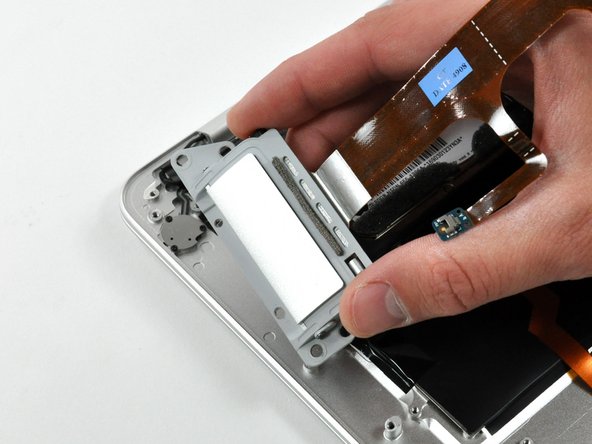
    • Lift the port hatch assembly out of the upper case.

Conclusion

To reassemble your device, follow these instructions in reverse order.

System

Member since: 09/24/09

2,562 Guides authored

0 Comments

Add Comment

View Statistics:

Past 24 Hours: 0

Past 7 Days: 0

Past 30 Days: 0

All Time: 2