/

MacBook Pro 13" Unibody Early 2011 Trackpad Replacement

What you need

  1. MacBook Pro 13" Unibody Early 2011 Trackpad Replacement, MacBook Pro 13" Unibody Early 2011 Trackpad Replacement: step 1, image 1 of 1
    • Remove the following ten screws:

    • Three 14.4 mm Phillips #00 screws

    • Three 3.5 mm Phillips #00 screws

    • Four 3.5 mm shouldered Phillips #00 screws

  2. MacBook Pro 13" Unibody Early 2011 Trackpad Replacement: step 2, image 1 of 2 MacBook Pro 13" Unibody Early 2011 Trackpad Replacement: step 2, image 2 of 2
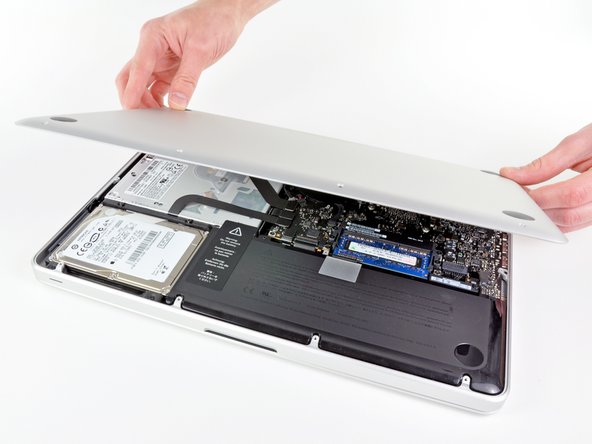
    • Use your fingers to pry the lower case away from the body of the MacBook near the vent.

    • Remove the lower case.

  3. MacBook Pro 13" Unibody Early 2011 Trackpad Replacement: step 3, image 1 of 2 MacBook Pro 13" Unibody Early 2011 Trackpad Replacement: step 3, image 2 of 2
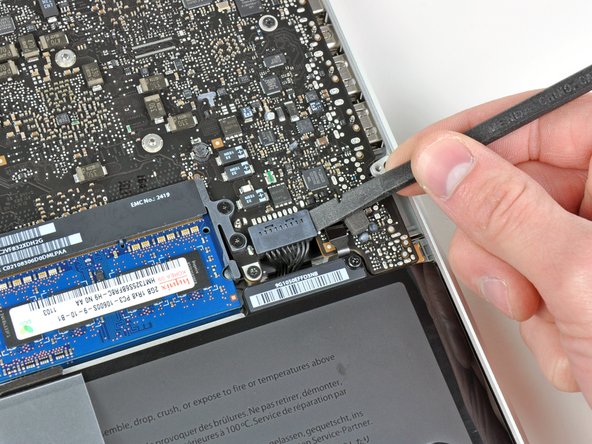
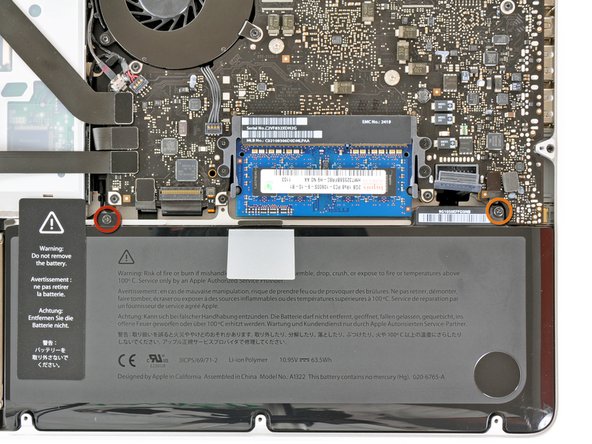
    • Use the edge of a spudger to pry the battery connector upwards from its socket on the logic board.

    • It is useful to pry upward on both short sides of the connector to "walk" it out of its socket. Be careful with the corners of the connectors, they can be easily broken off.

  4. MacBook Pro 13" Unibody Early 2011 Trackpad Replacement: step 4, image 1 of 1
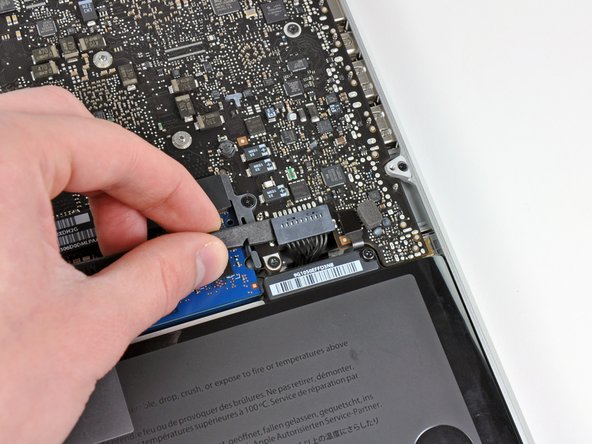
    • Bend the battery cable slightly away from its socket on the logic board so it does not accidentally connect itself while you work.

  5. MacBook Pro 13" Unibody Early 2011 Trackpad Replacement: step 5, image 1 of 1
    • Remove the following two screws:

    • One 5.6 mm Tri-wing screw

    • One 13 mm Tri-wing screw

  6. MacBook Pro 13" Unibody Early 2011 Trackpad Replacement: step 6, image 1 of 1
    • Carefully peel the battery warning label off the upper case between the battery and the optical drive.

    • Do not remove the label from the battery.

  7. MacBook Pro 13" Unibody Early 2011 Trackpad Replacement: step 7, image 1 of 1
    • Use the attached plastic pull tab to remove the battery from the upper case.

  8. MacBook Pro 13" Unibody Early 2011 Trackpad Replacement: step 8, image 1 of 1
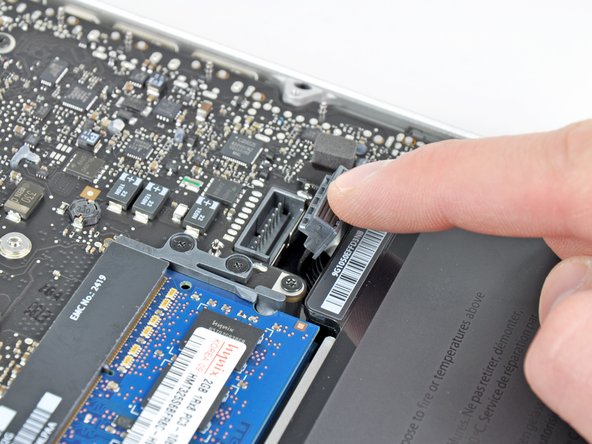
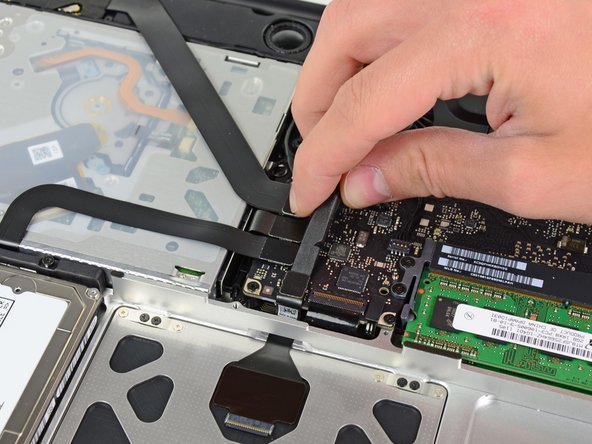
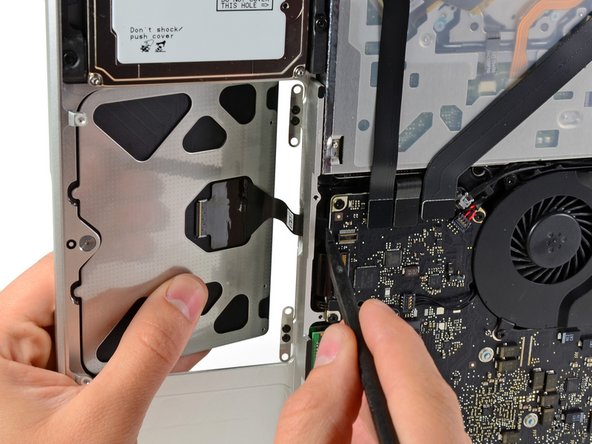
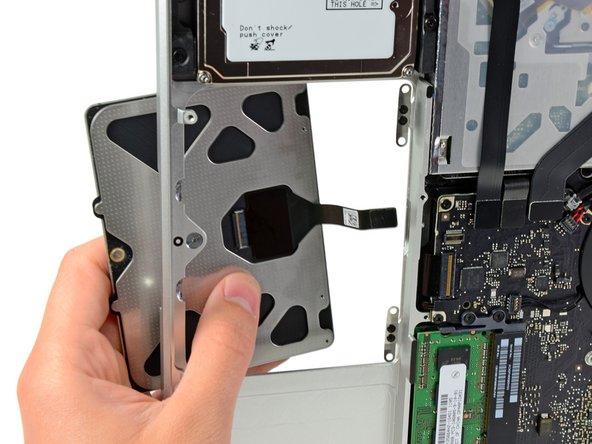
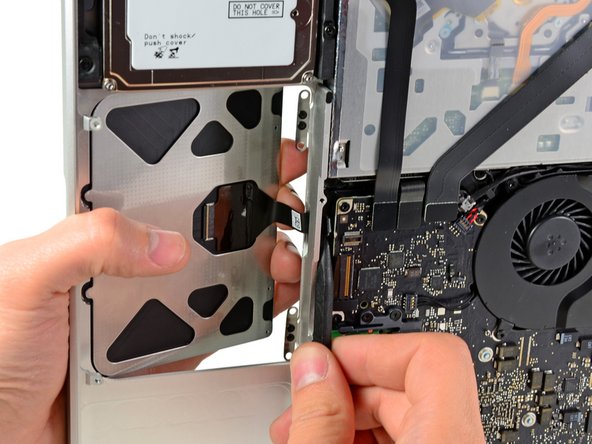
    • Use the flat end of a spudger to carefully pry the trackpad connector up from its socket on the logic board.

  9. MacBook Pro 13" Unibody Early 2011 Trackpad Replacement: step 9, image 1 of 1
    • Open your MacBook Pro and set it on a table as shown.

  10. MacBook Pro 13" Unibody Early 2011 Trackpad Replacement: step 10, image 1 of 1
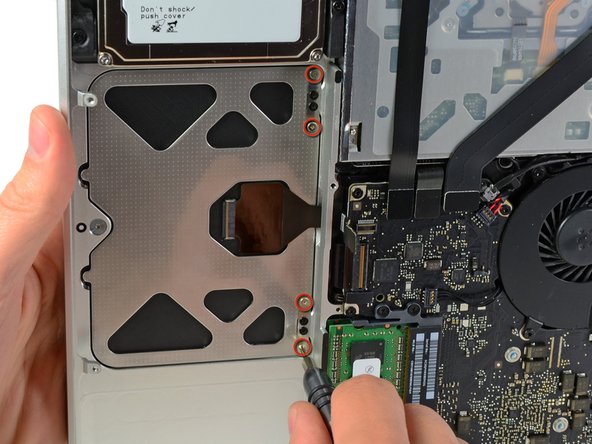
    • While holding the edge of the trackpad closest to the logic board with one hand, remove the four 1.2 mm Phillips screws highlighted in red.

  11. MacBook Pro 13" Unibody Early 2011 Trackpad Replacement: step 11, image 1 of 3 MacBook Pro 13" Unibody Early 2011 Trackpad Replacement: step 11, image 2 of 3 MacBook Pro 13" Unibody Early 2011 Trackpad Replacement: step 11, image 3 of 3
    • If necessary, carefully dislodge the edge of the trackpad closest to the keyboard from its recess in the upper case by pushing it away from the brackets attached to the upper case.

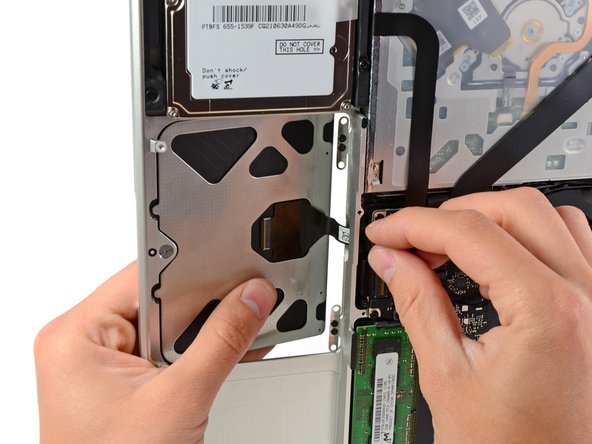
    • Carefully push the trackpad connector and cable down through the slot cut into the upper case.

    • It may be necessary to use a spudger to help get the trackpad connector past the edge of the logic board.

    • Once the cable has been completely pulled through its slot in the upper case, pull the trackpad away from the outer edge of the upper case and remove it from the machine.

  12. MacBook Pro 13" Unibody Early 2011 Trackpad Replacement: step 12, image 1 of 1
    • When installing your new trackpad, routing the cable through the upper case and past the logic board may be difficult. It is helpful to use the tip of a spudger to guide the connector past the logic board while pushing the cable through its slot in the upper case with your other hand.

  13. MacBook Pro 13" Unibody Early 2011 Trackpad Replacement: step 13, image 1 of 2 MacBook Pro 13" Unibody Early 2011 Trackpad Replacement: step 13, image 2 of 2
    • Next, reinstall the four 1.2 mm Phillips screws along the inner edge of the trackpad.

    • Tighten the screws all the way, then back them out about 1/4 turn.

    • Check the alignment of the trackpad on the keyboard side of the upper case. Once you have centered the trackpad in the upper case, tighten the four Phillips screws all the way.

Conclusion

To reassemble your device, follow these instructions in reverse order.

System

Member since: 09/24/09

2,562 Guides authored

0 Comments

Add Comment

View Statistics:

Past 24 Hours: 0

Past 7 Days: 0

Past 30 Days: 0

All Time: 3