/

MacBook Pro 15" Unibody Early 2011 Hard Drive Replacement

What you need

  1. MacBook Pro 15" Unibody Early 2011 Hard Drive Replacement, Lower Case: step 1, image 1 of 1
    • Remove the following ten screws securing the lower case to the upper case:

    • Three 13.5 mm (14.1 mm) Phillips screws.

    • Seven 3 mm Phillips screws.

  2. MacBook Pro 15" Unibody Early 2011 Hard Drive Replacement: step 2, image 1 of 1
    • Using both hands, lift the lower case near the vent to pop it off two clips securing it to the upper case.

    • Remove the lower case and set it aside.

  3. MacBook Pro 15" Unibody Early 2011 Hard Drive Replacement: step 3, image 1 of 2 MacBook Pro 15" Unibody Early 2011 Hard Drive Replacement: step 3, image 2 of 2
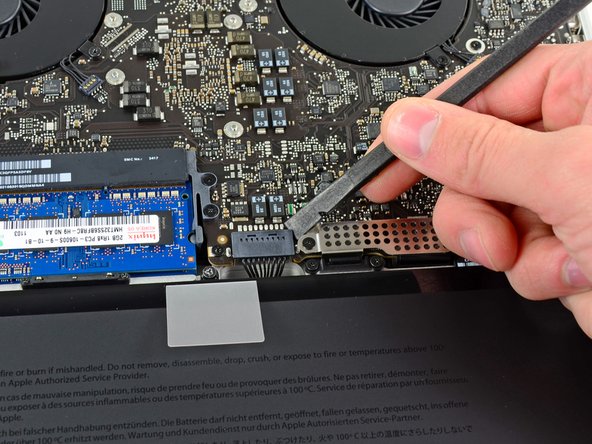
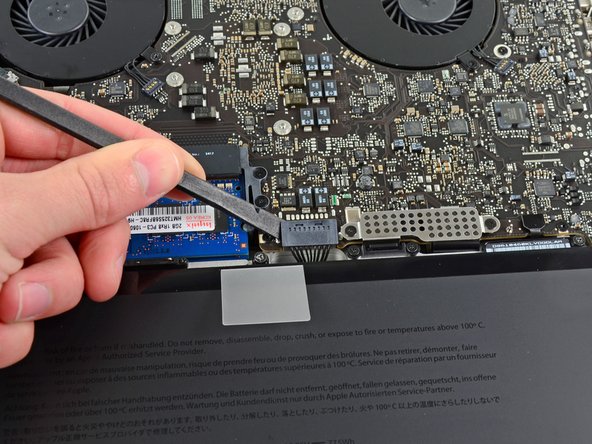
    • For certain repairs (e.g. hard drive), disconnecting the battery connector is not necessary but it prevents any accidental shorting of electronics on the motherboard. If you do not disconnect the battery connector, please be careful as parts of the motherboard might be electrified.

    • Use the edge of a spudger to pry the battery connector upwards from its socket on the logic board.

    • It is useful to pry upward on both short sides of the connector to "walk" it out of its socket.

  4. MacBook Pro 15" Unibody Early 2011 Hard Drive Replacement: step 4, image 1 of 1
    • Bend the battery cable slightly away from its socket on the logic board so it does not accidentally connect itself while you work.

  5. MacBook Pro 15" Unibody Early 2011 Hard Drive Replacement: step 5, image 1 of 1
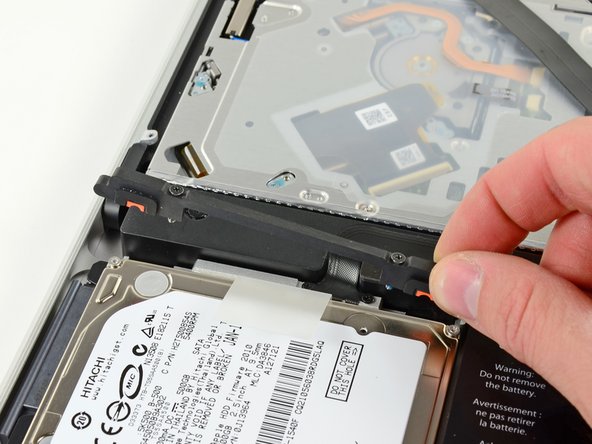
    • Remove two Phillips screws securing the hard drive bracket to the upper case.

    • These screws are captive to the hard drive bracket.

  6. MacBook Pro 15" Unibody Early 2011 Hard Drive Replacement: step 6, image 1 of 1
    • Lift the the retaining bracket out of the upper case.

  7. MacBook Pro 15" Unibody Early 2011 Hard Drive Replacement: step 7, image 1 of 1
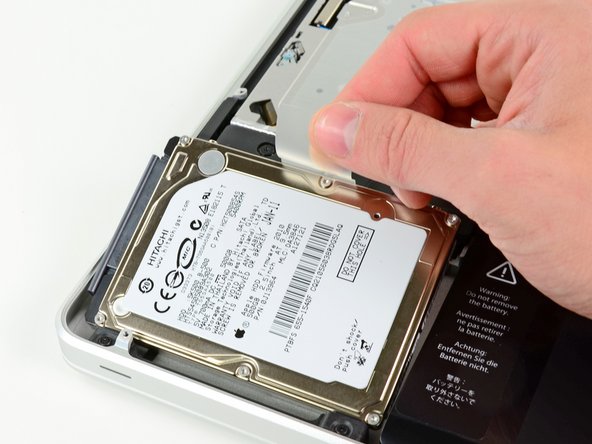
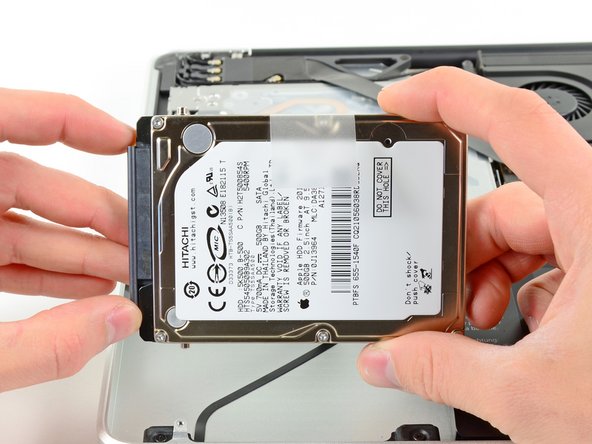
    • Lift the hard drive by its pull tab and pull it out of the chassis, minding the cable attaching it to the computer.

  8. MacBook Pro 15" Unibody Early 2011 Hard Drive Replacement: step 8, image 1 of 2 MacBook Pro 15" Unibody Early 2011 Hard Drive Replacement: step 8, image 2 of 2
    • Remove the hard drive cable by pulling its connector straight away from the hard drive.

  9. MacBook Pro 15" Unibody Early 2011 Hard Drive Replacement: step 9, image 1 of 2 MacBook Pro 15" Unibody Early 2011 Hard Drive Replacement: step 9, image 2 of 2
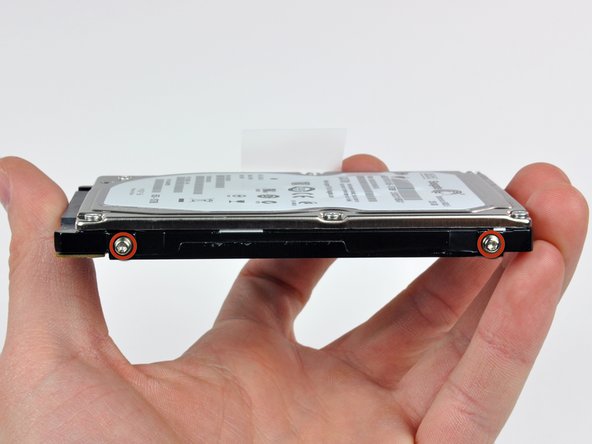
    • Remove two T6 Torx screws from each side of the hard drive (four screws total).

    • You'll need to transfer these screws to your new hard drive if you're changing drives.

    • If desired, peel the pull tab off your old hard drive and transfer it to the side of your new drive.

    • If you are installing a new hard drive, we have an OS X install guide to get you up and running. Many recent Macs may be able to use OS X Internet Recovery.

Conclusion

To reassemble your device, follow these instructions in reverse order.

System

Member since: 09/24/09

2,562 Guides authored

0 Comments

Add Comment

View Statistics:

Past 24 Hours: 0

Past 7 Days: 0

Past 30 Days: 0

All Time: 0