/

MacBook Unibody Model A1278 Trackpad Replacement

What you need

  1. MacBook Unibody Model A1278 Trackpad Replacement, MacBook Unibody Model A1278 Trackpad Replacement: step 1, image 1 of 1
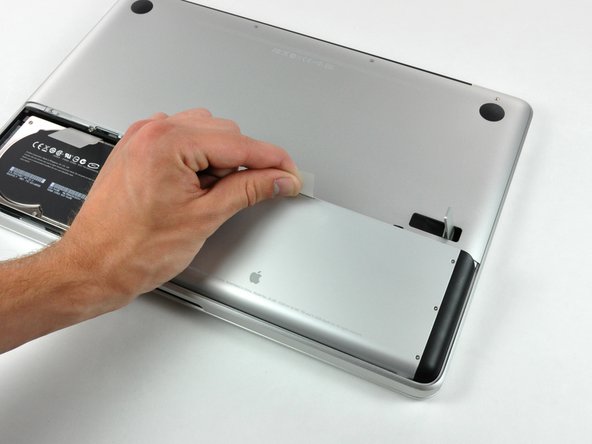
    • With the case closed, place the Unibody top-side down on a flat surface.

    • Depress the grooved side of the access door release latch enough to grab the free end. Lift the release latch until it is vertical.

  2. MacBook Unibody Model A1278 Trackpad Replacement: step 2, image 1 of 1
    • The access door should now be raised enough to lift it up and out of the Unibody.

  3. MacBook Unibody Model A1278 Trackpad Replacement: step 3, image 1 of 1
    • Be sure the access door release latch is vertical before proceeding.

    • Grab the white plastic tab and pull the battery up and out of the Unibody.

  4. MacBook Unibody Model A1278 Trackpad Replacement: step 4, image 1 of 1
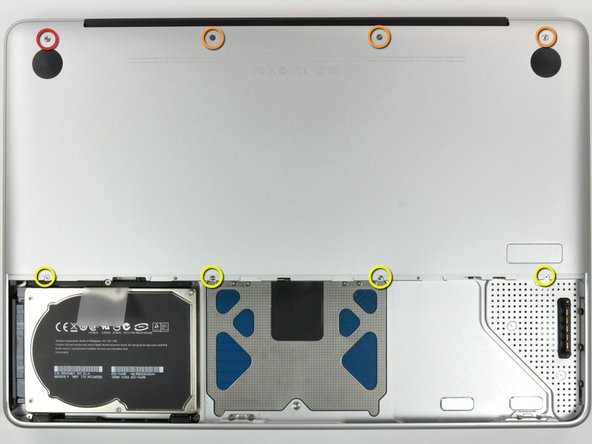
    • Remove the following eight screws securing the lower case to the chassis:

    • One 3 mm Phillips screw.

    • Three 13.5 mm Phillips screws.

    • Four 3.5 mm Phillips screws.

  5. MacBook Unibody Model A1278 Trackpad Replacement: step 5, image 1 of 1
    • Using both hands, lift and remove the lower case off the upper case.

  6. MacBook Unibody Model A1278 Trackpad Replacement: step 6, image 1 of 1
    • Remove the four 10.3 mm Phillips screws securing the mid wall to the upper case.

  7. MacBook Unibody Model A1278 Trackpad Replacement: step 7, image 1 of 1
    • Lift the mid wall out of the upper case.

  8. MacBook Unibody Model A1278 Trackpad Replacement: step 8, image 1 of 2 MacBook Unibody Model A1278 Trackpad Replacement: step 8, image 2 of 2
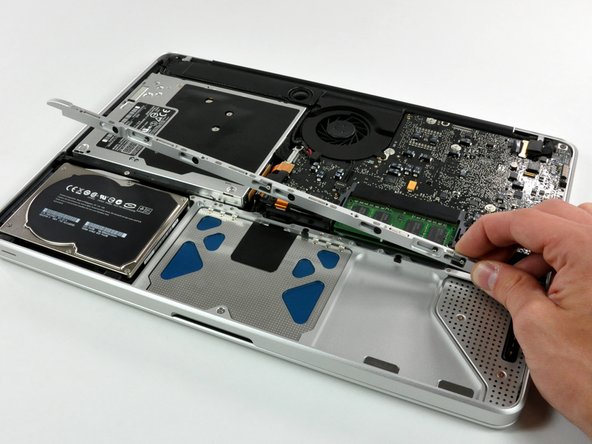
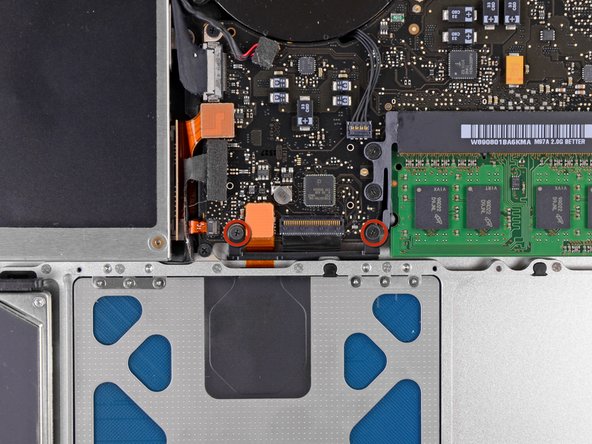
    • Remove the two 5 mm Phillips screws securing the keyboard flex bracket to the upper case.

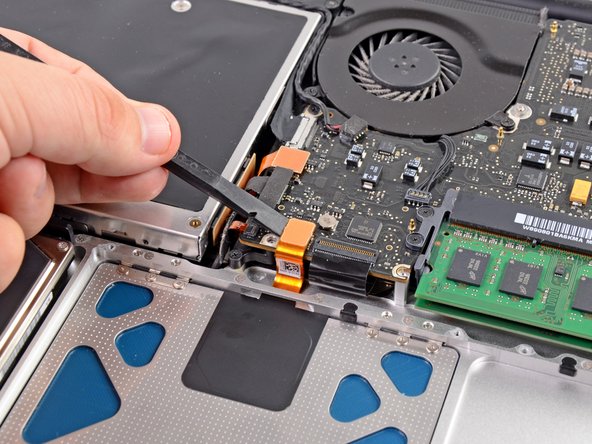
    • Lift the keyboard flex bracket out of the upper case.

  9. MacBook Unibody Model A1278 Trackpad Replacement: step 9, image 1 of 1
    • Use the flat end of a spudger to pry the trackpad connector straight up off the logic board.

  10. MacBook Unibody Model A1278 Trackpad Replacement: step 10, image 1 of 1
    • Remove the six 1.4 mm Y0 Tri-point screws securing the trackpad to the upper case.

  11. MacBook Unibody Model A1278 Trackpad Replacement: step 11, image 1 of 2 MacBook Unibody Model A1278 Trackpad Replacement: step 11, image 2 of 2
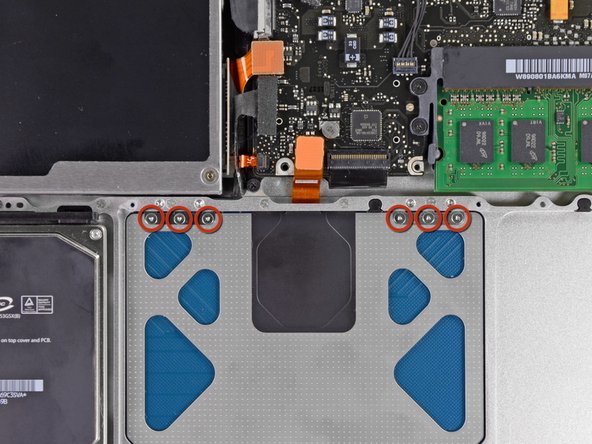
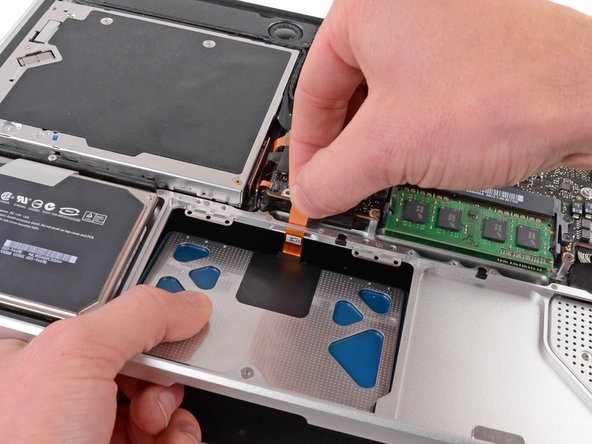
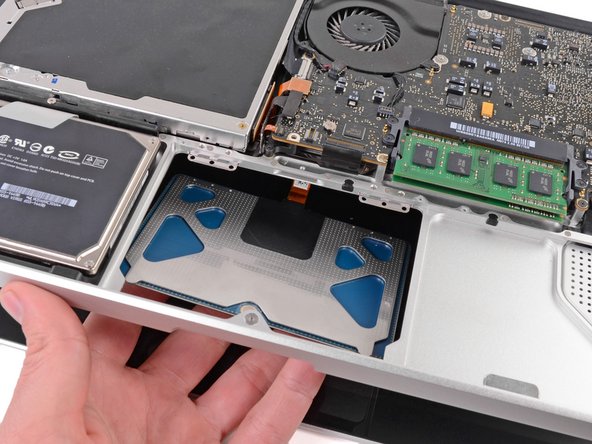
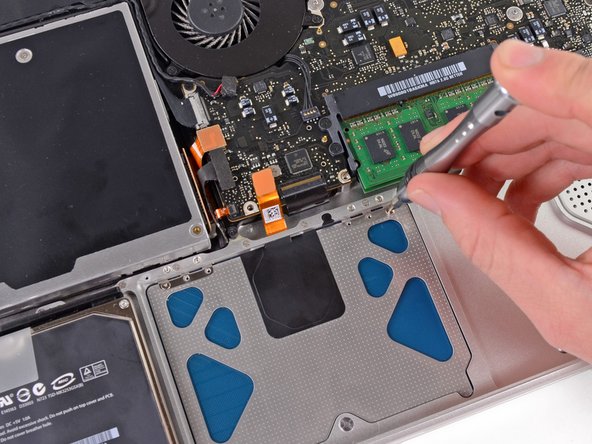
    • Carefully dislodge the edge of the trackpad closest to the keyboard from its recess in the upper case by pushing it away from the brackets attached to the upper case.

    • De-route the trackpad cable through its slot cut into the upper case.

  12. MacBook Unibody Model A1278 Trackpad Replacement: step 12, image 1 of 1
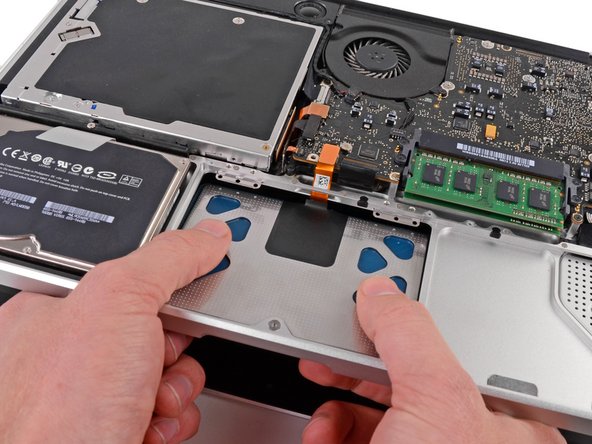
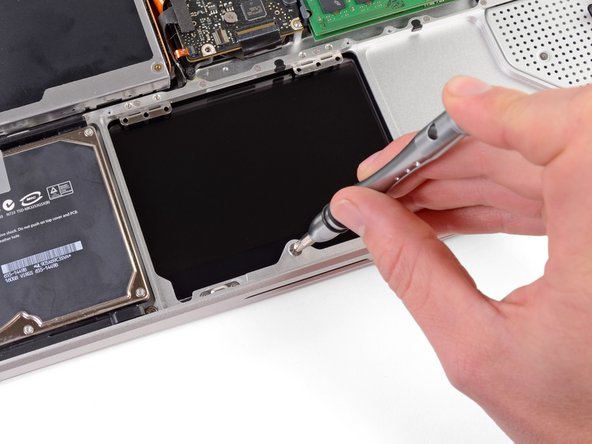
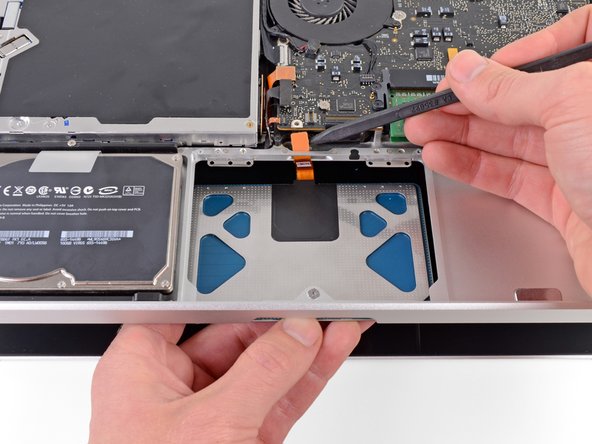
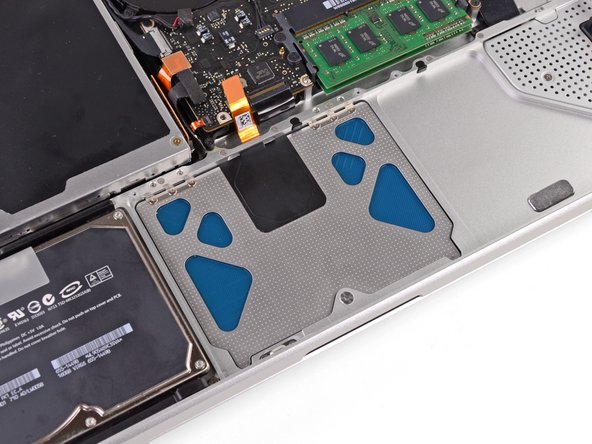
    • Pull the trackpad away from the outer edge of the upper case.

    • Remove the trackpad and set it aside.

  13. MacBook Unibody Model A1278 Trackpad Replacement: step 13, image 1 of 1
    • In the following steps, you will be working on your new upper case.

    • Use a Y1 Tri-wing screwdriver to loosely install the 1.2 mm set screw included with your new upper case into its tapped hole near the middle of the trackpad opening on your new upper case.

    • Only tighten it about one turn for now.

  14. MacBook Unibody Model A1278 Trackpad Replacement: step 14, image 1 of 2 MacBook Unibody Model A1278 Trackpad Replacement: step 14, image 2 of 2
    • Carefully insert the cable from your old trackpad through its slot cut into your new upper case.

    • Use one hand to hold the trackpad cable in place as you insert the two retaining tabs on the outer edge of the trackpad under the lip on the upper case.

    • Pull the trackpad cable as you seat the trackpad into its void in your new upper case.

  15. MacBook Unibody Model A1278 Trackpad Replacement: step 15, image 1 of 1
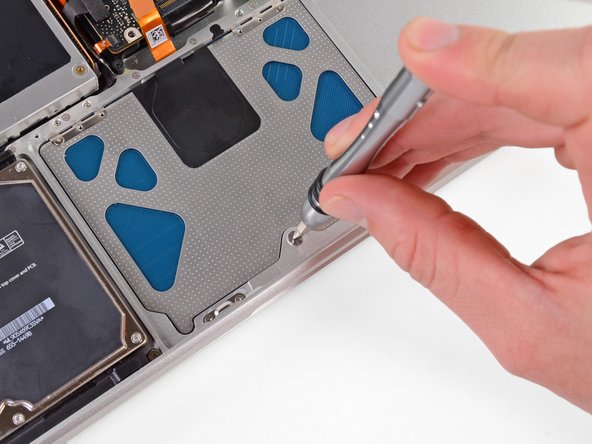
    • Insert a 1.4 mm Y0 Tri-wing screw into each of the outer holes drilled into the trackpad (two screws total).

    • You'll install the rest in a bit.

    • Tighten the screws all the way, then back them out about a quarter turn to aid in aligning your trackpad during the next few steps.

  16. MacBook Unibody Model A1278 Trackpad Replacement: step 16, image 1 of 1
    • Before tightening, make sure that the trackpad is freely moving up and down. If you feel stiffness, try to very gently adjust it so that in its untightened position the lower part easily moves up and down.

    • While continually trying to click your trackpad, gently tighten the Y1 Tri-wing set screw until the clicks return to their factory "feel".

    • You can tell when the screw is tightened just right by the noise it makes when the trackpad clicks. If the set screw is too loose, the trackpad will have excessive play before it clicks. If it is too tight, the trackpad will click too easily and won't make the characteristic loud mouse clicking noise.

  17. MacBook Unibody Model A1278 Trackpad Replacement: step 17, image 1 of 1
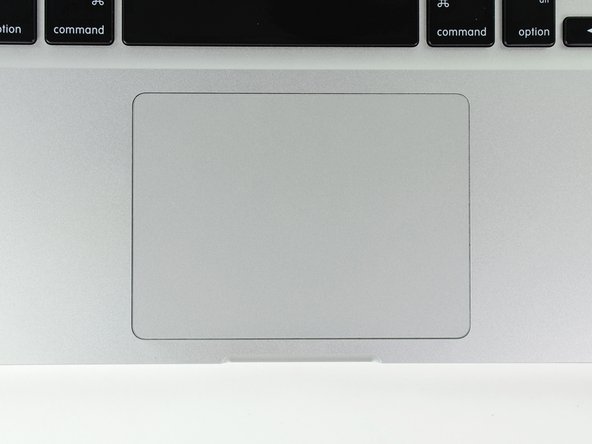
    • Next, flip your upper case over so the keyboard side is facing up.

    • Align the trackpad so it is centered in its hole cut into the upper case.

  18. MacBook Unibody Model A1278 Trackpad Replacement: step 18, image 1 of 1
    • Tighten the outer two screws along the inner edge of the trackpad and check the alignment of it on the outer side of the upper case.

    • If its alignment looks good, install the rest of the Y0 Tri-wing screws along the inner edge of the trackpad.

    • Before reassembling your machine, verify that the set screw is still installed in a position so the mouse will click correctly.

Conclusion

To reassemble your device, follow these instructions in reverse order.

System

Member since: 09/24/09

2,562 Guides authored

0 Comments

Add Comment

View Statistics:

Past 24 Hours: 0

Past 7 Days: 0

Past 30 Days: 0

All Time: 2