/

MacBook Unibody Model A1342 Fan Replacement

What you need

  1. MacBook Unibody Model A1342 Fan Replacement, MacBook Unibody Model A1342 Fan Replacement: step 1, image 1 of 1
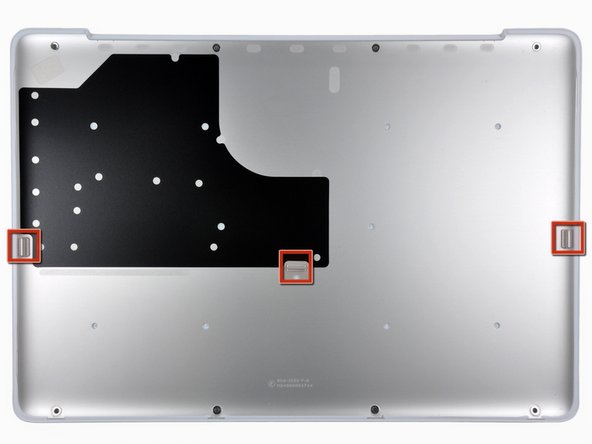
    • Remove the eight 4 mm Phillips screws securing the lower case to the MacBook.

  2. MacBook Unibody Model A1342 Fan Replacement: step 2, image 1 of 3 MacBook Unibody Model A1342 Fan Replacement: step 2, image 2 of 3 MacBook Unibody Model A1342 Fan Replacement: step 2, image 3 of 3
    • The lower case is constructed of rubber-coated aluminum. Do not excessively bend the aluminum during removal, as any permanent deformation will cause tolerance issues after reassembly.

    • Slightly lift the lower case near the vent opening.

    • Continue running your fingers between the lower and upper cases until the upper case pops off its retaining clips.

    • The location of these three clips is shown in the third picture.

  3. MacBook Unibody Model A1342 Fan Replacement: step 3, image 1 of 1
    • For precautionary purposes, we advise that you disconnect the battery connector from the logic board to avoid any electrical discharge. This step is optional and is not required.

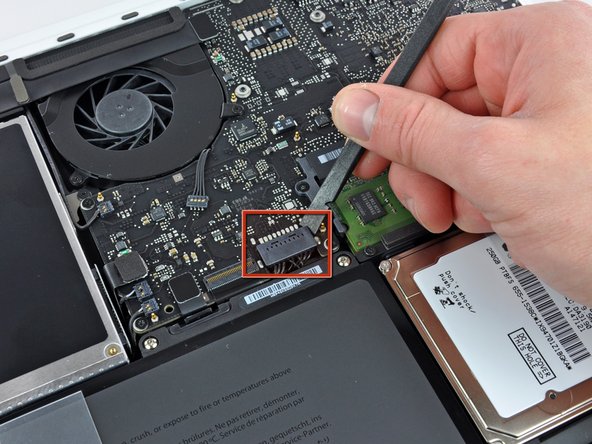
    • Use the flat end of a spudger to lift the battery connector up out of its socket on the logic board.

    • It may be easier to use your fingernails to lift up on both sides of the connector.

  4. MacBook Unibody Model A1342 Fan Replacement: step 4, image 1 of 1
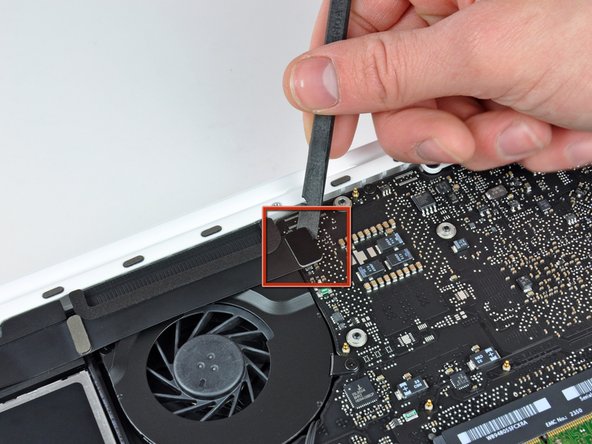
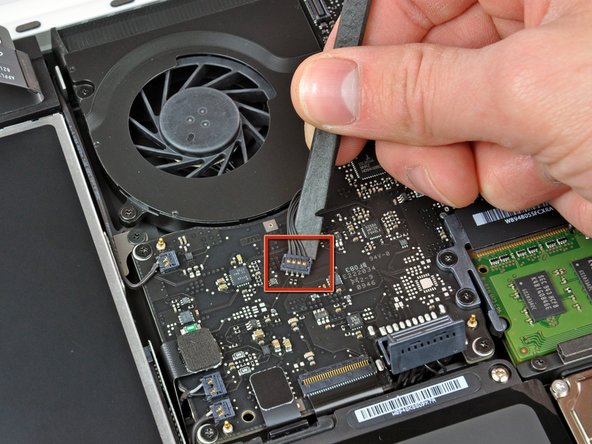
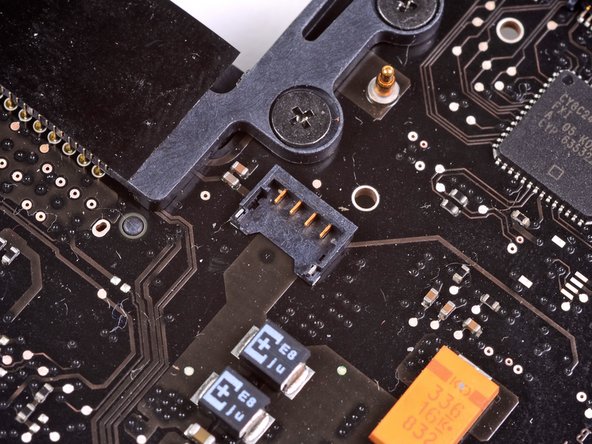
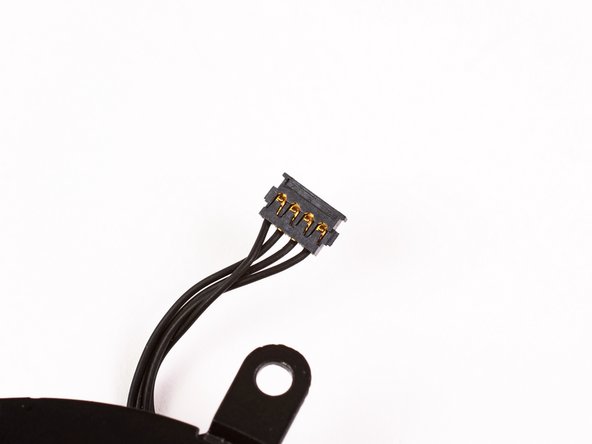
    • Use a spudger to pry the AirPort/Bluetooth ribbon cable connector straight up off the logic board.

    • Gently bend the AirPort/Bluetooth ribbon cable away from the fan.

  5. MacBook Unibody Model A1342 Fan Replacement: step 5, image 1 of 3 MacBook Unibody Model A1342 Fan Replacement: step 5, image 2 of 3 MacBook Unibody Model A1342 Fan Replacement: step 5, image 3 of 3
    • Use the flat end of a spudger to pry the fan connector straight up off the logic board.

    • It is useful to twist the spudger axially from beneath the fan cable wires to release the connector.

    • The fan socket and the fan connector can be seen in the second and third pictures. Be careful not to break the plastic fan socket off the logic board as you use your spudger to lift the fan connector straight up and out of its socket. The layout of the logic board shown in the second picture may look slightly different than your machine but the fan socket is the same.

  6. MacBook Unibody Model A1342 Fan Replacement: step 6, image 1 of 1
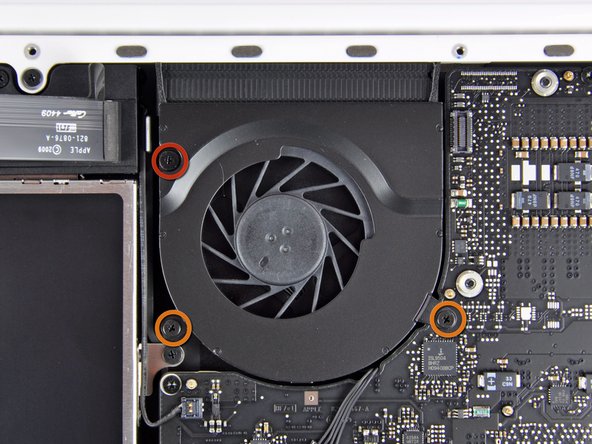
    • Remove the following three screws securing the fan to the upper case:

    • One 7.1 mm Phillips

    • Two 5.3 mm Phillips

  7. MacBook Unibody Model A1342 Fan Replacement: step 7, image 1 of 1
    • Lift the fan out of the upper case.

Conclusion

To reassemble your device, follow these instructions in reverse order.

System

Member since: 09/24/09

2,562 Guides authored

0 Comments

Add Comment

View Statistics:

Past 24 Hours: 0

Past 7 Days: 0

Past 30 Days: 0

All Time: 0