/

MacBook Unibody Model A1342 LCD Replacement

What you need

  1. MacBook Unibody Model A1342 LCD Replacement, MacBook Unibody Model A1342 LCD Replacement: step 1, image 1 of 3 MacBook Unibody Model A1342 LCD Replacement, MacBook Unibody Model A1342 LCD Replacement: step 1, image 2 of 3 MacBook Unibody Model A1342 LCD Replacement, MacBook Unibody Model A1342 LCD Replacement: step 1, image 3 of 3
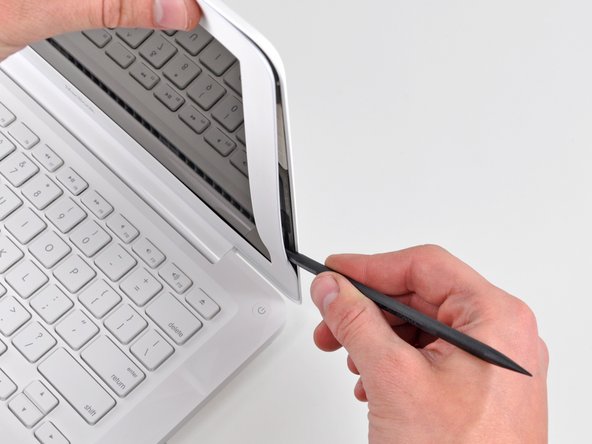
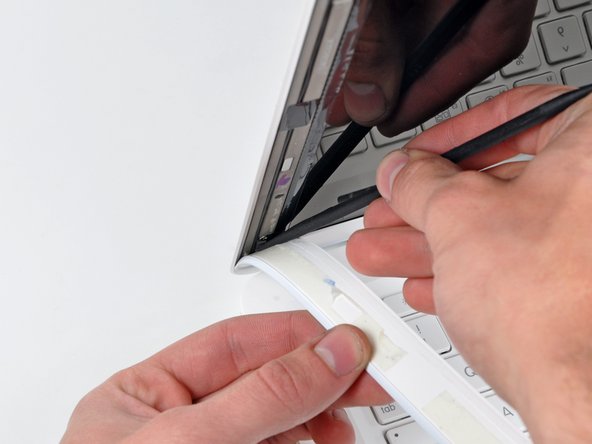
    • Insert the flat end of a spudger between the thin rubber strip surrounding the front display bezel and the rear display bezel.

    • Do not try to insert the spudger between the thin rubber strip and the plastic face of the front display bezel.

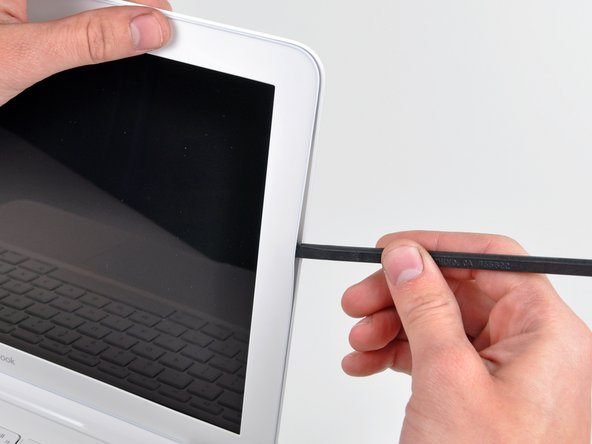
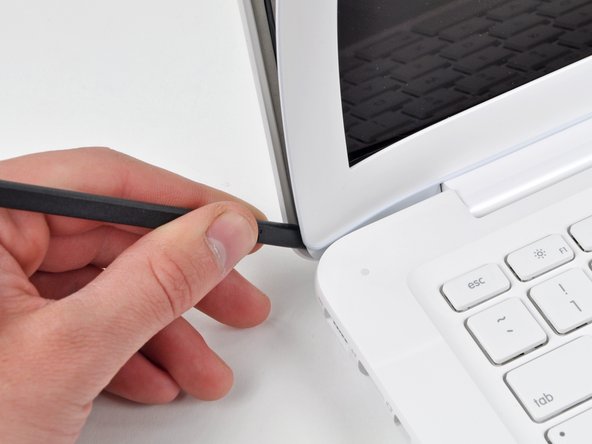
    • Use the flat end of your spudger to carefully pry the front display bezel away from the adhesive securing it to the rear display bezel.

    • Do not pry against the fragile glass LCD panel. Also, do not excessively bend the plastic, as it may permanently deform.

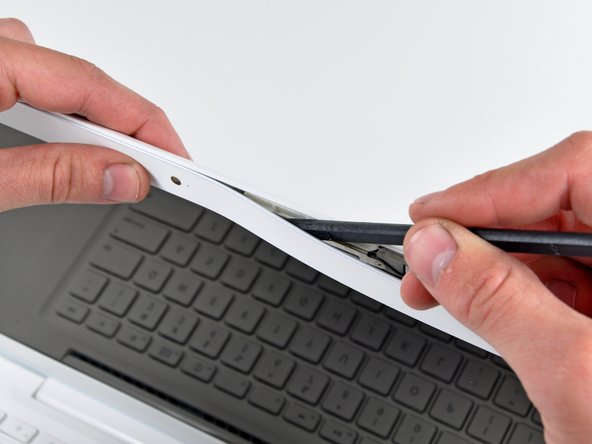
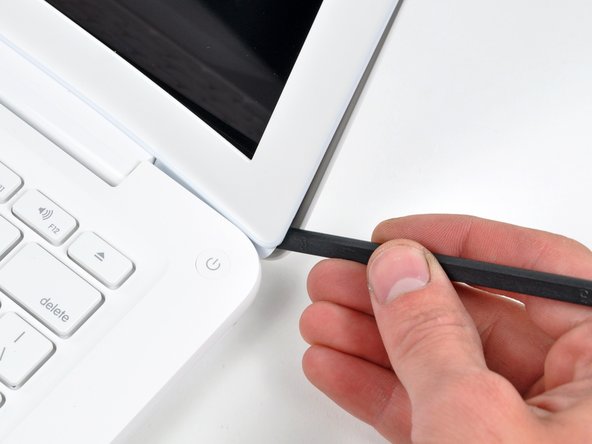
    • Continue prying until the front display bezel is free along the right side of the display and behind the right clutch hinge.

  2. MacBook Unibody Model A1342 LCD Replacement: step 2, image 1 of 2 MacBook Unibody Model A1342 LCD Replacement: step 2, image 2 of 2
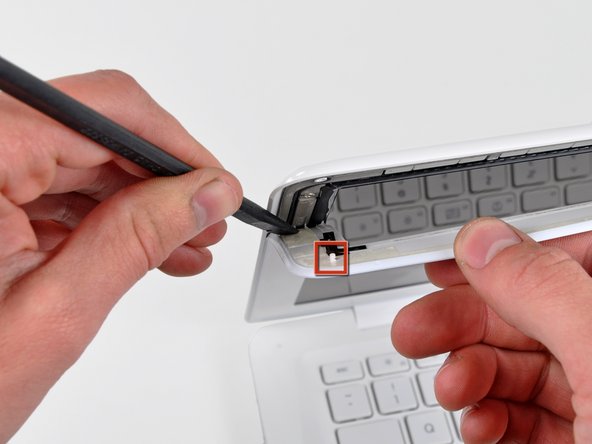
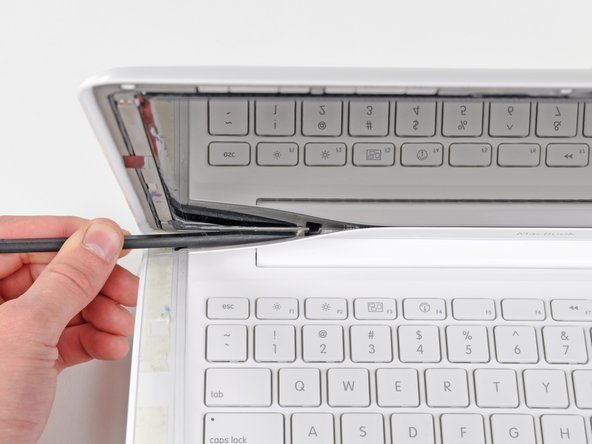
    • Use the flat end of a spudger to pry the front display bezel off the top edge of the display assembly.

    • It may be helpful to insert and twist the flat end of your spudger to enlarge the gap between the front & rear display bezels as you work your way around the edge of the display.

    • Continue separating until the top edge of the front display bezel is free from the display assembly.

    • Be careful when prying near the iSight camera board, as it has exposed circuitry and is delicate.

  3. MacBook Unibody Model A1342 LCD Replacement: step 3, image 1 of 2 MacBook Unibody Model A1342 LCD Replacement: step 3, image 2 of 2
    • Use your spudger to pry the left side of the front display bezel away from the display assembly.

    • During reassembly, be sure the small plastic pegs on the front display bezel (shown in red) mate up with the holes in the rear display bezel. Failure to do so will prevent the front display bezel from sitting flush against the rear bezel.

  4. MacBook Unibody Model A1342 LCD Replacement: step 4, image 1 of 2 MacBook Unibody Model A1342 LCD Replacement: step 4, image 2 of 2
    • Carefully pry up the front display bezel where it is stuck to the display assembly near the clutch hinges.

  5. MacBook Unibody Model A1342 LCD Replacement: step 5, image 1 of 1
    • Slowly work your way across the lower edge of the front display bezel until it is free from the display assembly.

    • Be sure to pry up as far away from the LCD as possible, as it extends below the edge of the front display bezel.

    • When you get about half way across, pry up from the other side of the front display bezel's lower edge to ease the process.

    • Remove the front display bezel from the display assembly.

    • To help the adhesive avoid losing is tackiness, do not excessively handle the adhesive and be sure to keep it clean until you are ready for installation.

  6. MacBook Unibody Model A1342 LCD Replacement: step 6, image 1 of 2 MacBook Unibody Model A1342 LCD Replacement: step 6, image 2 of 2
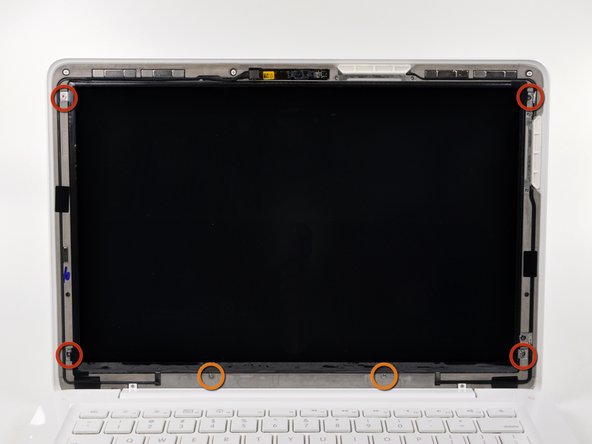
    • Remove following six screws securing the LCD to the rear display bezel:

    • Four 3.4 mm Phillips.

    • Two 3 mm Phillips.

    • Do not try to remove the LCD yet. The circuitry along its lower edge is wedged in a gap along the lower edge of the display recess in the plastic display assembly.

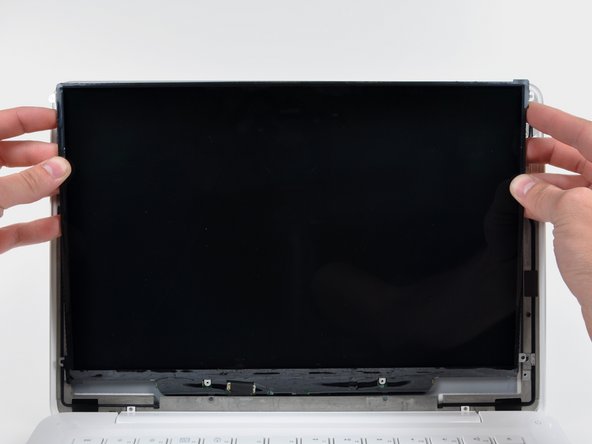
    • Hold the display vertically and tip it enough to grab the top edge of the LCD and rotate it slightly out of the display assembly, being careful not to break the circuitry off its lower edge.

  7. MacBook Unibody Model A1342 LCD Replacement: step 7, image 1 of 1
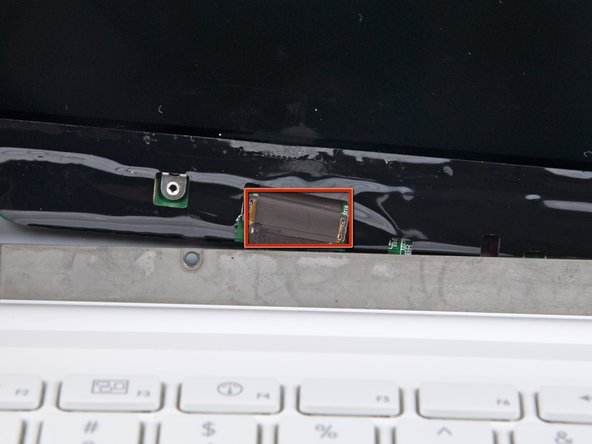
    • Peel the piece of tape covering the display data cable connector away from the edge closest to the LCD.

  8. MacBook Unibody Model A1342 LCD Replacement: step 8, image 1 of 2 MacBook Unibody Model A1342 LCD Replacement: step 8, image 2 of 2
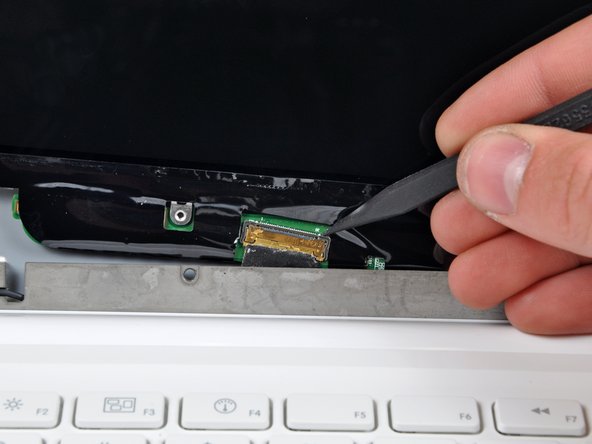
    • Use the tip of a spudger to flip up the thin steel retaining clip securing the display data cable to its socket on the LCD.

    • While holding the display data cable by the retaining clip, pull the LCD straight up and away from its socket.

    • Lift the LCD out of the display assembly and set it aside.

Conclusion

To reassemble your device, follow these instructions in reverse order.

System

Member since: 09/24/09

2,562 Guides authored

0 Comments

Add Comment

View Statistics:

Past 24 Hours: 0

Past 7 Days: 0

Past 30 Days: 0

All Time: 0