/

PlayStation 2 Top Cover Replacement

What you need

  1. PlayStation 2 Top Cover Replacement, PlayStation 2 Top Cover Replacement: step 1, image 1 of 3 PlayStation 2 Top Cover Replacement, PlayStation 2 Top Cover Replacement: step 1, image 2 of 3 PlayStation 2 Top Cover Replacement, PlayStation 2 Top Cover Replacement: step 1, image 3 of 3
    • Flip the PlayStation 2 over so it lays with the bottom of the device facing upwards.

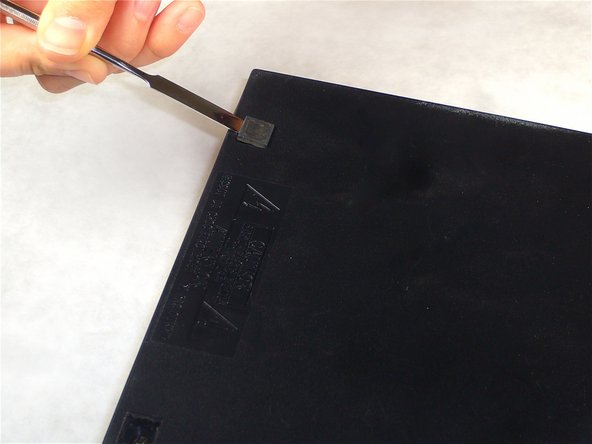
    • Use the flat edge of a metal spudger to pry the eight flat screw covers out.

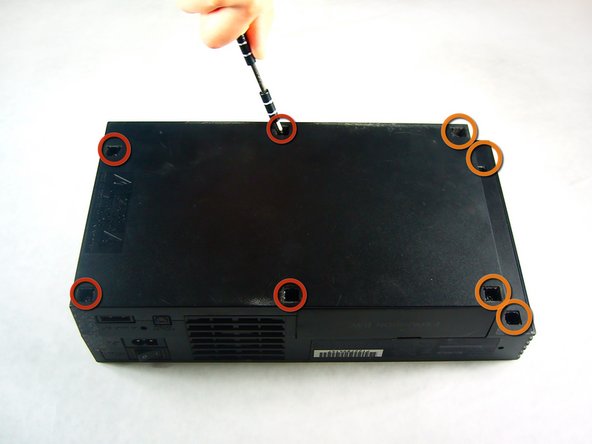
    • Remove the following eight screws securing the top cover to the bottom case:

    • Four 55.4 mm Philips screws

    • Four 18.0 mm Phillips screws

  2. PlayStation 2 Top Cover Replacement: step 2, image 1 of 1
    • Some models have a different number of screws and feet. Remove all the feet and screws in the bottom of the case.

    • The 10 screw model has 6 screws in the bottom-most portion and 4 in the upper tray.

  3. PlayStation 2 Top Cover Replacement: step 3, image 1 of 1
    • Peel the warranty sticker (located next to the main power switch) straight away from the case.

    • To avoid activating the VOID that may come up, heat it carefully to remove and replace it clean

  4. PlayStation 2 Top Cover Replacement: step 4, image 1 of 2 PlayStation 2 Top Cover Replacement: step 4, image 2 of 2
    • Flip the PlayStation 2 back to its original upside position.

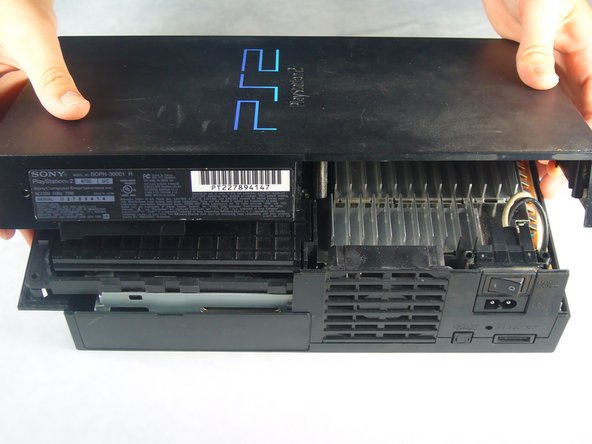
    • Lift the top cover off the bottom case.

    • To facilitate the removal, it is recommended to pry open the half closer to the power switch first while rocking the top cover towards the front of the bottom case.

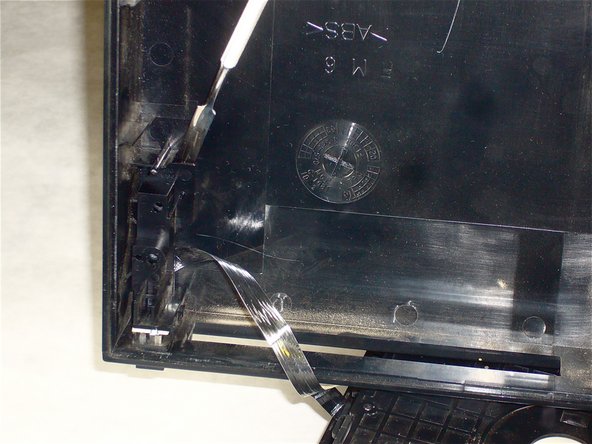
    • Carefully remove the power cord that attaches the top and bottom halves by disconnecting the power cord assembly from the bottom case.

Conclusion

To reassemble your device, follow these instructions in reverse order.

System

Member since: 09/24/09

2,562 Guides authored

0 Comments

Add Comment

View Statistics:

Past 24 Hours: 0

Past 7 Days: 0

Past 30 Days: 0

All Time: 3