/

PowerBook G4 Titanium Mercury Lower Case Replacement

What you need

    • Turn the G4 over.

    • Remove the eight Phillips screws from the lower case.
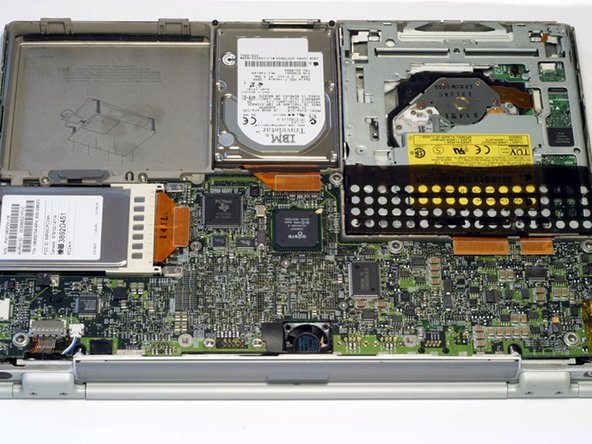
  1. PowerBook G4 Titanium Mercury Lower Case Replacement: step 2, image 1 of 1
    • Using your thumbs, slide the lower case away from you.

    • The lower case may stick in the front on a tab just above the center of the DVD drive. Be careful as you work the case off, or you may break the thin strip of plastic just above the drive.

    • Lift the lower case off.

  2. PowerBook G4 Titanium Mercury Lower Case Replacement: step 3, image 1 of 1
    • Your laptop should look approximately like this.

Conclusion

To reassemble your device, follow these instructions in reverse order.

System

Member since: 09/24/09

2,562 Guides authored

0 Comments

Add Comment

View Statistics:

Past 24 Hours: 0

Past 7 Days: 0

Past 30 Days: 0

All Time: 1