/

Sony Cyber-shot DSC-W150 Front Casing Replacement

What you need

  1. Sony Cyber-shot DSC-W150 Front Casing Replacement, Sony Cyber-shot DSC-W150 Front Casing Replacement: step 1, image 1 of 1
    • The screws from the camera are extremely small so it is a good idea to have a small container to hold all the screws as you remove them.

  2. Sony Cyber-shot DSC-W150 Front Casing Replacement: step 2, image 1 of 1
    • Take your screwdriver and remove the bottom screws of the camera. (The picture shows the lens facing away from you and the LCD facing you.) There should be four silver screws.

  3. Sony Cyber-shot DSC-W150 Front Casing Replacement: step 3, image 1 of 1
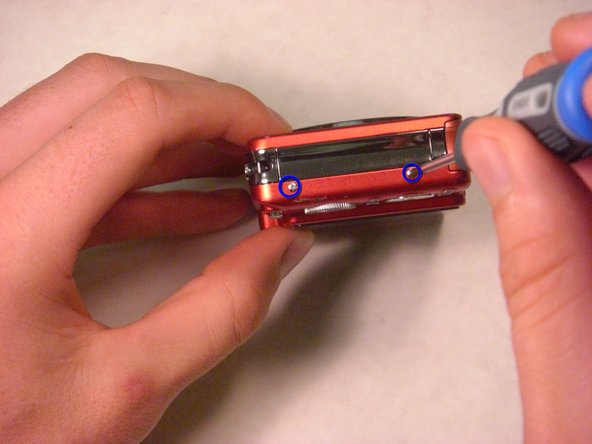
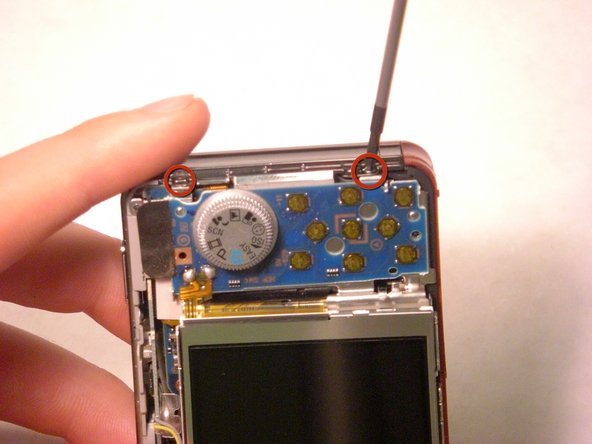
    • On the right side of the camera, remove the two screws using the screwdriver. There will be two silver screws. (The picture shows the lens facing away from you and LCD screen facing you.)

  4. Sony Cyber-shot DSC-W150 Front Casing Replacement: step 4, image 1 of 1
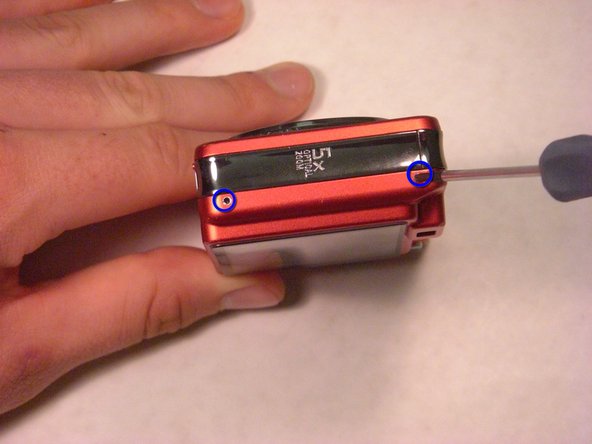
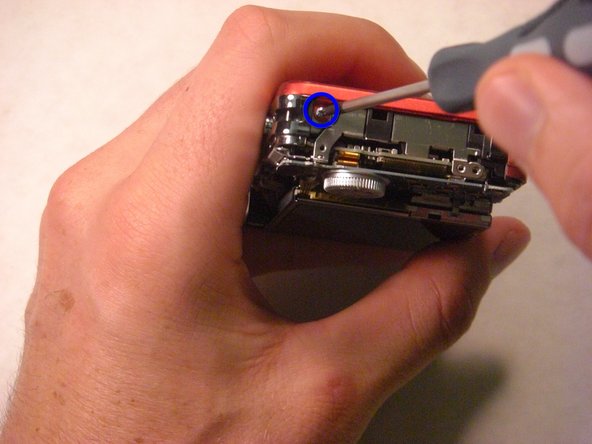
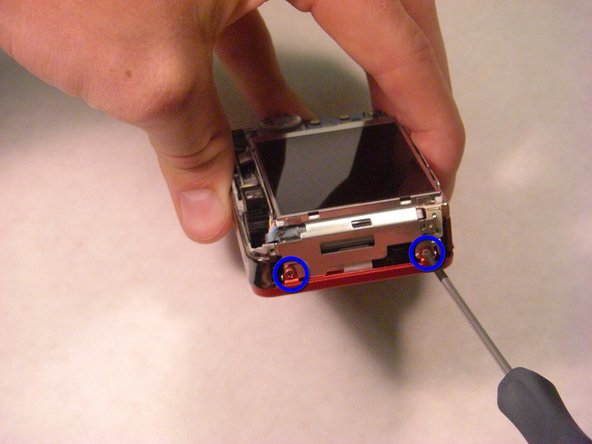
    • On the left side of the camera, remove the two screws using the screwdriver. There will be two silver screws. (The picture shows the lens facing away from you and the LCD screen facing you.)

  5. Sony Cyber-shot DSC-W150 Front Casing Replacement: step 5, image 1 of 1
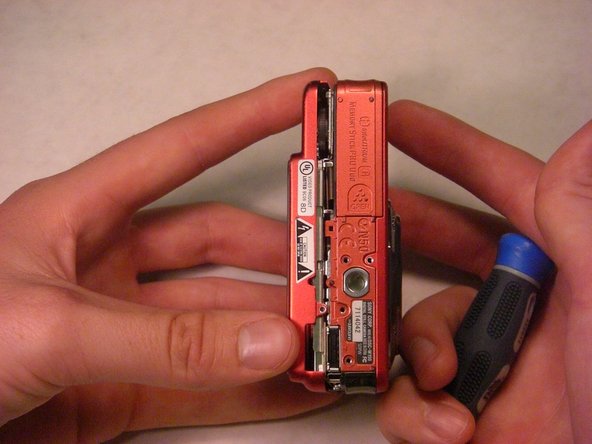
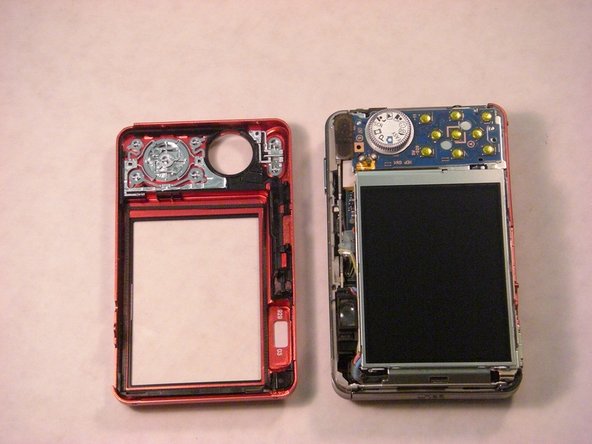
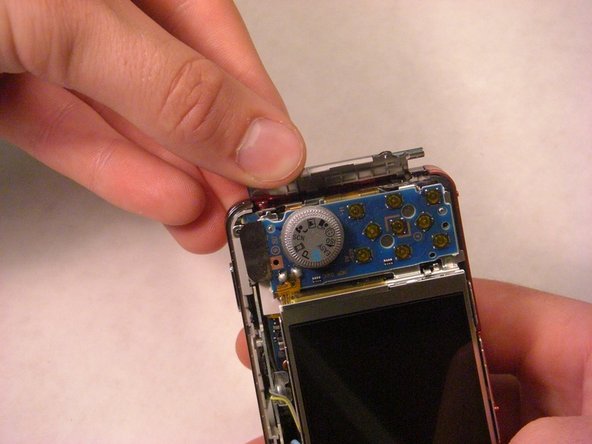
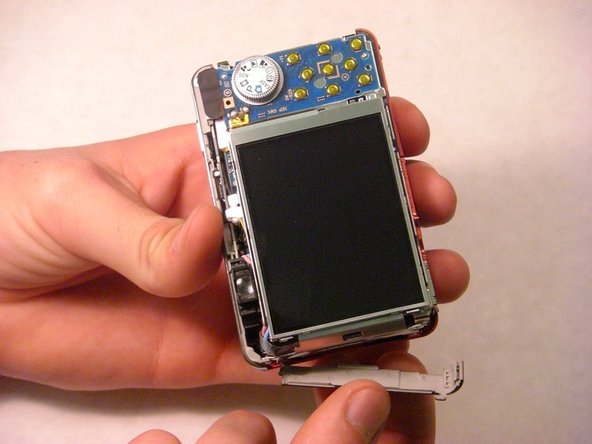
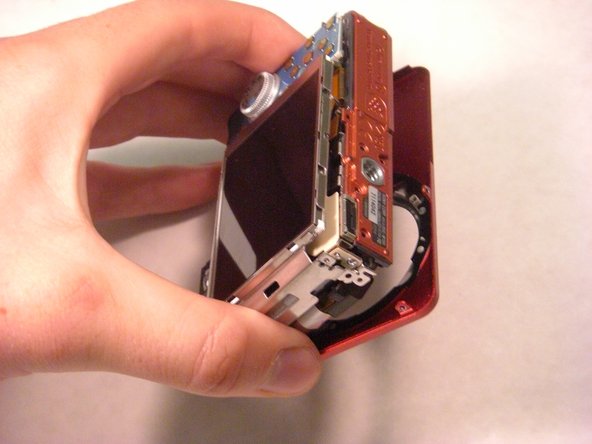
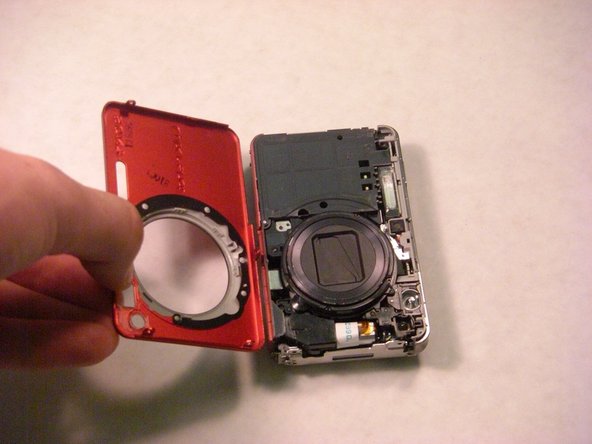
    • Gently remove the back casing by holding onto both sides of the camera and pulling them apart.

  6. Sony Cyber-shot DSC-W150 Front Casing Replacement: step 6, image 1 of 1
    • Now, carefully pull off the back cover.

  7. Sony Cyber-shot DSC-W150 Front Casing Replacement: step 7, image 1 of 1
    • The two halves of the camera casing should now be separate.

  8. Sony Cyber-shot DSC-W150 Front Casing Replacement: step 8, image 1 of 1
    • Keep track of the small screws that you remove.

    • Opening, removing and/or replacing the front casing may void your manufacturers warranty

  9. Sony Cyber-shot DSC-W150 Front Casing Replacement: step 9, image 1 of 1
    • Remove the two screws at the top of the camera casing.

  10. Sony Cyber-shot DSC-W150 Front Casing Replacement: step 10, image 1 of 1
    • Gently pop open the plastic piece as shown.

  11. Sony Cyber-shot DSC-W150 Front Casing Replacement: step 11, image 1 of 1
    • Remove the screw connecting the front casing to the electrical components as shown.

  12. Sony Cyber-shot DSC-W150 Front Casing Replacement: step 12, image 1 of 1
    • Gently loosen and remove the side casing by firmly pulling with your fingers.

    • Take care not to break the fragile part or to scratch the LCD screen.

  13. Sony Cyber-shot DSC-W150 Front Casing Replacement: step 13, image 1 of 1
    • Remove the two screws connecting the front casing to the electrical components.

  14. Sony Cyber-shot DSC-W150 Front Casing Replacement: step 14, image 1 of 1
    • Gently loosen the front casing.

    • Be careful not to scratch any of the exposed electrical components.

  15. Sony Cyber-shot DSC-W150 Front Casing Replacement: step 15, image 1 of 1
    • Fully remove the front casing from the camera.

Conclusion

To reassemble your device, follow these instructions in reverse order.

System

Member since: 09/24/09

2,562 Guides authored

0 Comments

Add Comment

View Statistics:

Past 24 Hours: 0

Past 7 Days: 0

Past 30 Days: 0

All Time: 1