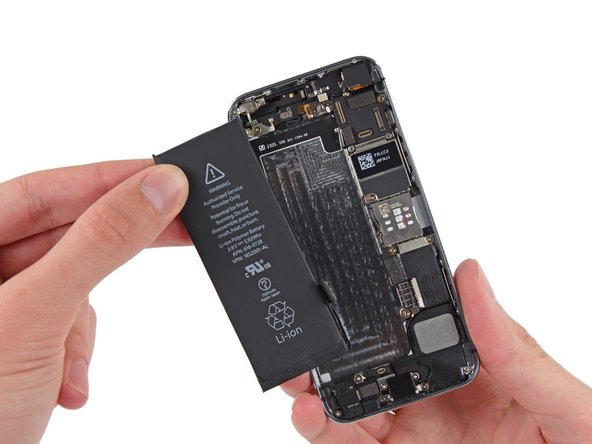
/

iPhone 5s Battery Replacement

What you need

Video Overview

  1. iPhone 5s Battery Replacement, iPhone 5s Battery Replacement: step 1, image 1 of 3 iPhone 5s Battery Replacement, iPhone 5s Battery Replacement: step 1, image 2 of 3 iPhone 5s Battery Replacement, iPhone 5s Battery Replacement: step 1, image 3 of 3
    • If your display glass is cracked, keep further breakage contained and prevent bodily harm during your repair by taping the glass.

    • Lay overlapping strips of clear packing tape over the iPhone's display until the whole face is covered.

    • This will keep glass shards contained and provide structural integrity when prying and lifting the display.

    • Wear safety glasses to protect your eyes from any glass shaken free during the repair.

  2. iPhone 5s Battery Replacement: step 2, image 1 of 1
    • Power off your iPhone before beginning disassembly.

    • Remove the two 3.9 mm Pentalobe screws next to the Lightning connector.

  3. iPhone 5s Battery Replacement, iSclack Opening Procedure: step 3, image 1 of 3 iPhone 5s Battery Replacement, iSclack Opening Procedure: step 3, image 2 of 3 iPhone 5s Battery Replacement, iSclack Opening Procedure: step 3, image 3 of 3
    • The next two steps demonstrate using the , a great tool for safely opening the iPhone 5s that we recommend for anyone doing more than one repair. If you aren't using the iSclack, skip to step 5.

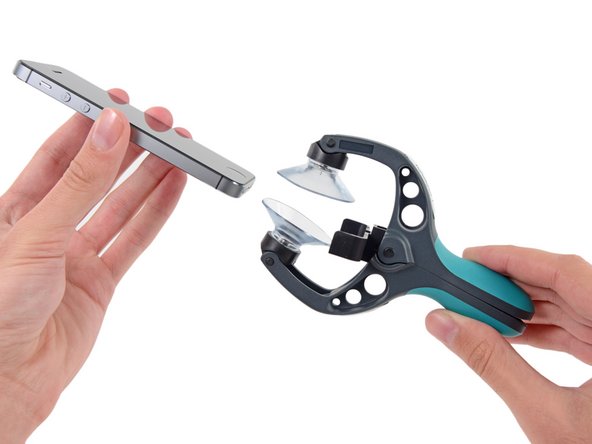
    • Close the handle on the iSclack, opening the suction-cup jaws.

    • Place the bottom of your iPhone in between the suction cups, against the plastic depth gauge.

    • The top suction cup should rest just above the home button.

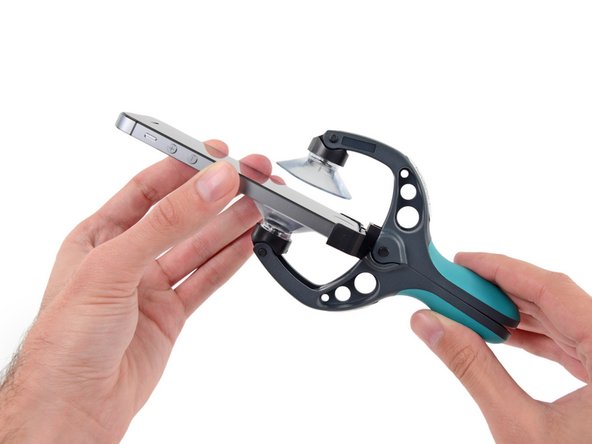
    • Open the handles to close the jaws of the iSclack. Center the suction cups and press them firmly onto the top and bottom of the iPhone.

  4. iPhone 5s Battery Replacement: step 4, image 1 of 2 iPhone 5s Battery Replacement: step 4, image 2 of 2
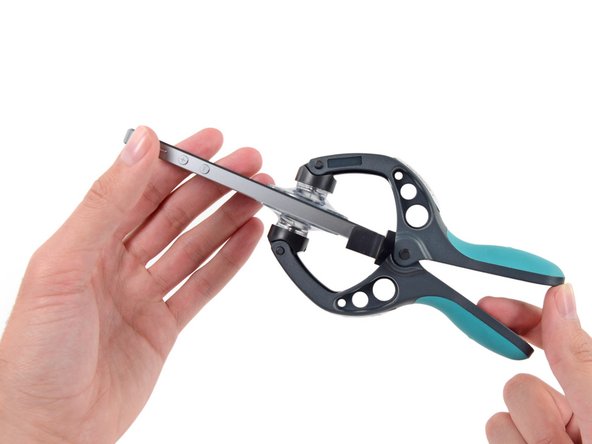
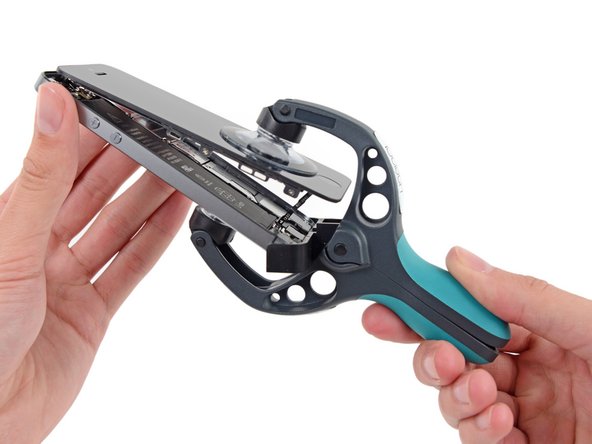
    • Hold onto your iPhone securely and close the handle of the iSclack to separate the suction cups, pulling the front panel up from the rear case.

    • The iSclack is designed to safely open your iPhone just enough to separate the pieces, but not enough to damage the home button cable.

    • Peel the two suction cups off your iPhone.

    • Skip the next three steps and continue on step 8.

  5. iPhone 5s Battery Replacement, Manual Opening Procedure: step 5, image 1 of 1
    • If you don't have an iSclack, use a single suction cup to lift the front panel:

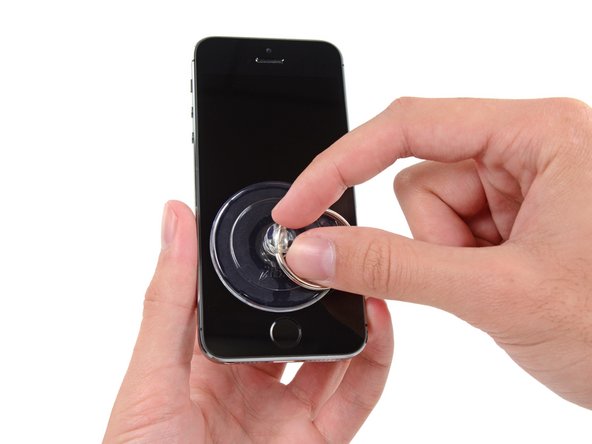
    • Press a suction cup onto the screen, just above the home button.

    • Be sure the cup is completely on the screen to get a tight seal.

  6. iPhone 5s Battery Replacement: step 6, image 1 of 1
    • The front panel is attached with clips, and there are several ribbon cables connecting it to the rest of the phone. Your goal here is to release the clips and open the phone only enough to disconnect the cables. Go slowly and carefully to avoid damage.

    • Make sure the suction cup is firmly attached to the front panel assembly near the home button.

    • While holding the iPhone down with one hand, pull up on the suction cup to slightly separate the home button end of the front panel from the rear case.

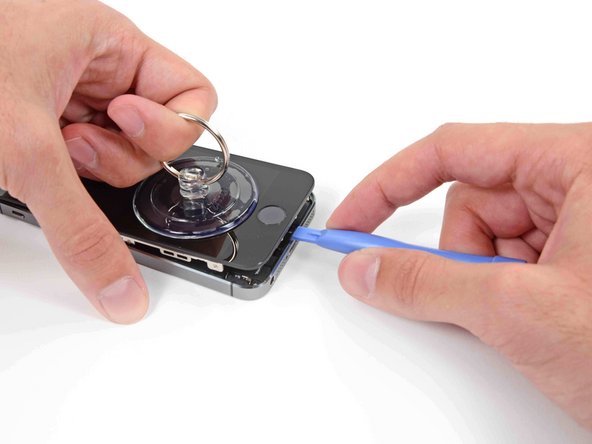
    • With a plastic opening tool, gently pry the edges of the rear case down, away from the front panel assembly, while you pull up with the suction cup.

    • Take your time and apply firm, constant force. The 5s front panel assembly is a much tighter fit than most devices.

  7. iPhone 5s Battery Replacement: step 7, image 1 of 2 iPhone 5s Battery Replacement: step 7, image 2 of 2
    • Do not try to completely remove the front panel assembly from the rear case, as there are several ribbon cables still attached at the top of the iPhone.

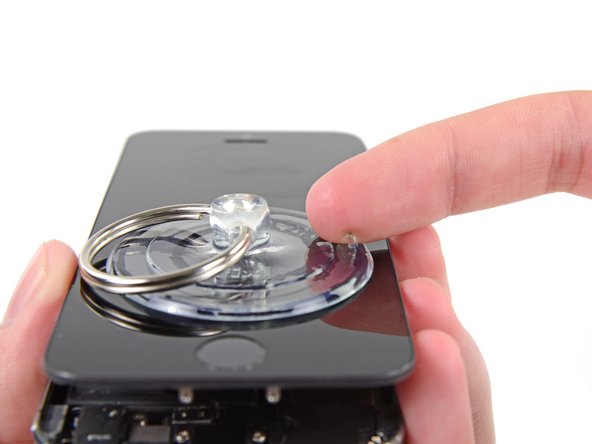
    • Pull the plastic nub to release the vacuum seal on the suction cup.

    • Remove the suction cup from the display assembly.

  8. iPhone 5s Battery Replacement: step 8, image 1 of 3 iPhone 5s Battery Replacement: step 8, image 2 of 3 iPhone 5s Battery Replacement: step 8, image 3 of 3
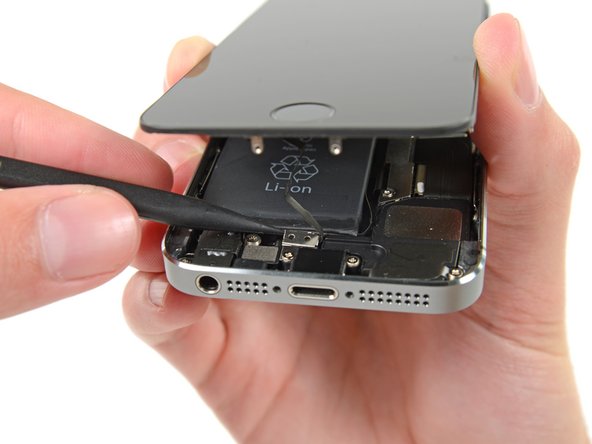
    • Open the phone just enough to reveal the metal bracket covering the home button cable.

    • Do not open the phone too far or you risk damaging the home button cable, or the socket it plugs into. Keep the cable loose—if it is stretched taut, that's too far.

    • Only the phone's original home button assembly will be capable of using the Touch ID functionality. If you rip the cable, installing a new home button will only restore ordinary home button functions, not the Touch ID features.

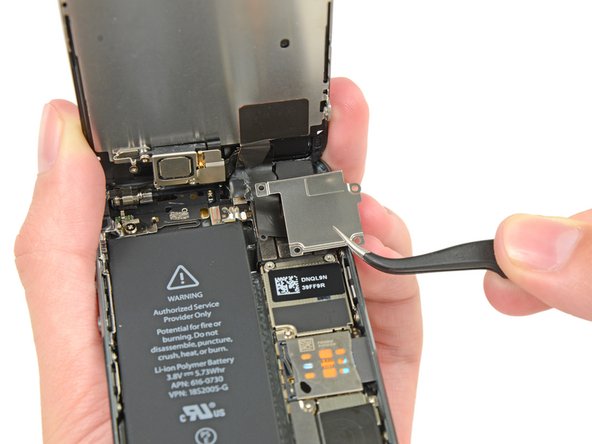
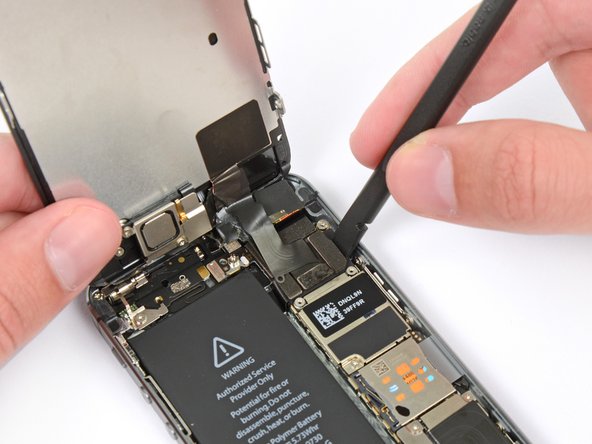
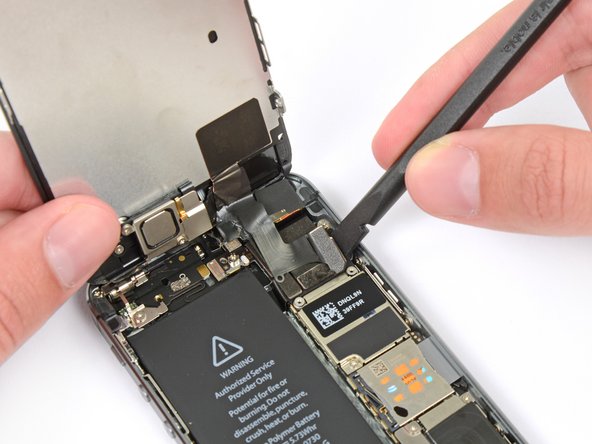
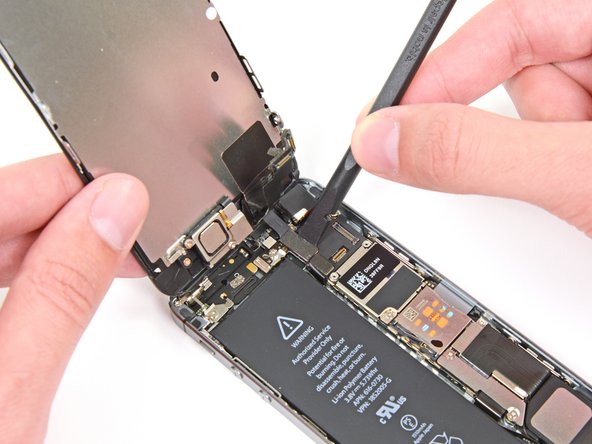
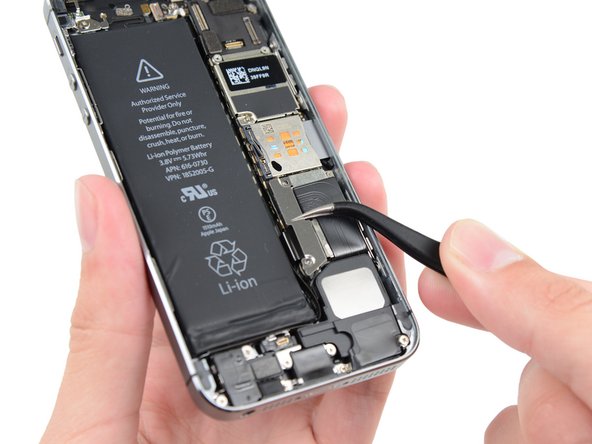
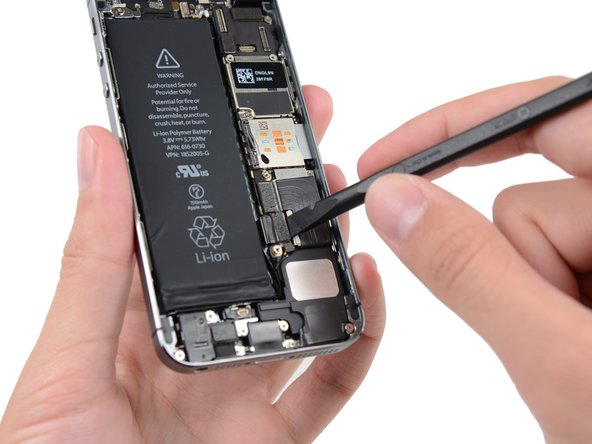
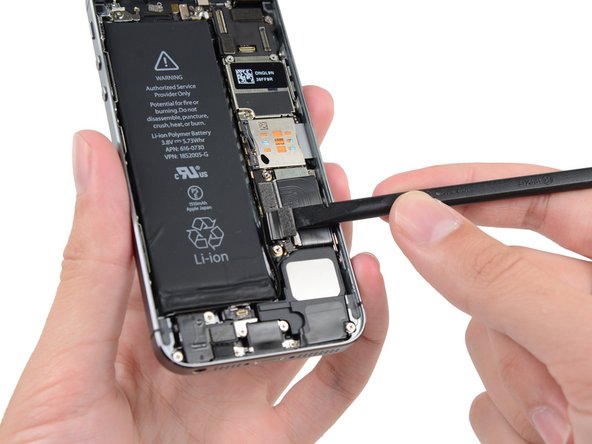
    • Use the tip of a spudger to push the bracket free and remove it with tweezers.

  9. iPhone 5s Battery Replacement: step 9, image 1 of 2 iPhone 5s Battery Replacement: step 9, image 2 of 2
    • Use the tip of a spudger to pry the home button cable connector up out of its socket.

    • Be sure you're separating the cable connector from its socket, and not prying the entire socket up. The socket is on its own glued-down cable that can be pried up if you aren't careful.

  10. iPhone 5s Battery Replacement: step 10, image 1 of 2 iPhone 5s Battery Replacement: step 10, image 2 of 2
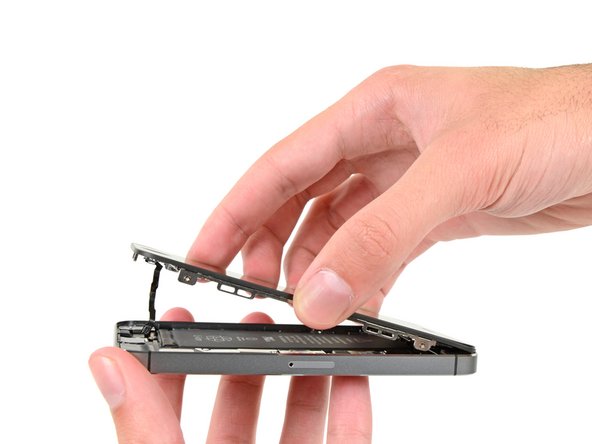
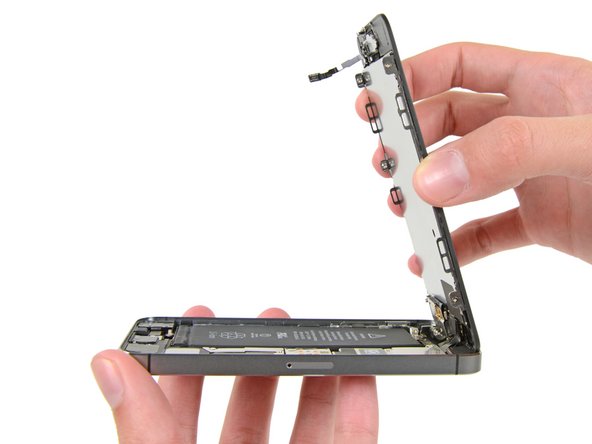
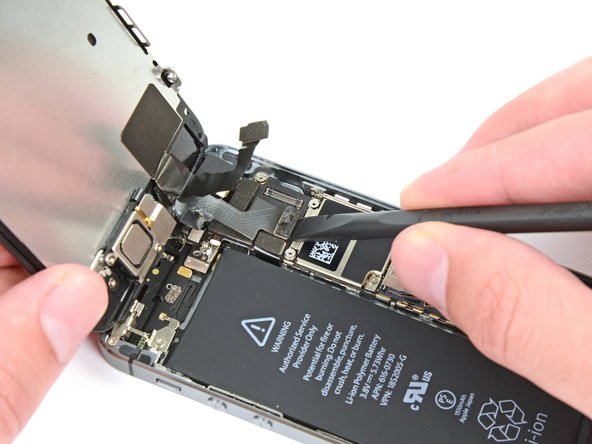
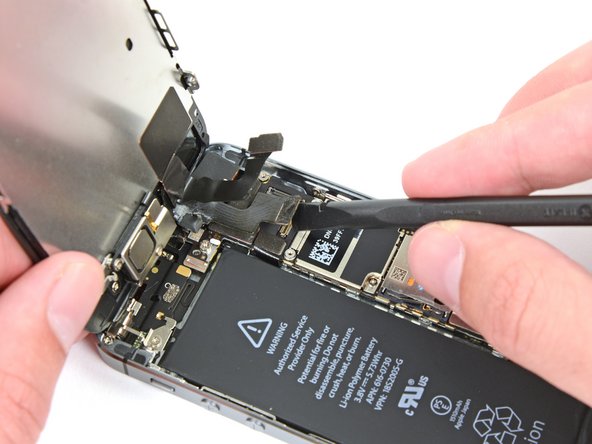
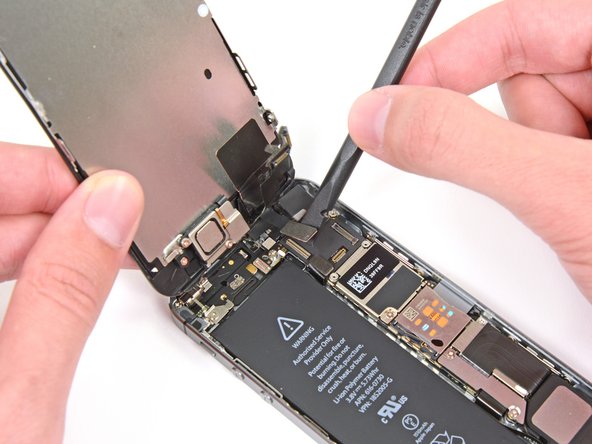
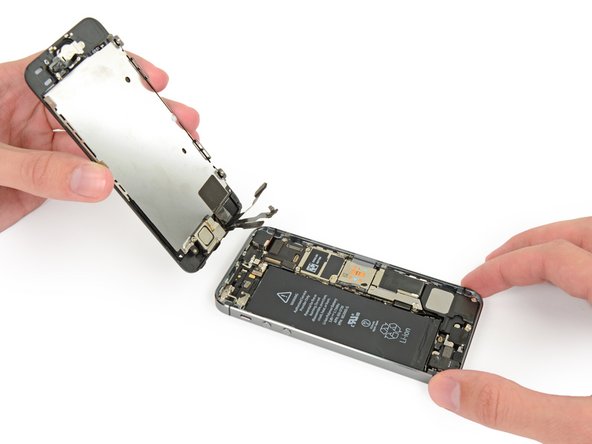
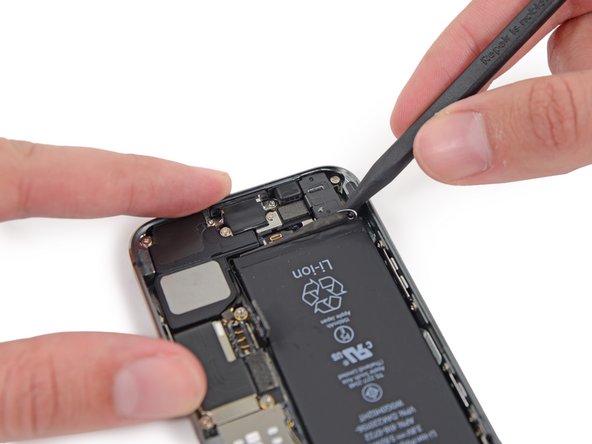
    • Once the connector has been released, pull the home button end of the assembly away from the rear case, using the top of the phone as a hinge.

    • During the next few steps, until you remove the front panel assembly, keep it supported at a 90º angle in relation to the rear case.

  11. iPhone 5s Battery Replacement: step 11, image 1 of 1
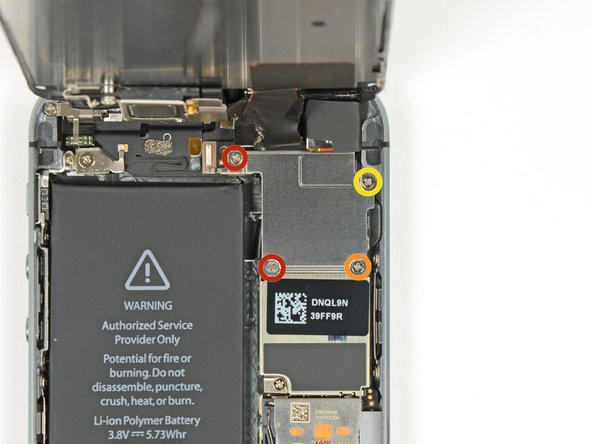
    • Remove the following screws securing the front panel assembly cable bracket to the logic board:

    • Two 1.7 mm Phillips #000 screws

    • One 1.2 mm Phillips #000 screw

    • One 1.3 mm Phillips #000 screw

    • This 1.3 mm screw tends to not be attracted to a magnetized screwdriver. Take care not to lose it when removing.

    • It is especially important to keep track of your screws in this step for reassembly. Accidentally using the 1.3 mm screw or one of the 1.7 mm screws in the bottom right hole will result in significant damage to the logic board causing the phone to no longer boot properly.

    • Be careful not to over-tighten the screws. If they don't fit easily when you are securing them, they may be the wrong size, don't force them

  12. iPhone 5s Battery Replacement: step 12, image 1 of 1
    • Remove the front panel assembly cable bracket from the logic board.

  13. iPhone 5s Battery Replacement: step 13, image 1 of 2 iPhone 5s Battery Replacement: step 13, image 2 of 2
    • Use the flat end of a spudger to disconnect the front-facing camera and sensor cable.

  14. iPhone 5s Battery Replacement: step 14, image 1 of 2 iPhone 5s Battery Replacement: step 14, image 2 of 2
    • While still supporting the front panel, disconnect the digitizer cable connector.

  15. iPhone 5s Battery Replacement: step 15, image 1 of 2 iPhone 5s Battery Replacement: step 15, image 2 of 2
    • Finally, disconnect the LCD cable connector.

    • When reassembling your phone, the LCD cable may pop off the connector. This can result in white lines or a blank screen when powering your phone back on. If that happens, simply reconnect the cable and power cycle your phone. The best way to power cycle your phone is to disconnect and reconnect the battery.

  16. iPhone 5s Battery Replacement: step 16, image 1 of 1
    • Remove the front panel assembly from the rear case.

  17. iPhone 5s Battery Replacement: step 17, image 1 of 1
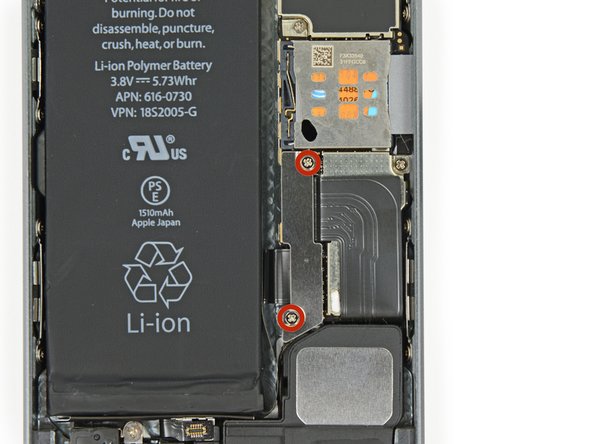
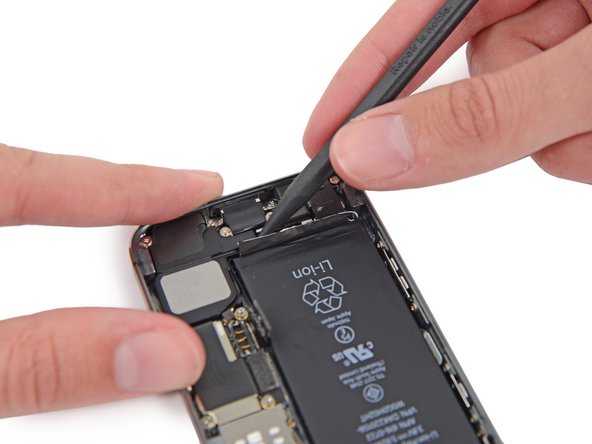
    • Remove the two 1.6 mm Phillips #000 screws securing the metal battery connector bracket to the logic board.

  18. iPhone 5s Battery Replacement: step 18, image 1 of 1
    • Remove the metal battery connector bracket from the iPhone.

  19. iPhone 5s Battery Replacement: step 19, image 1 of 2 iPhone 5s Battery Replacement: step 19, image 2 of 2
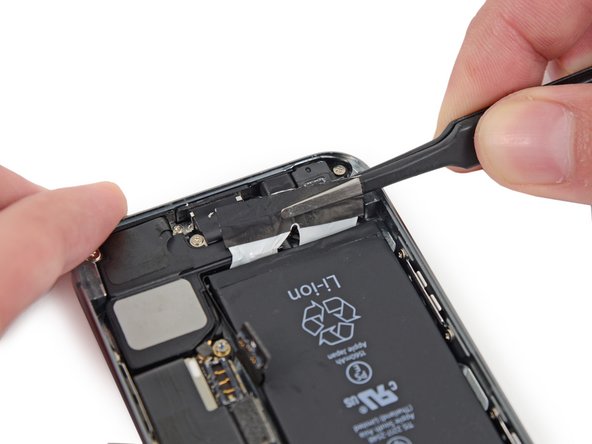
    • Use the flat end of a spudger to gently pry the battery connector up from its socket on the logic board.

    • Be very careful to only pry up on the battery connector and not the socket on the logic board. If you pry up on the logic board socket, you may break the connector entirely.

  20. iPhone 5s Battery Replacement: step 20, image 1 of 3 iPhone 5s Battery Replacement: step 20, image 2 of 3 iPhone 5s Battery Replacement: step 20, image 3 of 3
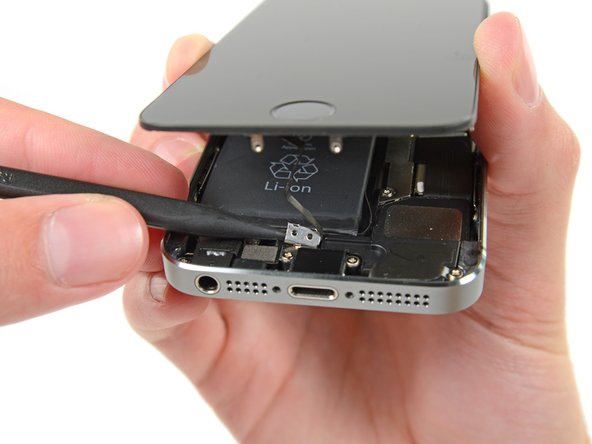
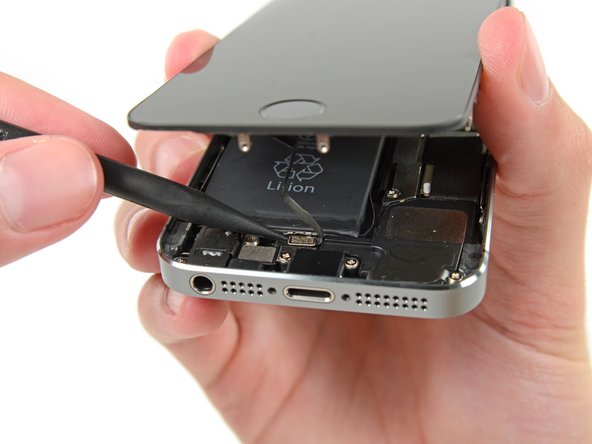
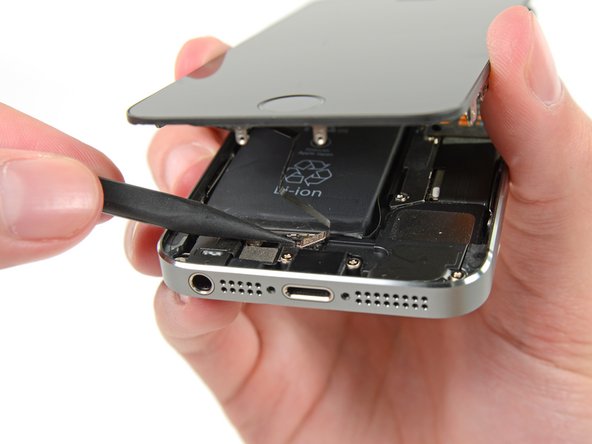
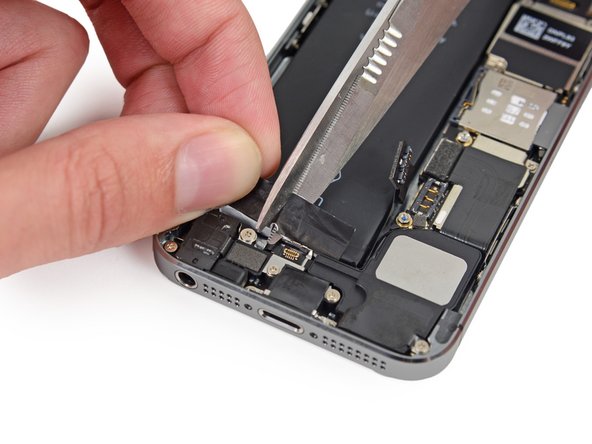
    • Run the tip of a spudger between the battery and the headphone jack to unfold the battery adhesive tab.

  21. iPhone 5s Battery Replacement: step 21, image 1 of 3 iPhone 5s Battery Replacement: step 21, image 2 of 3 iPhone 5s Battery Replacement: step 21, image 3 of 3
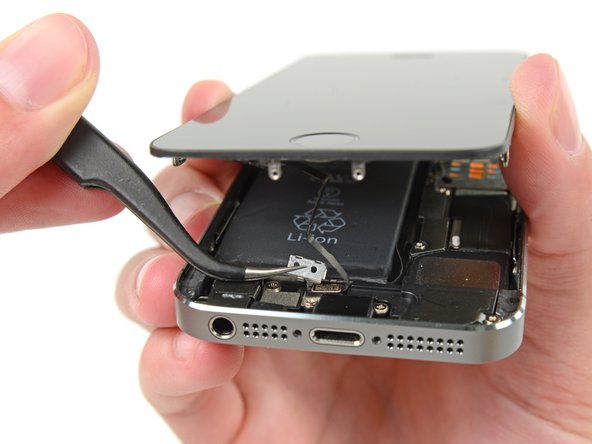
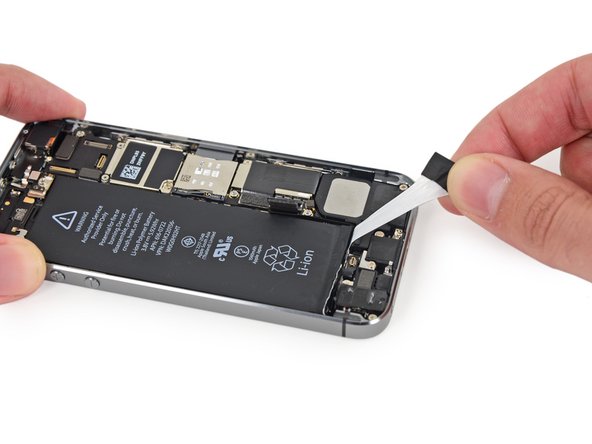
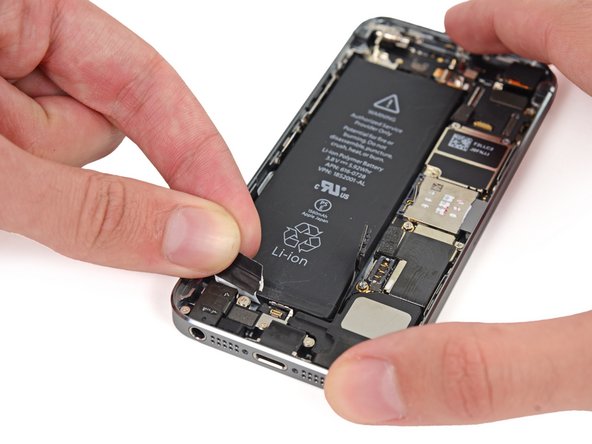
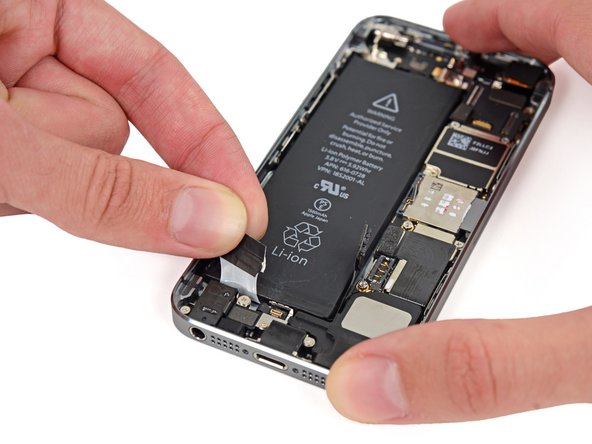
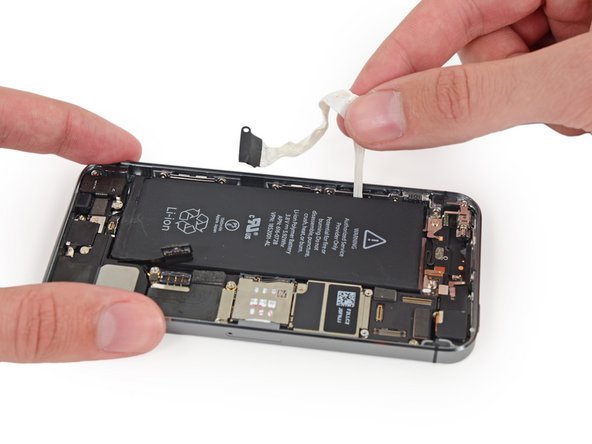
    • Use a pair of tweezers to pull the battery adhesive tab away from the phone.

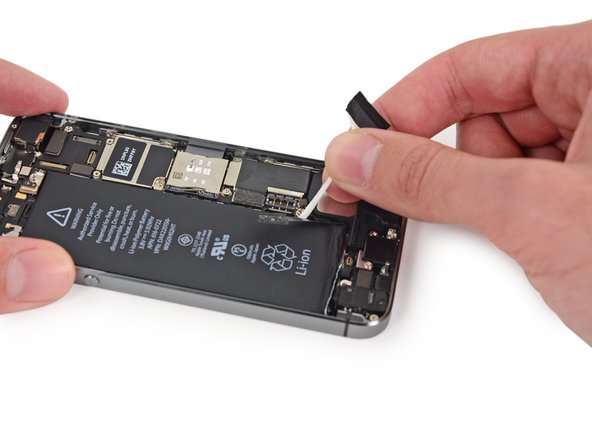
    • Cut the black battery adhesive tab between the two white adhesive strips, separating them.

  22. iPhone 5s Battery Replacement: step 22, image 1 of 2 iPhone 5s Battery Replacement: step 22, image 2 of 2
    • Pull the innermost tab evenly straight up.

    • Do not twist the tab; try to keep the adhesive strip as flat and wide as possible. When the adhesive bunches up it tends to tear.

    • Be sure you do not pull the tab against any of the components of the phone; they may puncture the adhesive and cause the strip to tear.

  23. iPhone 5s Battery Replacement: step 23, image 1 of 2 iPhone 5s Battery Replacement: step 23, image 2 of 2
    • Pull the tab carefully and evenly around the corner of the battery.

    • Pull the tab away from the battery as you round the corner to avoid the sharp corner.

  24. iPhone 5s Battery Replacement: step 24, image 1 of 2 iPhone 5s Battery Replacement: step 24, image 2 of 2
    • Pull the strip along the side of the battery until the strip comes free from the phone.

  25. iPhone 5s Battery Replacement: step 25, image 1 of 3 iPhone 5s Battery Replacement: step 25, image 2 of 3 iPhone 5s Battery Replacement: step 25, image 3 of 3
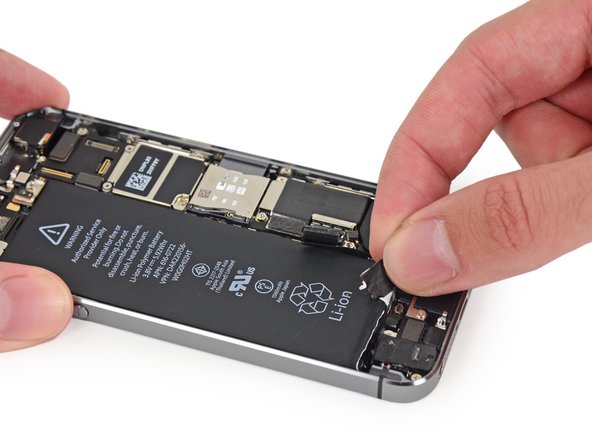
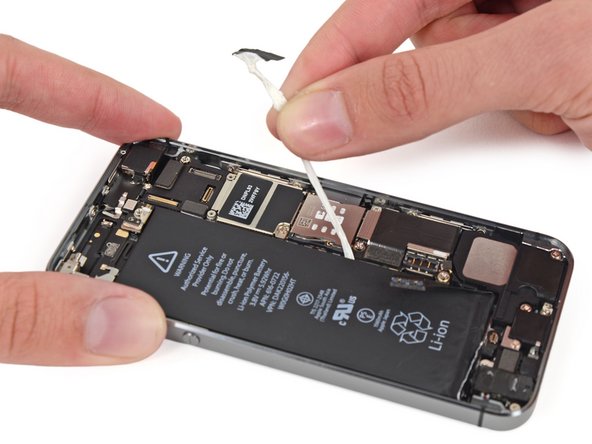
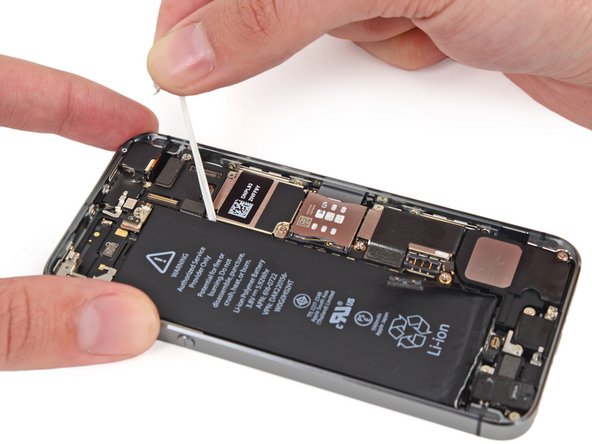
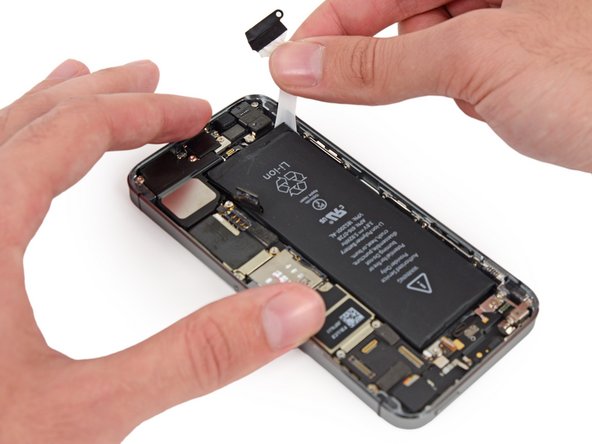
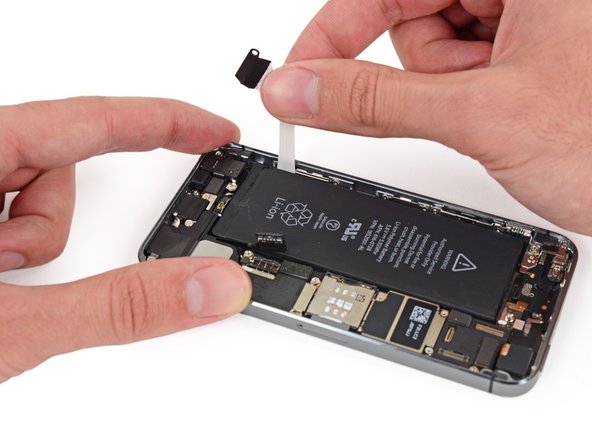
    • Pull the outside battery adhesive tab straight up and carefully around the corner of the battery.

  26. iPhone 5s Battery Replacement: step 26, image 1 of 2 iPhone 5s Battery Replacement: step 26, image 2 of 2
    • Pull the strip along the edge of the battery until it is freed from the phone.

  27. iPhone 5s Battery Replacement: step 27, image 1 of 1
    • If any of the adhesive strips broke off and the battery remains stuck to the rear case, [invalid guide link] or use a hair dryer to heat the rear case directly behind the battery.

    • A piece of dental floss may be used to work between the battery and adhesive strip.

  28. iPhone 5s Battery Replacement: step 28, image 1 of 1
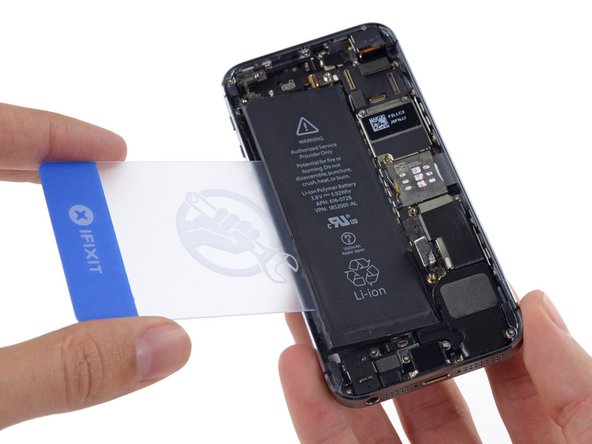
    • Flip the iPhone back over and insert a plastic card between the case side of the battery and the rear case.

    • Do not pry against the logic board or you may damage the phone.

    • Be careful to keep the card as flat as possible to avoid bending the battery, which may damage it and cause it to release dangerous chemicals.

    • Press the card in farther to break up the adhesive behind the battery.

  29. iPhone 5s Battery Replacement: step 29, image 1 of 3 iPhone 5s Battery Replacement: step 29, image 2 of 3 iPhone 5s Battery Replacement: step 29, image 3 of 3
    • Pull the battery out of the rear case.

Conclusion

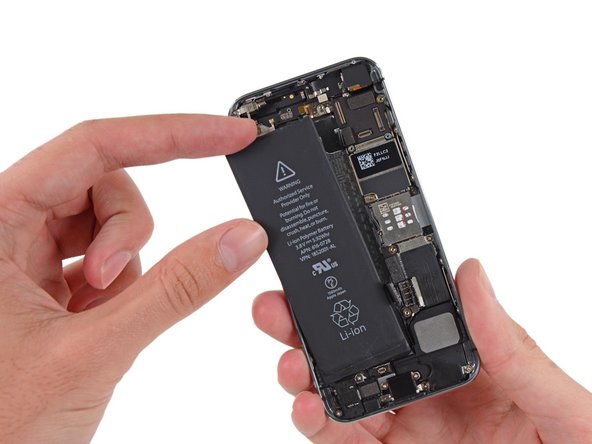
To reassemble your device, follow these instructions in reverse order.

System

Member since: 09/24/09

2,562 Guides authored

0 Comments

Add Comment

View Statistics:

Past 24 Hours: 0

Past 7 Days: 0

Past 30 Days: 0

All Time: 25