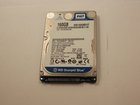
Acer Aspire One ZG5 Hard Drive Replacement

Views: 320

View statistics:

Past 24 Hours:
0
Past 7 Days:
0
Past 30 Days:
1
All Time:
320
Comments: 0

No one has left comments on this guide. Will you be first?

Go to guide comments
Completed: 0

No one has marked this guide "completed." Will you be the first?

Favorites: 0

No one has favorited (and subscribed to) this guide. Will you be the first?

Time Required: No estimate
Difficulty: Moderate
Acer Aspire One ZG5 Hard Drive Replacement

Introduction

Go to step 1 ↓

Use this guide to replace the hard drive in the Acer Aspire One ZG5. After removing the motherboard, the hard drive is easy to replace.

    1. Acer Aspire One ZG5 Hard Drive Replacement, Acer Aspire One ZG5 Hard Drive Replacement: step 1, image 1 of 1
      • Turn the netbook upside down with the battery at the top, away from you.

      Add Comment

    2. Acer Aspire One ZG5 Hard Drive Replacement: step 2, image 1 of 1
      • Unlock the battery by sliding the switch located near the left hinge to the left "unlocked" position.

      Add Comment

    3. Acer Aspire One ZG5 Hard Drive Replacement: step 3, image 1 of 1
      • Slide the latch located on the opposite hinge from the lock while pushing the battery up.

      Add Comment

    4. Acer Aspire One ZG5 Hard Drive Replacement: step 4, image 1 of 1
      • Gently loosen the two Phillips #0 screws in the small panel that covers the wireless card.

      • These screws are built into the panel and aren't meant to be completely removed.

      Add Comment

    5. Acer Aspire One ZG5 Hard Drive Replacement: step 5, image 1 of 1
      • Lift up the panel and remove it from the case.

      Add Comment

    6. Acer Aspire One ZG5 Hard Drive Replacement: step 6, image 1 of 1
      • Disconnect the two antenna cables from the left side of the wireless card.

      Add Comment

    7. Acer Aspire One ZG5 Hard Drive Replacement: step 7, image 1 of 1
      • Remove the single 3.9 mm Phillips #1 screw from the bottom left of the wireless card.

      Add Comment

    8. Acer Aspire One ZG5 Hard Drive Replacement: step 8, image 1 of 1
      • Gently lift up the left side of the wireless card and slide the card out of its socket.

      Add Comment

    9. Acer Aspire One ZG5 Hard Drive Replacement: step 9, image 1 of 1
      • Turn the netbook over and open the display so that the keyboard is facing you.

      Add Comment

    10. Acer Aspire One ZG5 Hard Drive Replacement: step 10, image 1 of 3 Acer Aspire One ZG5 Hard Drive Replacement: step 10, image 2 of 3 Acer Aspire One ZG5 Hard Drive Replacement: step 10, image 3 of 3
      • There are three tabs located on the top of the keyboard.

      • Start with the spudger pointing towards the display and pry up to push each tab off the keyboard.

      • As you move to the next tab, ensure the previous tab doesn't reset itself.

      Add Comment

    11. Acer Aspire One ZG5 Hard Drive Replacement: step 11, image 1 of 2 Acer Aspire One ZG5 Hard Drive Replacement: step 11, image 2 of 2
      • Lift top of keyboard up. If it doesn't lift easily, there may be tabs on the sides - use the tool to ease them aside and/or shift the keyboard from side to side.

      • There is a short ribbon cable connecting the keyboard to the netbook.

      Add Comment

    12. Acer Aspire One ZG5 Hard Drive Replacement: step 12, image 1 of 2 Acer Aspire One ZG5 Hard Drive Replacement: step 12, image 2 of 2
      • Disconnect the ribbon by lifting the black plastic hinge and removing the clear blue cable.

      Add Comment

    13. Acer Aspire One ZG5 Hard Drive Replacement: step 13, image 1 of 1
      • Close the display and turn the ZG5 over so that the battery compartment faces away from you.

      Add Comment

    14. Acer Aspire One ZG5 Hard Drive Replacement: step 14, image 1 of 2 Acer Aspire One ZG5 Hard Drive Replacement: step 14, image 2 of 2
      • Remove three 5.8 mm Phillips #0 screws from the bottom of the case

      • Remove three 3.9 mm Phillips #1 screws from the battery compartment.

      • Remove two 5.8 mm Phillips #0 screws from underneath the feet near the hinges.

      Add Comment

    15. Acer Aspire One ZG5 Hard Drive Replacement: step 15, image 1 of 1
      • Turn the netbook back over and open the display with the keyboard cavity facing you.

      Add Comment

    16. Acer Aspire One ZG5 Hard Drive Replacement: step 16, image 1 of 3 Acer Aspire One ZG5 Hard Drive Replacement: step 16, image 2 of 3 Acer Aspire One ZG5 Hard Drive Replacement: step 16, image 3 of 3
      • Flip up the retaining flap on the trackpad ribbon cable ZIF connector.

      • Using the blue tab, pull the trackpad ribbon cable from its socket on the motherboard.

      Add Comment

    17. Acer Aspire One ZG5 Hard Drive Replacement: step 17, image 1 of 2 Acer Aspire One ZG5 Hard Drive Replacement: step 17, image 2 of 2
      • Remove the five black 4.7 mm Phillips #0 screws from the metal casing.

      • Remove the single silver 4.3 mm Phillips #00 screw from the right side of the metal casing.

      Add Comment

    18. Acer Aspire One ZG5 Hard Drive Replacement: step 18, image 1 of 2 Acer Aspire One ZG5 Hard Drive Replacement: step 18, image 2 of 2
      • Starting at the red rings along the hinge, insert a spudger or plastic opening tool into the seam between the two halves of the case.

      • Slide the spudger toward the front of the device, releasing the small clips that hold down the top case.

      • Gently lift off the top case.

      Add Comment

    19. Acer Aspire One ZG5 Hard Drive Replacement: step 19, image 1 of 1
      • Disconnect the two antenna cables from the right side of the wireless card.

      Add Comment

    20. Acer Aspire One ZG5 Hard Drive Replacement: step 20, image 1 of 1
      • Remove the single 3.9 mm Phillips #1 screw from the wireless card.

      Add Comment

    21. Acer Aspire One ZG5 Hard Drive Replacement: step 21, image 1 of 1
      • Gently pull the wireless card to the right and slide it out of its socket.

      Add Comment

    22. Acer Aspire One ZG5 Hard Drive Replacement: step 22, image 1 of 1
      • Disconnect the display cable from the top left of the motherboard.

      Add Comment

    23. Acer Aspire One ZG5 Hard Drive Replacement: step 23, image 1 of 2 Acer Aspire One ZG5 Hard Drive Replacement: step 23, image 2 of 2
      • Disconnect the speaker cable from its socket on the motherboard.

      Add Comment

    24. Acer Aspire One ZG5 Hard Drive Replacement: step 24, image 1 of 1
      • Remove three 3.9 mm Phillips #1 screws from the small I/O board.

      • Remove a single 3.9 mm Phillips #0 screw from the front of the motherboard.

      • Some laptops may instead have a single 4.7 mm Phillips #0 screw.

      Add Comment

    25. Acer Aspire One ZG5 Hard Drive Replacement: step 25, image 1 of 1
      • Remove the two 4.7 mm Phillips #1 screws that connect the display to the motherboard.

      Add Comment

    26. Acer Aspire One ZG5 Hard Drive Replacement: step 26, image 1 of 1
      • Gently lift the I/O board up from the right side of the case.

      • The I/O board is attached to the motherboard by a short cable.

      Add Comment

    27. Acer Aspire One ZG5 Hard Drive Replacement: step 27, image 1 of 1
      • Lift the entire motherboard assembly out the case.

      Add Comment

    28. Acer Aspire One ZG5 Hard Drive Replacement: step 28, image 1 of 1
      • Turn the motherboard over so that the RAM is facing up.

      Add Comment

    29. Acer Aspire One ZG5 Hard Drive Replacement: step 29, image 1 of 2 Acer Aspire One ZG5 Hard Drive Replacement: step 29, image 2 of 2
      • Disconnect the I/O board from the motherboard.

      Add Comment

    30. Acer Aspire One ZG5 Hard Drive Replacement: step 30, image 1 of 1
      • Remove the two 4.7 mm Phillips #0 screws that hold down the hard drive.

      Add Comment

    31. Acer Aspire One ZG5 Hard Drive Replacement: step 31, image 1 of 1
      • Pull the hard drive straight out from the motherboard.

      Add Comment

    32. Acer Aspire One ZG5 Hard Drive Replacement: step 32, image 1 of 1
      • Remove the four 3.9 mm Phillips #1 screws from the hard drive casing.

      • There are two screws on each side of the casing.

      Add Comment

    33. Acer Aspire One ZG5 Hard Drive Replacement: step 33, image 1 of 1
      • Remove the upper and lower casing from the hard drive.

      Add Comment

Conclusion

To reassemble your device, follow these instructions in reverse order.

Cancel: I did not complete this guide.

System

Member since: 09/24/09

2,562 Guides authored

0 Guide Comments

Add Comment

View Statistics:

Past 24 Hours: 0

Past 7 Days: 0

Past 30 Days: 1

All Time: 320