What you need
-
-
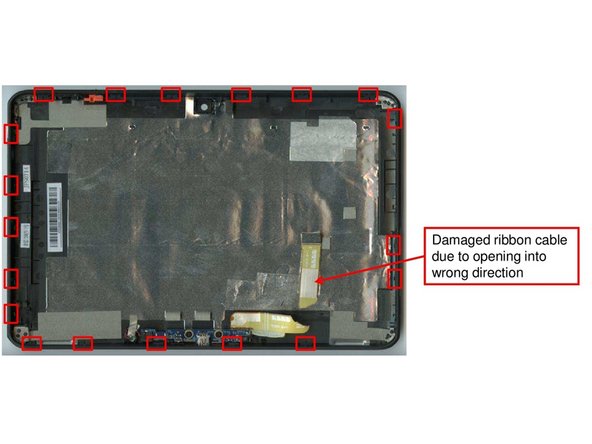
In order to remove the back cover of the device. First, the side elements need to be removed. They are fixed with 11 little clips. Use a lever and apply some force.
-
Use the Philipps #1 Screwdriver to unscrew the 4 screws from beneath the side elements.
-
Open the back cover towards the connector for the charging cable. some force and a good lever are required to open the device. 19 Clips are fixing the back cover to the device.
-
-
-
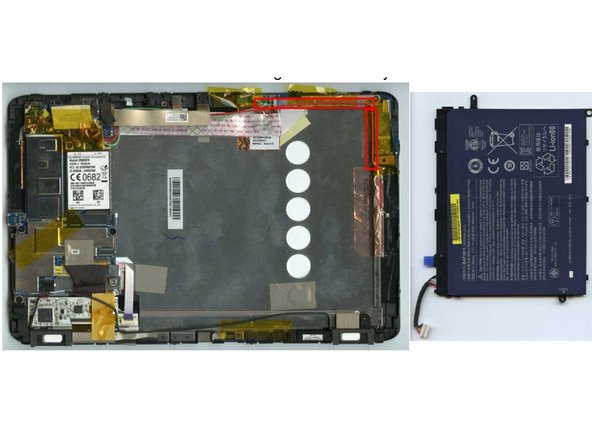
Once the back cover has been removed. In order to secure the battery pull off all of the adhesives marked in the first graphic. 3 Screws need to be loosened that hold down the battery, use the Phillips 00 screw driver.
-
On one of the edges of the battery there are the battery connectors that have to be unplugged.
-
Now, remove the battery from the device.
-
-
-
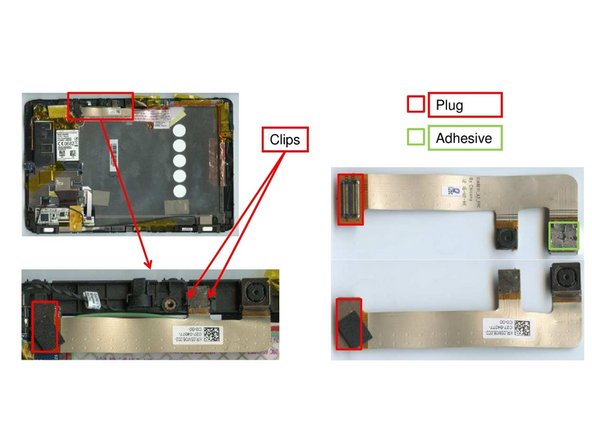
The removal of the front camera can be achieved by pulling the plug from mainboard and overpowering the 2 small clips and the adhesive that hold down the camera. Shouldn't be a problem.
-
-
-
To remove the mainboard use the Screw Driver Phillips #00 again to unscrew 5 screws that fix the mainboard to the device.
-
Before you remove the mainboard (which is now possible) watch out for cable and plugs that you might damage (or don't).
-
Remove the mainboard.
-
-
-
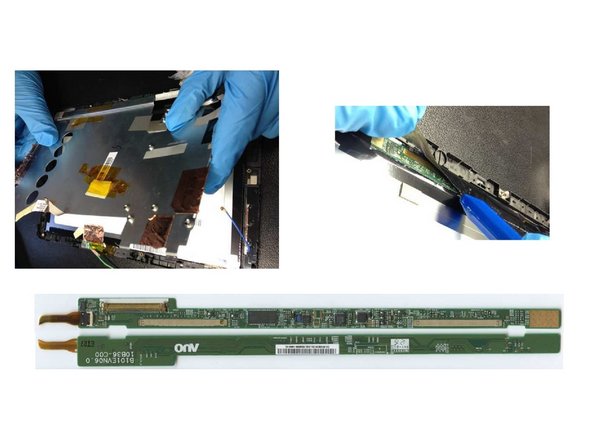
The display board is located in on the four corners of the device (opposite from the speakers!). It is only attached to the rest of the device using one-sided tape (easy to pull off) and 2 ribbon cables that need to be unplugged.
-
-
-
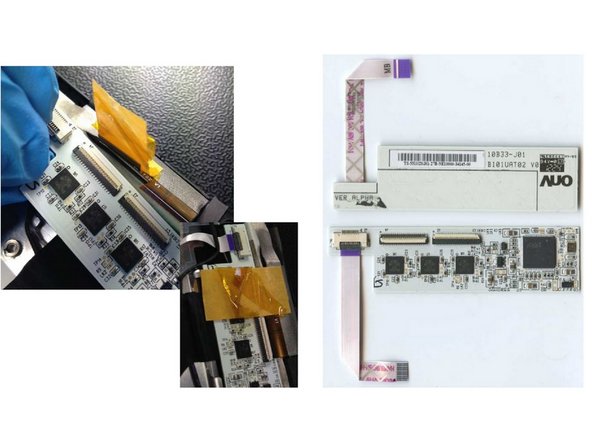
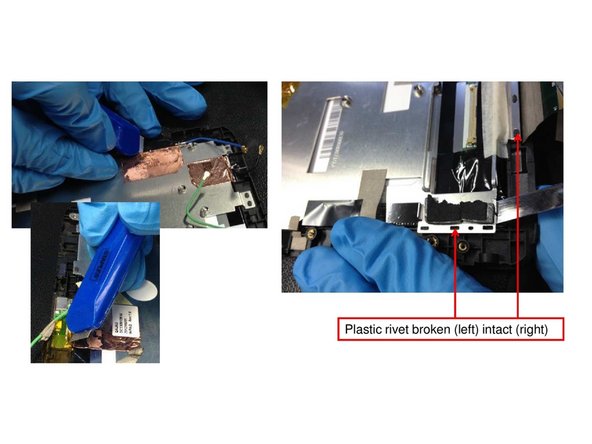
In order two remove the display driver board, first, the metal cover must be removed. The cover is held down by four strips of copper tape that can be cut or ripped off.
-
Lever off the metal cover. Note: this process will destroy most of the plastics remaining that still withstand the process of disassembly.
-
Once the metal cover has been removed, you can cut off the tape that the display driver board is wrapped inside.
-