
Apple PowerBook G3 400 Hard Drive Replacement

What you need

  1. Apple PowerBook G3 400 Hard Drive Replacement, Apple PowerBook G3 400 Hard Drive Replacement: step 1, image 1 of 1
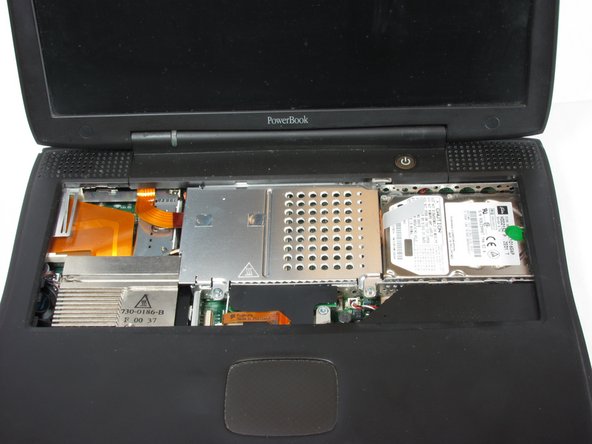
    • Pull the keyboard tabs toward you while lifting up on the keyboard until it releases from it's hold.

    • To lift the keyboard out pull it up and away from you. Then place the keyboard on the track pad.

    Add Comment

  2. Apple PowerBook G3 400 Hard Drive Replacement: step 2, image 1 of 1
    • Pull the keyboard ribbon vertically from the logic board to release connection.

    • The connector may be tight and difficult to remove. If stuck try rocking the connector back and forth while pulling up until it releases. This same process can be used for many of the connectors on this device.

    • Remove battery and CD/DVD drives before proceeding any further.

    Add Comment

  3. Apple PowerBook G3 400 Hard Drive Replacement: step 3, image 1 of 1
    • Your computer should look approximately like this.

    Add Comment

  4. Apple PowerBook G3 400 Hard Drive Replacement: step 4, image 1 of 1
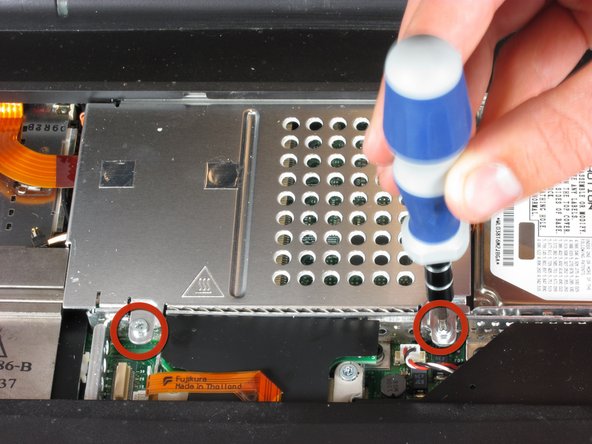
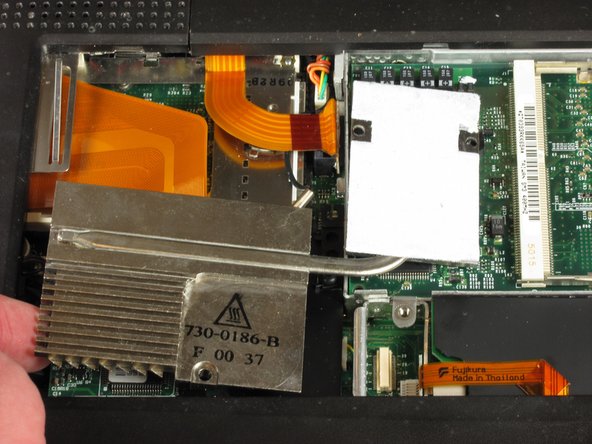
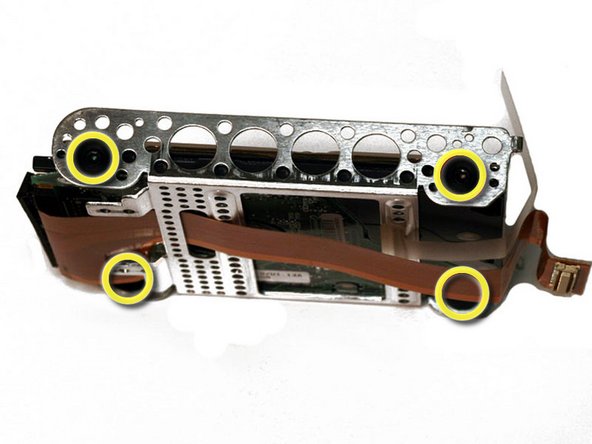
    • Remove the two silver Phillips #1 screws that attach the heat shield to the metal framework.

    • Lift the heat shield up and toward you.

    Add Comment

  5. Apple PowerBook G3 400 Hard Drive Replacement: step 5, image 1 of 1
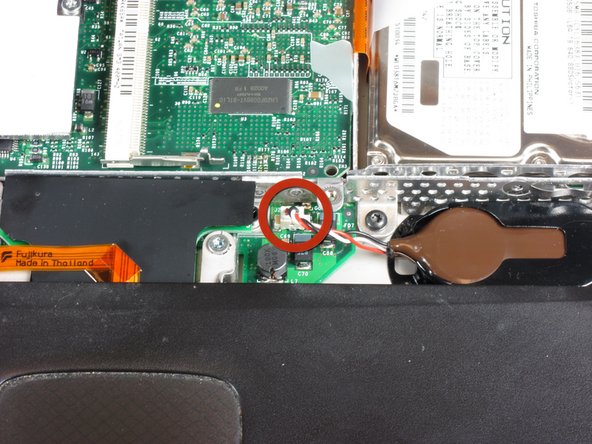
    • Pull the PRAM battery cable vertically upward to disconnect it.

    • Remove the battery by pulling up and to the left.

    Add Comment

  6. Apple PowerBook G3 400 Hard Drive Replacement: step 6, image 1 of 1
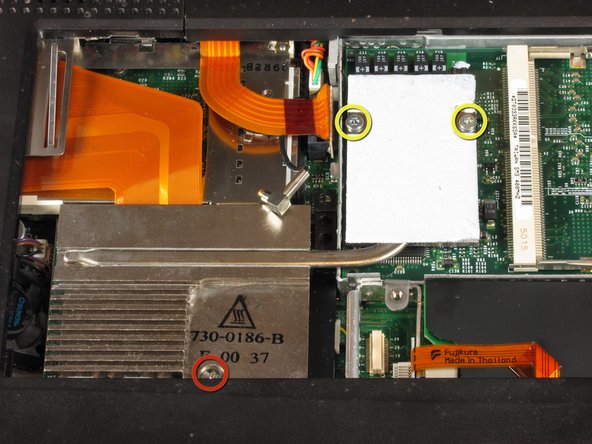
    • Remove the two T8 Torx screws that attach the heat sink to the processor.

    • Remove the long silver Phillips #1 screw from the heat sink.

    Add Comment

  7. Apple PowerBook G3 400 Hard Drive Replacement: step 7, image 1 of 1
    • Lift up the heat sink unit from the left side and remove.

    Add Comment

  8. Apple PowerBook G3 400 Hard Drive Replacement: step 8, image 1 of 1
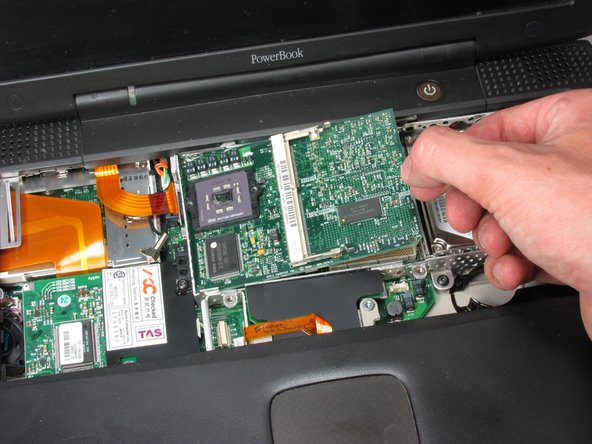
    • Lift the processor on the right side and pull directly up.

    • The RAM chips should be in the slots on the processor.

    Add Comment

  9. Apple PowerBook G3 400 Hard Drive Replacement: step 9, image 1 of 1
    • After removing the RAM, your laptop should now look like this.

    Add Comment

  10. Apple PowerBook G3 400 Hard Drive Replacement: step 10, image 1 of 1
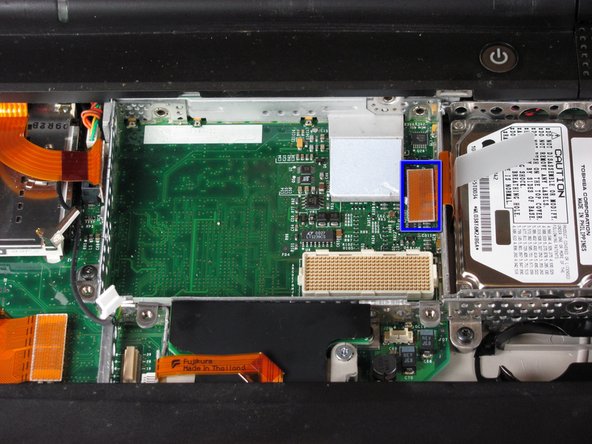
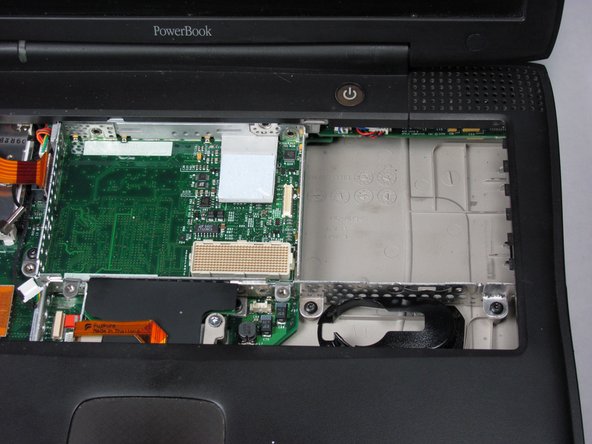
    • Locate the orange tab, which should be just left of the hard-drive.

    • You must disconnect this orange tab from the logic board to enable the next step.

    • It is better to do this by grabbing the plastic connection point, not the relatively flexible cable.

    Add Comment

  11. Apple PowerBook G3 400 Hard Drive Replacement: step 11, image 1 of 1
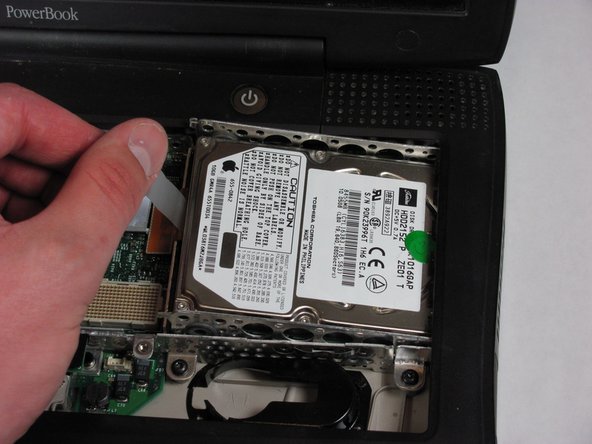
    • Grab the plastic strip shown here and gently remove, pulling up and left.

    • Pull left to avoid the hard drive catching the casing.

    Add Comment

  12. Apple PowerBook G3 400 Hard Drive Replacement: step 12, image 1 of 1
    • Once you have removed the hard-drive, your laptop should like this.

    Add Comment

  13. Apple PowerBook G3 400 Hard Drive Replacement: step 13, image 1 of 1
    • Each of the Torx screws will need to be removed. They are located at each corner.

    Add Comment

  14. Apple PowerBook G3 400 Hard Drive Replacement: step 14, image 1 of 1
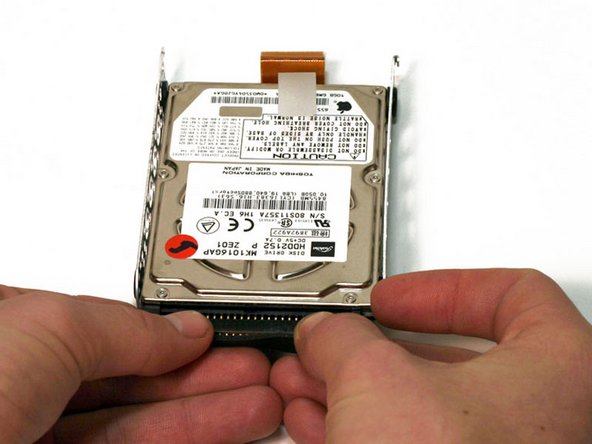
    • Applying even pressure during this step is key. You must be careful not to damage the hard-drive beyond repair.

    • The pins are very sensitive.

    • Pull the connector cable from the hard-drive with even pressure the entire time.

    Add Comment

Conclusion

To reassemble your device, follow these instructions in reverse order.

Cancel: I did not complete this guide.

System

Member since: 09/24/09

2,562 Guides authored

0 Guide Comments

Add Comment

View Statistics:

Past 24 Hours: 0

Past 7 Days: 2

Past 30 Days: 5

All Time: 39