What you need
-
-
In order to open the device and remove the back cover a total of 20 clips need to loosened using a lever tool. This should pose no problem and leave the device undamaged.
-
-
-
Removing the battery requires two short steps. First unplug the battery connector that connects the battery to the plug located on the mainboard.
-
After this, the force of two small double-sided adhesive patches located underneath the battery needs to be overcome using a lever tool.
-
-
-
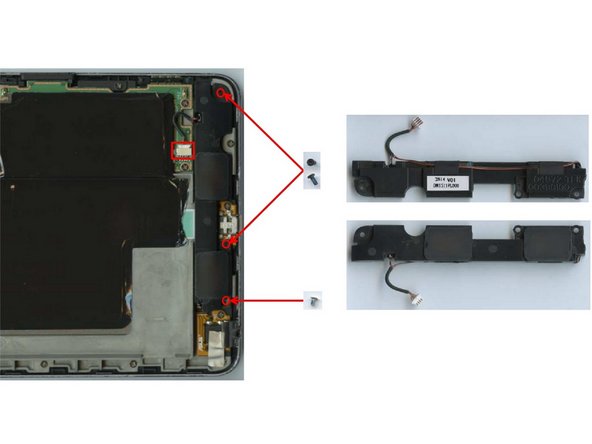
To remove the speakers, first three screws close to the edge of the device need to be removed using a #00 screw driver.
-
After unplugging the plug that connects the speakers to the mainboard, the speakers should be easily removable.
-
-
-
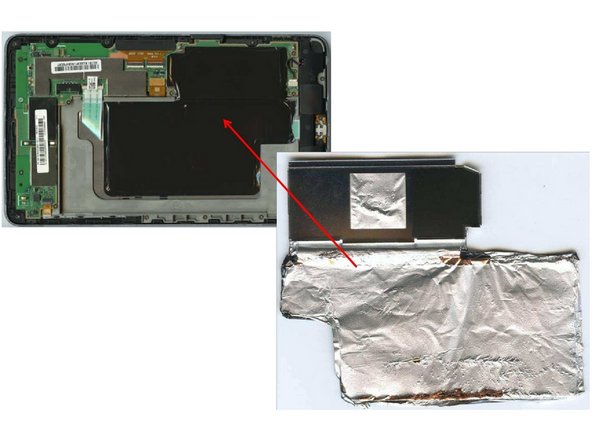
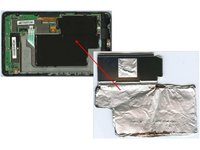
The tin copper shielding of the EMI shield, is adhered pretty well to the mainboard. Pulling it off will require some work.
-
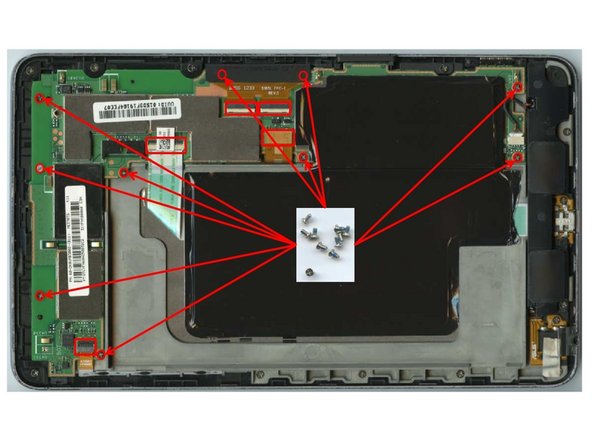
Removing the mainboard needs some unscrewing and unplugging. A total of ten screws need to be removed using a #00 screw driver. NOTE: one of the screws may be loacted underneath the warranty seal
-
Before being able to lift the mainboard from the device, five cables need to be unplugged.
-
-
-
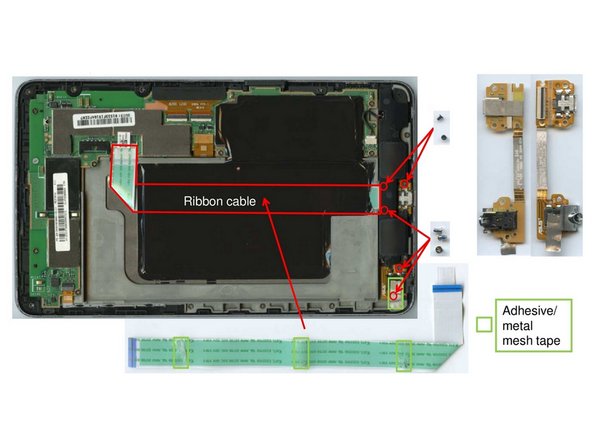
In order to remove the ribbon cable visible, three adhesive patches need to be loosened. After this the ribbon cable can be unplugged.
-
After this, five screws need to be removed. Three are located close to the usb port and two can be found in one of the corners of the device. Use a #00 screw driver to savely remove the screws.
-
The USB/headphone connector board can then be easily removed.
-
-
-
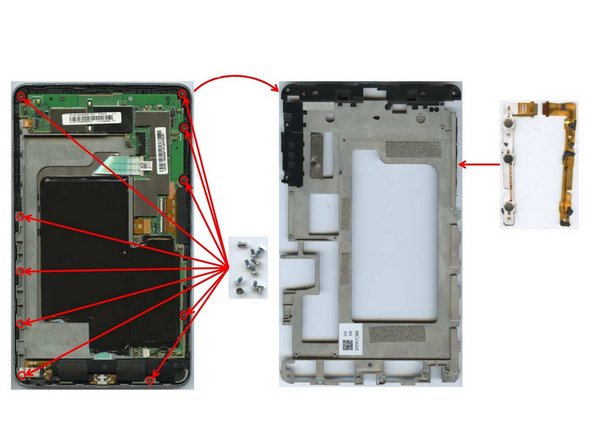
In order to remove the magnesium frame that stabilizes the device a lot of unscrewing is required. A total of ten screws have to be removed using a #00 screw driver.
-
Some metal mesh has to be removed too, before lifting the frame from the device.
-
-
-
The removal of the display unit will result in the destruction of the rest of the device. As the display is glued excessively to the rest of the device, it can only be removed using brutal force and a strong lever.
-