What you need
-
-
Before removing the display unit is possible, the SIM card holder and speaker covers must be removed.
-
The SIM Card Holder can easily be removed using a small tool. It is neither glued nor fastened with screws.
-
Find the charging slot. Next to it there are two rubber knobs that cover two screws (#0) unfasten them.
-
The two speaker are located on two of the device's corners. Remove the metal mesh tapes and unscrew four screws (#0). It is now possible to remove the speaker covers.
-
The display can now be flipped upward. NOTE: the display cable is still connected to the device. If flipped the wrong way it might tear.
-
Now remove the two adhesives that hold down he display cable. Unplug the cable's two connectors and remove the display unit from the device.
-
-
-
Remove the two adhesives that fix the battery cable to the mainboard. Then unplug the battery connector.
-
The battery has to be pried off the adhesives that hold it down inside the device. Use of a lever tool required.
-
-
-
In order to remove the camera module, unplug the camera connector and carefully pull of the camera. The use of a lever tool may be of help.
-
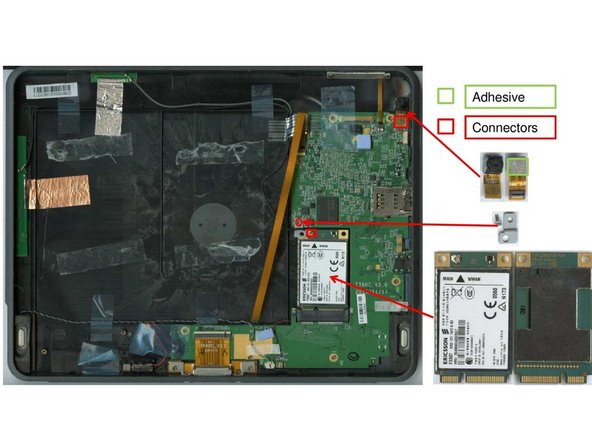
Close to the WWAN Port, there is a screw (#00), remove it. The screws socket comes of as well.
-
The WWAN Module can be unplugged manually.
-
-
-
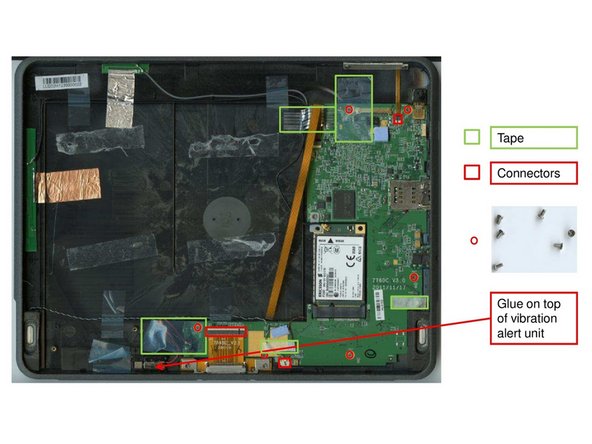
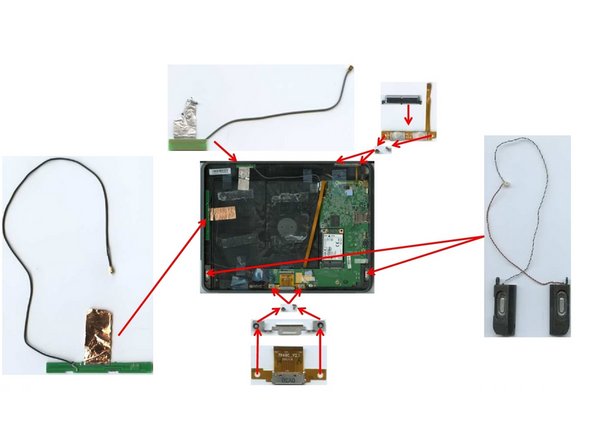
Loosen the five one-sided tapes on the mainboard and detach the connectors for volume control, the speakers and the ribbon cable. Also remove the vibration alert unit.
-
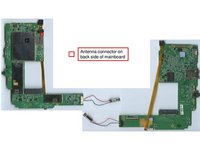
Loosen the six screws (#00) that hold down the mainboard. Remove the mainboard from the device. NOTE: antenna cable needs to be disconnected before removal is possible.
-
-
-
In order to remove the speakers, the adhesives above the speaker cable need to be removed. The speakers can then be remove using a lever tool.
-
Both the socket for the charging slot and the volume control buttons are fastened with two screws (#0) each.
-
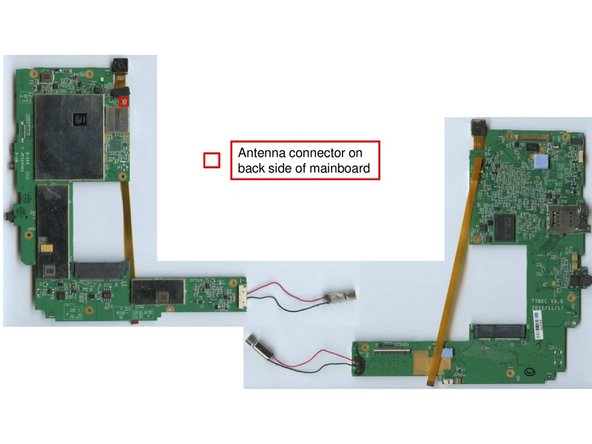
Above the antenna cable there are some silver and copper foil adhesives that need to be loosened before removing the antenna cables.
-
-
-
The ribbon cable is attached to the device via a small double-sided adhesive patch. Can be removed easily.
-
In order to remove the front glass from the display unit, brutal force must be used. It is likely that neither glass nor display board will be intact afterwards.
-
The display board can later be removed after cutting the plastic hull und prying it off the glass.
-