
Canon PowerShot SD450 Flash Bulb

What you need

  1. Canon PowerShot SD450 Flash Bulb, Canon PowerShot SD450 Flash Bulb: step 1, image 1 of 1
    • Remove the battery and SD Card from their slots. Leaving these in could cause the battery to ground and ruin the electronics.

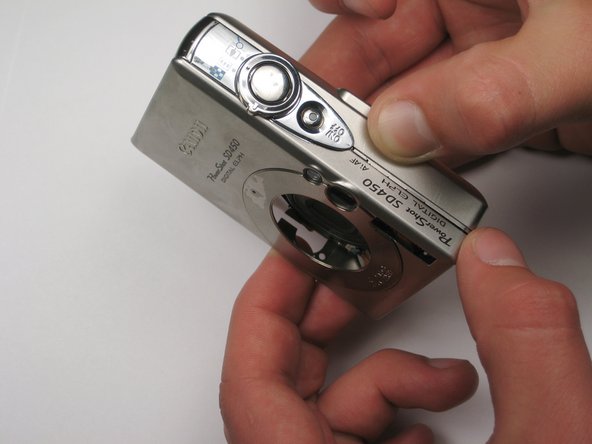
    • Unscrew the six screws on the casing. Two are on the bottom as pictured; two more are on each side of the camera.

    Add Comment

  2. Canon PowerShot SD450 Flash Bulb: step 2, image 1 of 1
    • Pull the lanyard mount off of the camera using a spudger or your fingers.

    Add Comment

  3. Canon PowerShot SD450 Flash Bulb: step 3, image 1 of 2 Canon PowerShot SD450 Flash Bulb: step 3, image 2 of 2
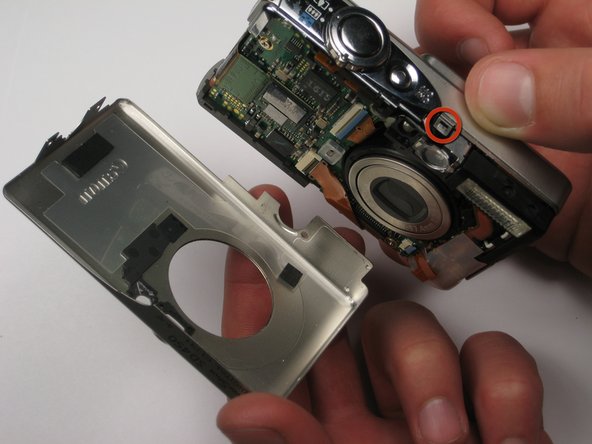
    • Find the line that separates the casing into its two halves. Hold each half seperately, and gently pull apart.

    • Note that there is a small metal clip holding the two halves together. It might help to press down on the back half (indicated) while pulling upward slightly on the front half.

    Add Comment

  4. Canon PowerShot SD450 Flash Bulb: step 4, image 1 of 1
    • Take hold of the inside of the camera, and gently pull away from the back casing.

    Add Comment

  5. Canon PowerShot SD450 Flash Bulb: step 5, image 1 of 1
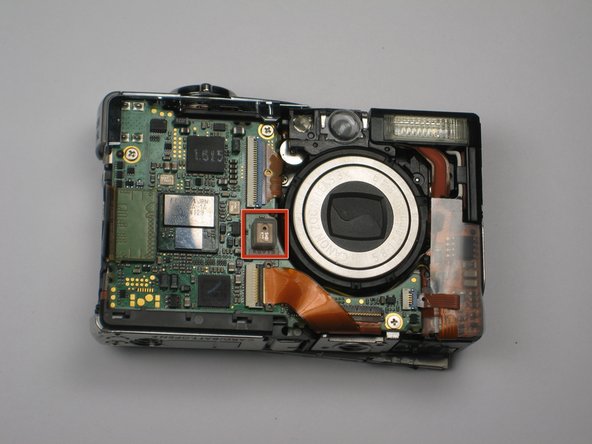
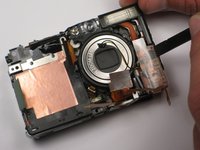
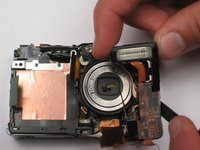
    • Remove the square, clear, rubber protector from the front of the logic board. This is not necessary to remove, but can easily fall off and get lost during later steps.

    Add Comment

  6. Canon PowerShot SD450 Flash Bulb: step 6, image 1 of 1
    • When you reassemble the camera, make sure the switch on the casing (pictured left) matches the position of the switch on the camera internals.

    • The black viewfinder padding (pictured right) can easily fall off the casing. Make sure you don't lose it when moving around parts.

    Add Comment

  7. Canon PowerShot SD450 Flash Bulb: step 7, image 1 of 1
    • Remove the LCD cable by gently prying the hinge open with a spudger or your finger. The cable should easily slide out.

    Add Comment

  8. Canon PowerShot SD450 Flash Bulb: step 8, image 1 of 1
    • Lift up the metallic-colored clip with the spudger to remove the shutter panel.

    Add Comment

  9. Canon PowerShot SD450 Flash Bulb: step 9, image 1 of 1
    • Remove the shutter panel with the spudger, now that the clip is released.

    Add Comment

  10. Canon PowerShot SD450 Flash Bulb: step 10, image 1 of 1
    • Use the spudger or your finger to release the orange ribbon from the logic board.

    Add Comment

  11. Canon PowerShot SD450 Flash Bulb: step 11, image 1 of 1
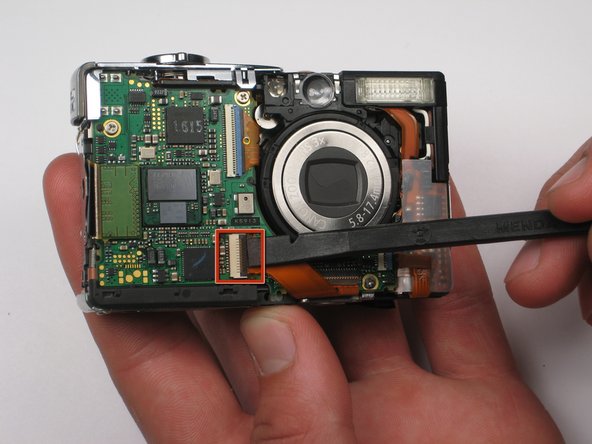
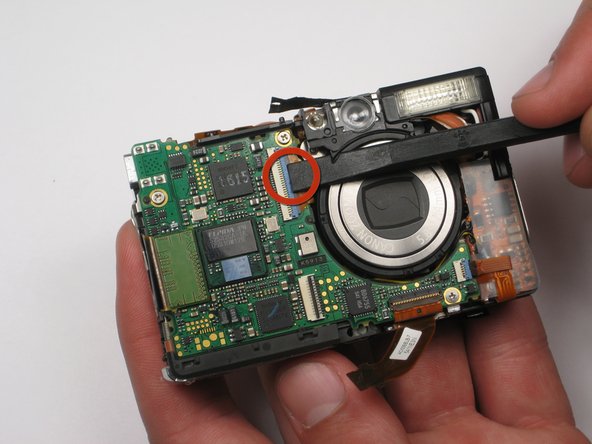
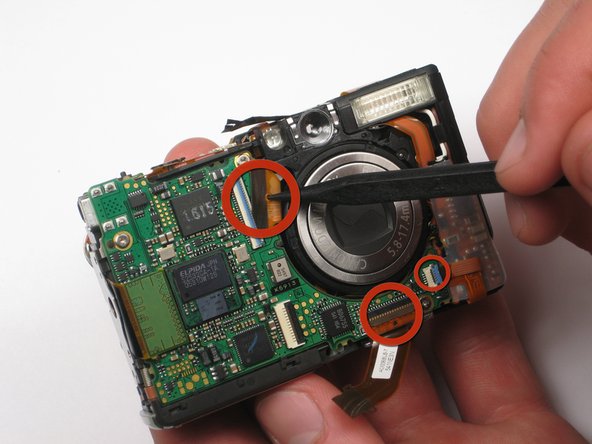
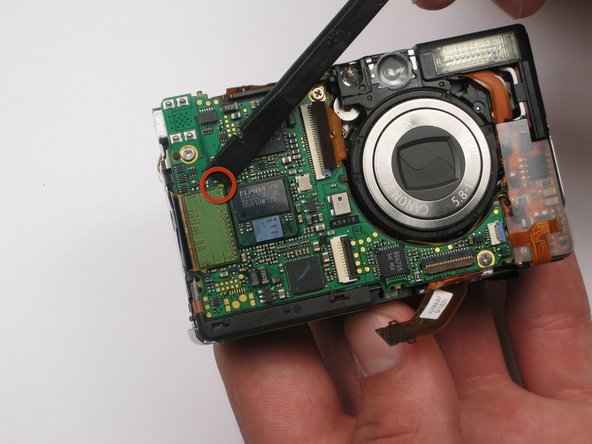
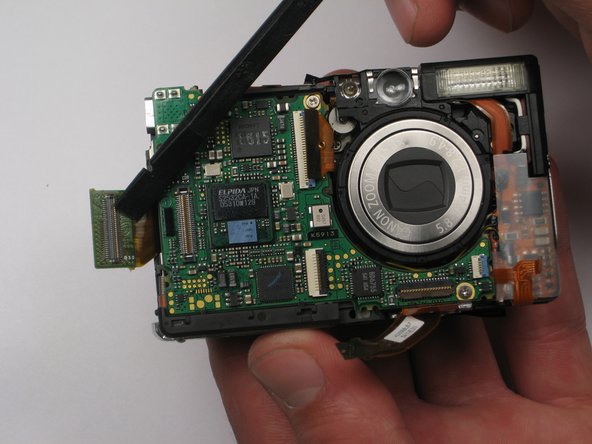
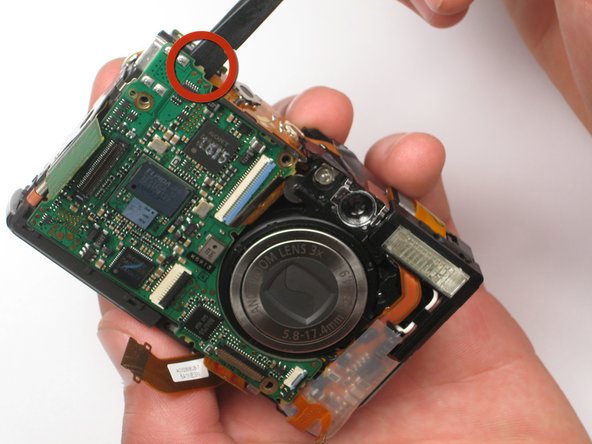
    • Pull the ribbon out of the socket using the spudger or your finger.

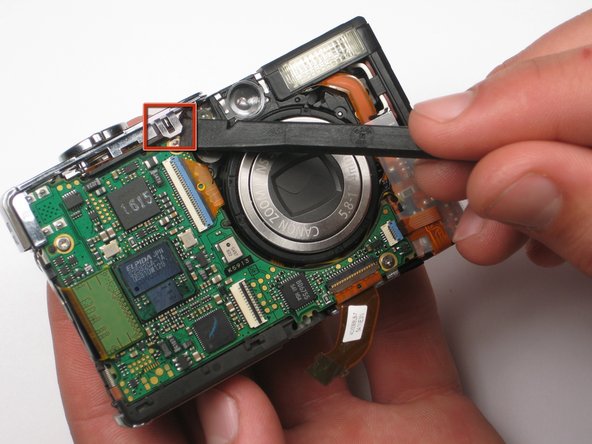
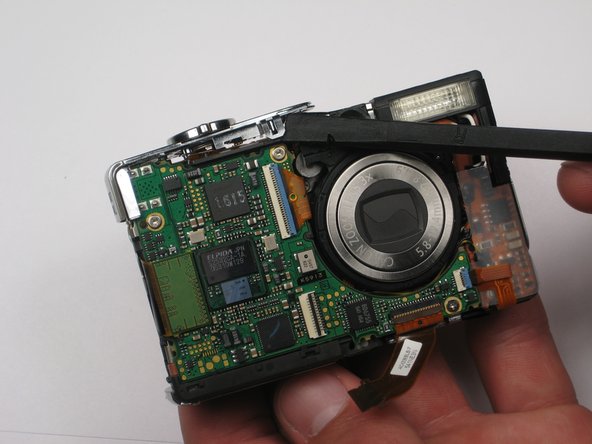
    • Disconnect the two other ribbons from the logic board in the same fashion.

    Add Comment

  12. Canon PowerShot SD450 Flash Bulb: step 12, image 1 of 1
    • Lift up the large green flap by using the spudger to pry up top right yellow edge.

    Add Comment

  13. Canon PowerShot SD450 Flash Bulb: step 13, image 1 of 1
    • Pull the flap back with the spudger so that the logic board is exposed.

    Add Comment

  14. Canon PowerShot SD450 Flash Bulb: step 14, image 1 of 1
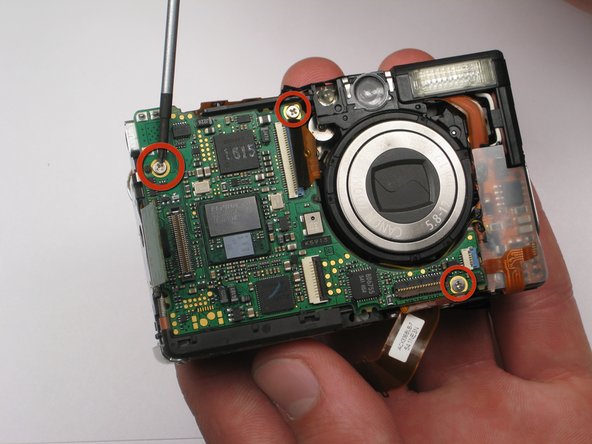
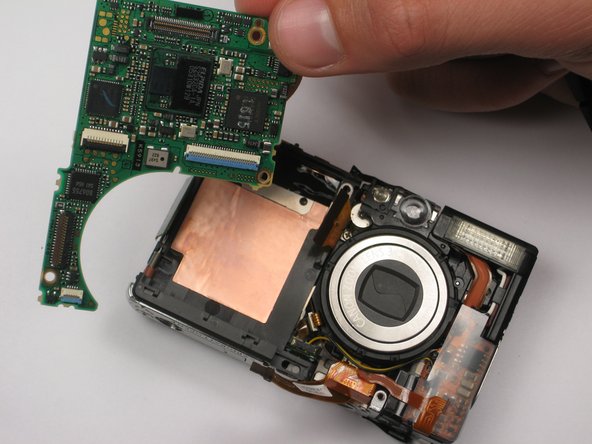
    • Use the screwdriver to remove the three screws on the logic board. Take note that the bottom right screw is shorter than the other two.

    Add Comment

  15. Canon PowerShot SD450 Flash Bulb: step 15, image 1 of 1
    • Use the spudger to carefully remove the logic board from behind.

    Add Comment

  16. Canon PowerShot SD450 Flash Bulb: step 16, image 1 of 1
    • Remove the detached logic board from the camera.

    Add Comment

  17. Canon PowerShot SD450 Flash Bulb: step 17, image 1 of 1
    • Remove the side screw holding the flash bulb.

    Add Comment

  18. Canon PowerShot SD450 Flash Bulb: step 18, image 1 of 1
    • Remove the orange ribbon from below the lens.

    Add Comment

  19. Canon PowerShot SD450 Flash Bulb: step 19, image 1 of 1
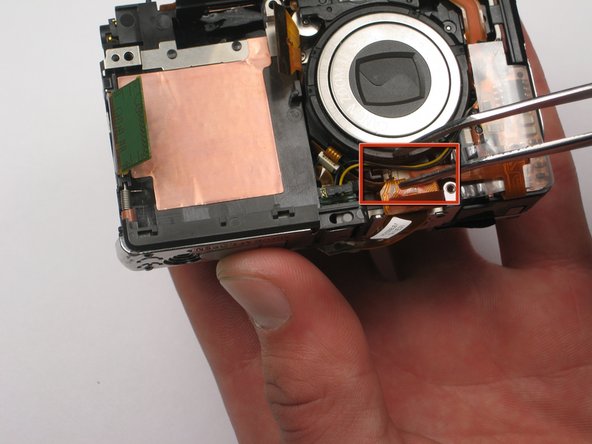
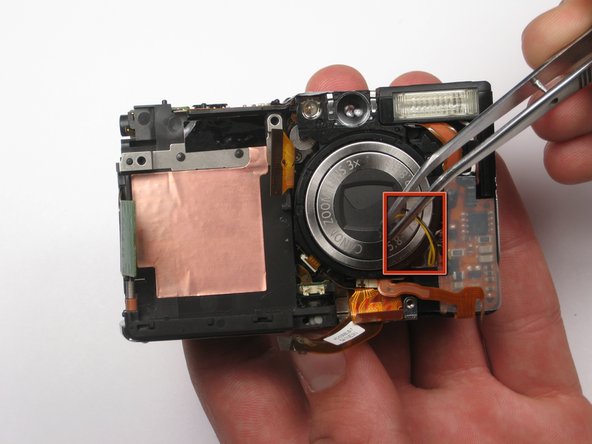
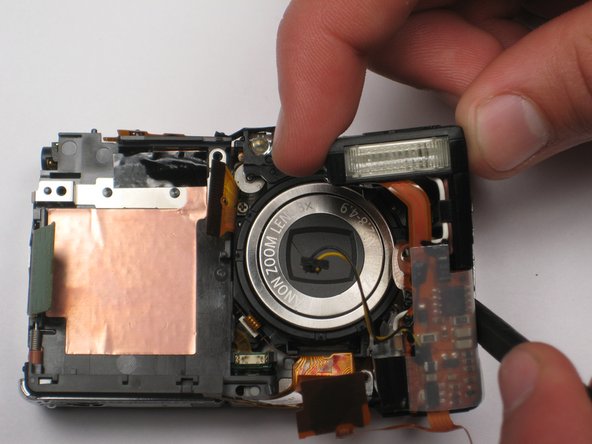
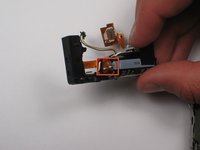
    • Grasp the plug that yellow and black wires are attached to, and gently remove. Tweezers are very helpful here.

    Add Comment

  20. Canon PowerShot SD450 Flash Bulb: step 20, image 1 of 3 Canon PowerShot SD450 Flash Bulb: step 20, image 2 of 3 Canon PowerShot SD450 Flash Bulb: step 20, image 3 of 3
    • Note that there is a capacitor in the flash bulb assembly, under the small circuit board. Do not touch the two metal terminals, as the capacitor may discharge. Damage and personal injury may result.

    • Use the spudger to carefully lift the flash bulb out.

    Add Comment

Conclusion

To reassemble your device, follow these instructions in reverse order.

Cancel: I did not complete this guide.

System

Member since: 09/24/09

2,562 Guides authored

0 Guide Comments

Add Comment

View Statistics:

Past 24 Hours: 0

Past 7 Days: 0

Past 30 Days: 4

All Time: 42