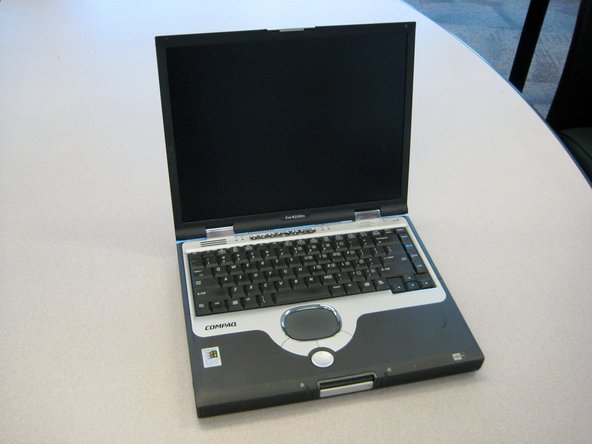
Compaq Evo N1000v Fan Replacement

What you need

    1. Compaq Evo N1000v Fan Replacement, Compaq Evo N1000v Fan Replacement: step 1, image 1 of 1
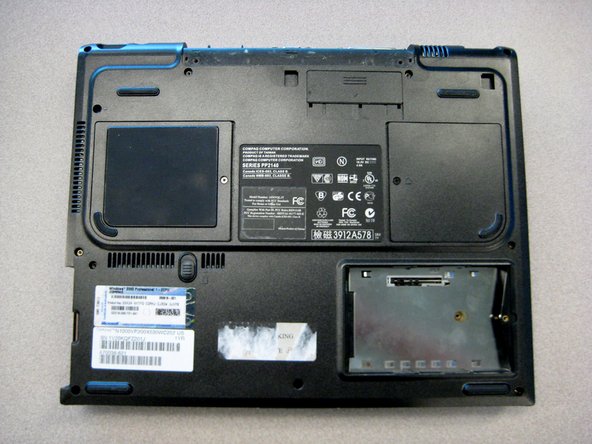
      • Turn the laptop bottom side up with the rear panel facing forward.

      Add Comment

    2. Compaq Evo N1000v Fan Replacement: step 2, image 1 of 1
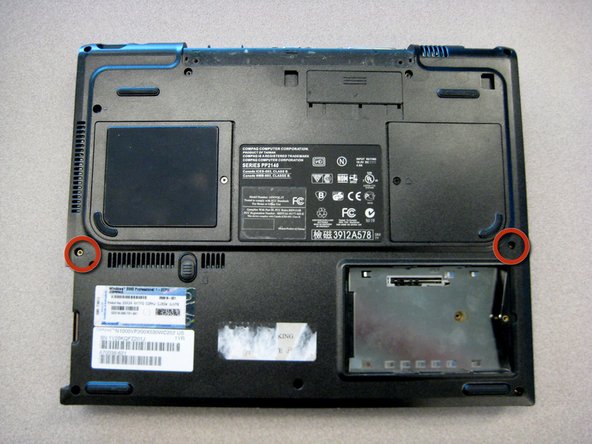
      • Remove the two T8 Torx screws that secure the LED cover to the base enclosure.

      Add Comment

    3. Compaq Evo N1000v Fan Replacement: step 3, image 1 of 1
      • Turn the laptop top side up with the front facing forward. Open the screen.

      Add Comment

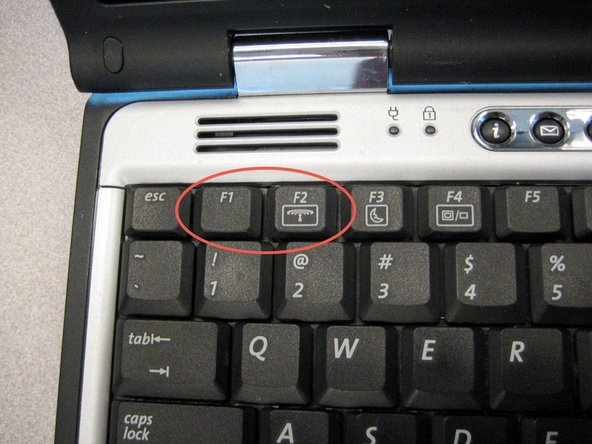
    4. Compaq Evo N1000v Fan Replacement: step 4, image 1 of 1
      • Locate the F1 and F2 keys near the top left corner of the keyboard.

      Add Comment

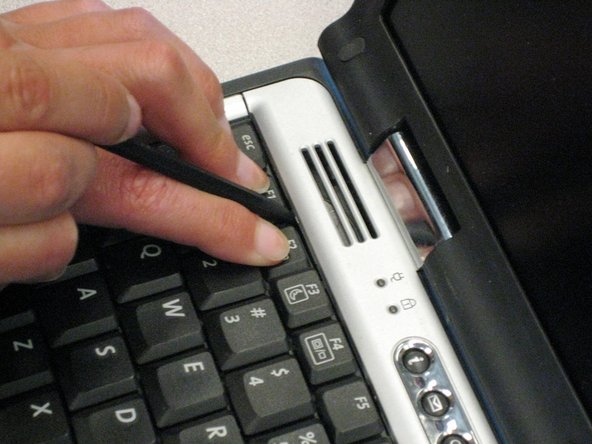
    5. Compaq Evo N1000v Fan Replacement: step 5, image 1 of 1
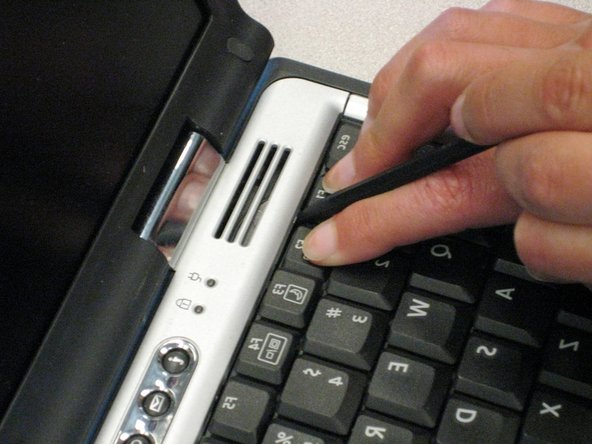
      • While holding the F1 and F2 keys, insert a spudger between the keys into the notch in the LED cover. Lift up.

      Add Comment

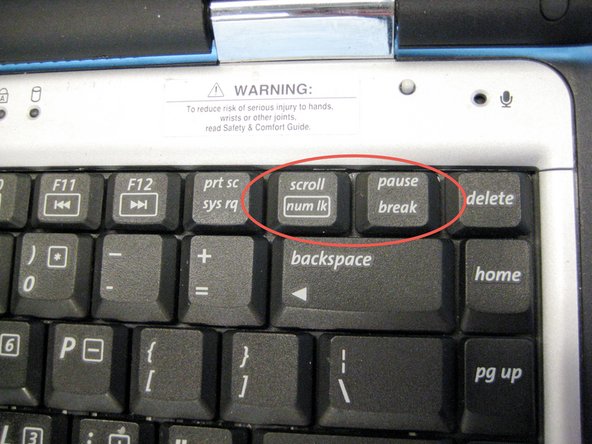
    6. Compaq Evo N1000v Fan Replacement: step 6, image 1 of 1
      • Locate the Pause and Scroll keys near the top right corner of the keyboard.

      Add Comment

    7. Compaq Evo N1000v Fan Replacement: step 7, image 1 of 1
      • While holding the Pause and Scroll keys, insert a spudger between the keys into the notch in the LED cover. Lift up.

      Add Comment

    8. Compaq Evo N1000v Fan Replacement: step 8, image 1 of 2 Compaq Evo N1000v Fan Replacement: step 8, image 2 of 2
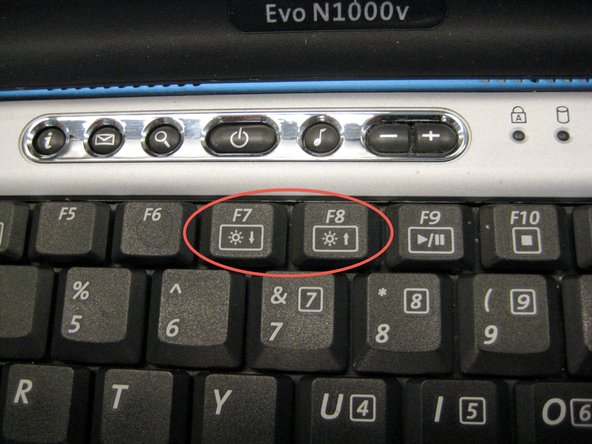
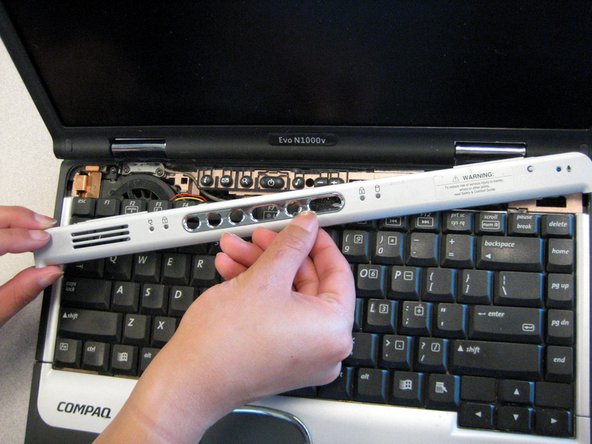
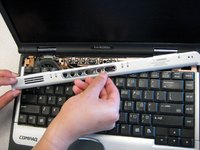
      • Insert a spudger between the F7 and F8 keys. Lift up to remove the LED cover.

      Add Comment

    9. Compaq Evo N1000v Fan Replacement: step 9, image 1 of 1
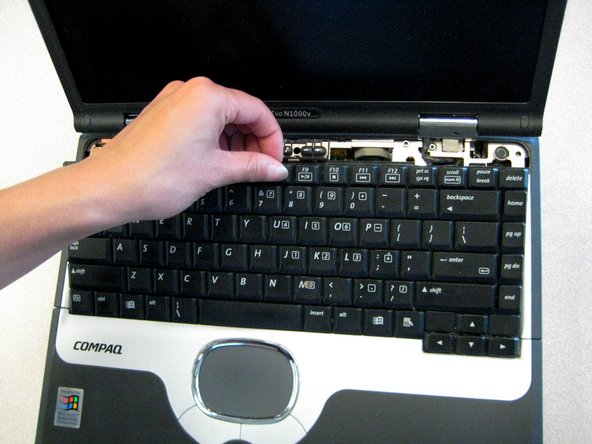
      • Lift the back edge of the keyboard and pull towards the screen.

      Add Comment

    10. Compaq Evo N1000v Fan Replacement: step 10, image 1 of 1
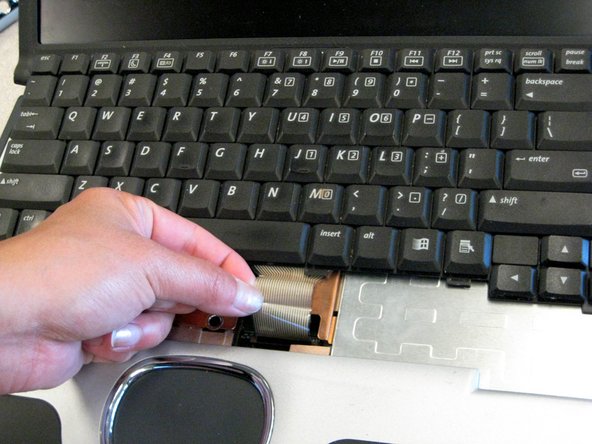
      • Pull the cable and lift up to release.

      Add Comment

    11. Compaq Evo N1000v Fan Replacement: step 11, image 1 of 1
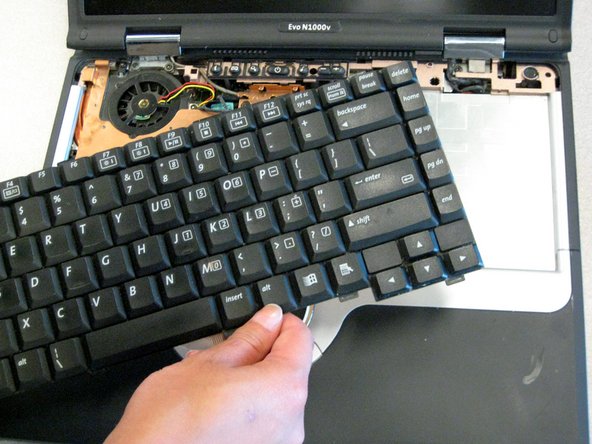
      • Remove the keyboard.

      Add Comment

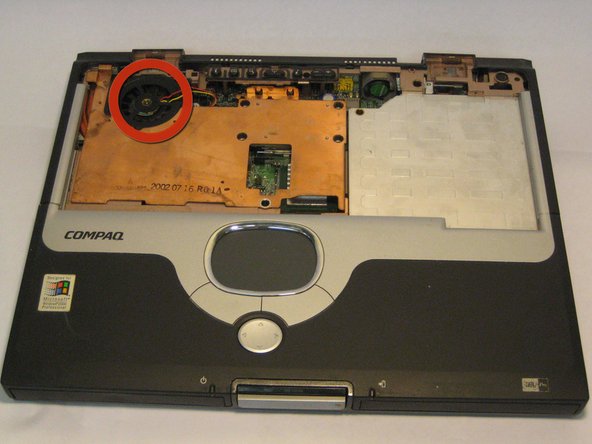
    12. Compaq Evo N1000v Fan Replacement: step 12, image 1 of 1
      • Locate the fan near the top left corner. It has three colored wires: yellow, red, and black.

      • Disconnect the cable connecting the fan to the system board.

      Add Comment

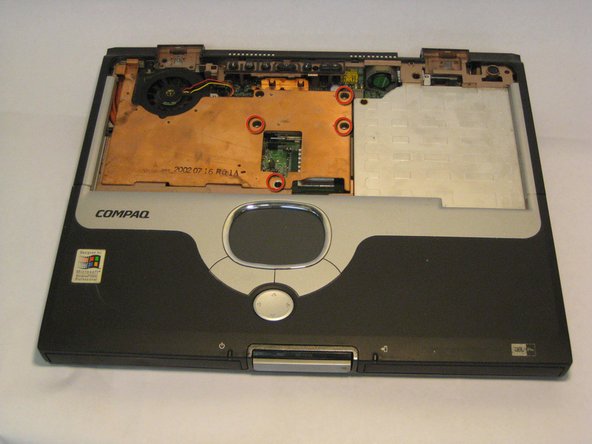
    13. Compaq Evo N1000v Fan Replacement: step 13, image 1 of 1
      • Locate and remove the four screws in the copper plate.

      Add Comment

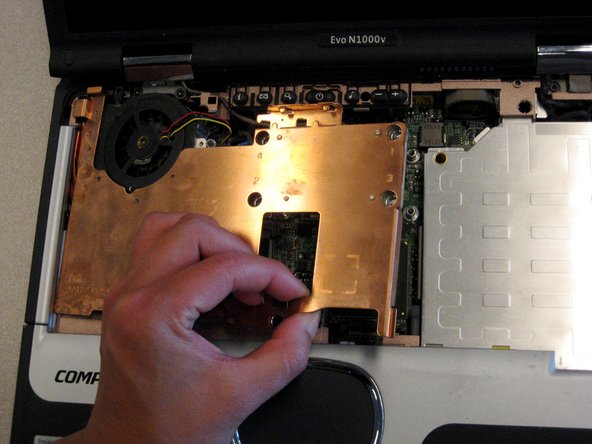
    14. Compaq Evo N1000v Fan Replacement: step 14, image 1 of 1
      • Remove the heat spreader by pulling the whole assembly up out of the computer.

      Add Comment

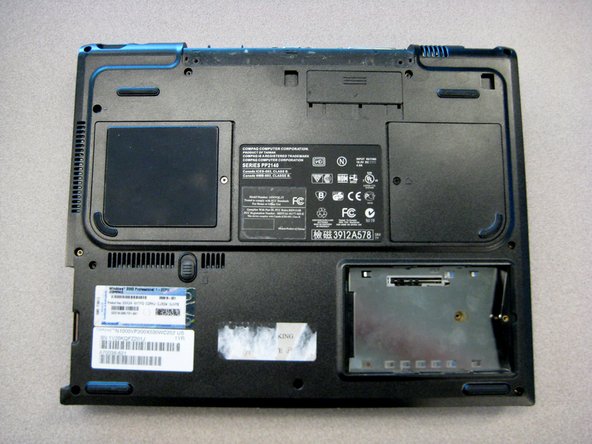
    15. Compaq Evo N1000v Fan Replacement: step 15, image 1 of 1
      • Flip the computer bottom side up with the rear facing forward.

      Add Comment

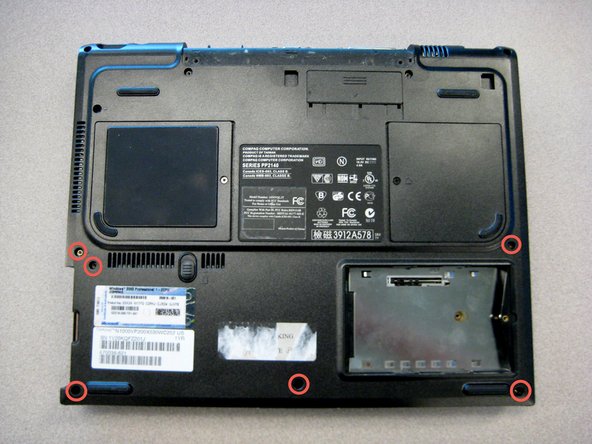
    16. Compaq Evo N1000v Fan Replacement: step 16, image 1 of 1
      • Remove the six screws shown in picture.

      Add Comment

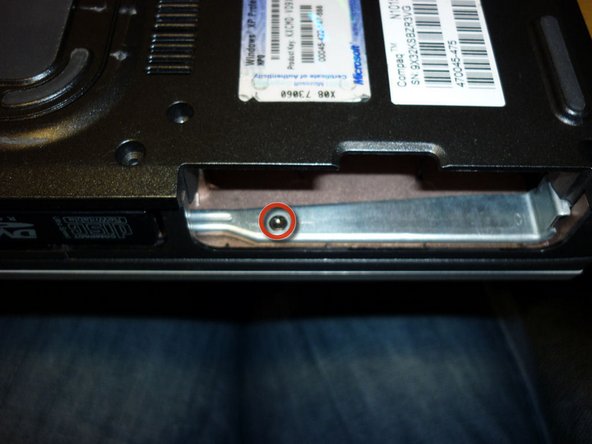
    17. Compaq Evo N1000v Fan Replacement: step 17, image 1 of 1
      • Remove battery and then remove screw in metal support on case edge

      • Flip the computer top side up with the front facing you.

      Add Comment

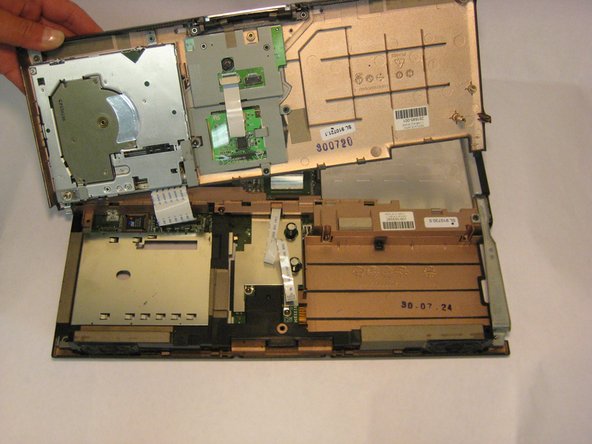
    18. Compaq Evo N1000v Fan Replacement: step 18, image 1 of 1
      • Lift up the palm rest from the front edge and swing it towards the screen.

      Add Comment

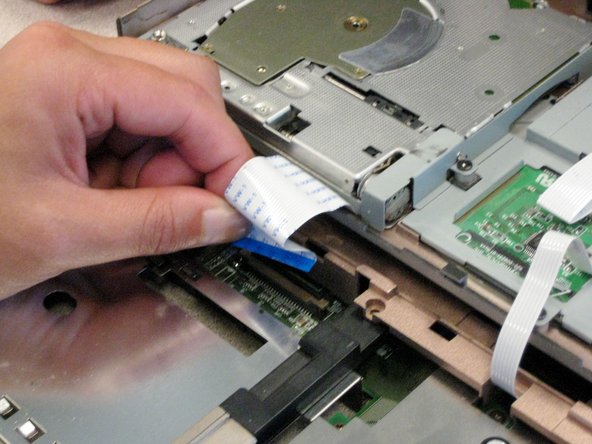
    19. Compaq Evo N1000v Fan Replacement: step 19, image 1 of 1
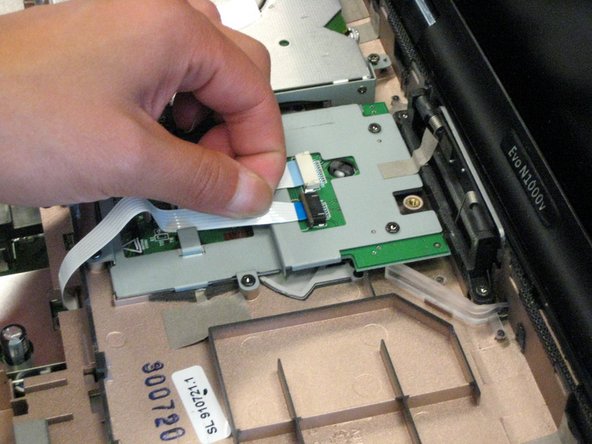
      • Locate the first connector. Disconnect by firmly pulling up.

      Add Comment

    20. Compaq Evo N1000v Fan Replacement: step 20, image 1 of 1
      • Locate the second connector. Remove by firmly pulling up.

      Add Comment

    21. Compaq Evo N1000v Fan Replacement: step 21, image 1 of 1
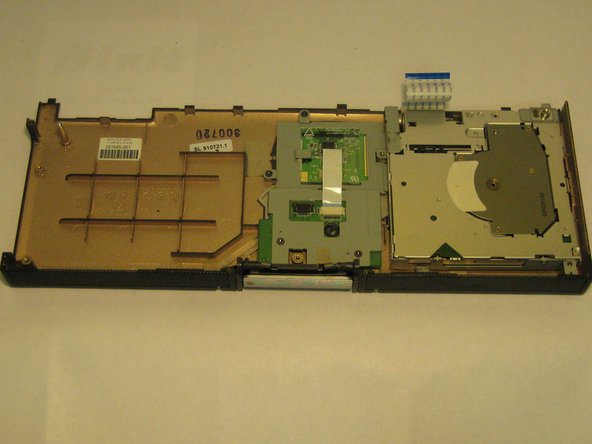
      • Remove the palm rest.

      Add Comment

    22. Compaq Evo N1000v Fan Replacement: step 22, image 1 of 1
      • Turn the base bottom side up.

      Add Comment

    23. Compaq Evo N1000v Fan Replacement: step 23, image 1 of 1
      • Remove the two TM 2.5mm x 8.0mm screws that secure the top cover to the base.

      Add Comment

    24. Compaq Evo N1000v Fan Replacement: step 24, image 1 of 1
      • Turn the base top side up with the front facing forward.

      Add Comment

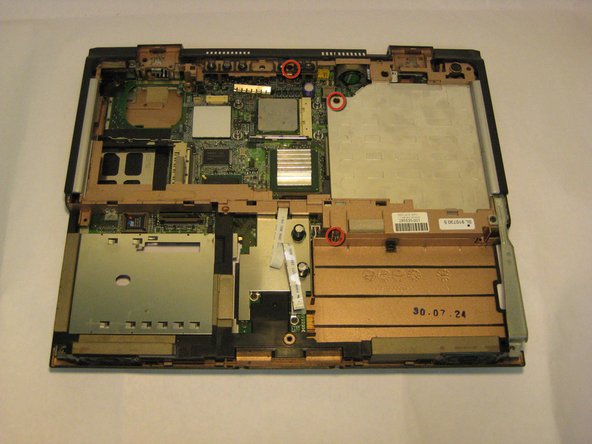
    25. Compaq Evo N1000v Fan Replacement: step 25, image 1 of 1
      • Remove the three TM 2.5 mm x 5.0 mm screws that secure the top cover to the base.

      Add Comment

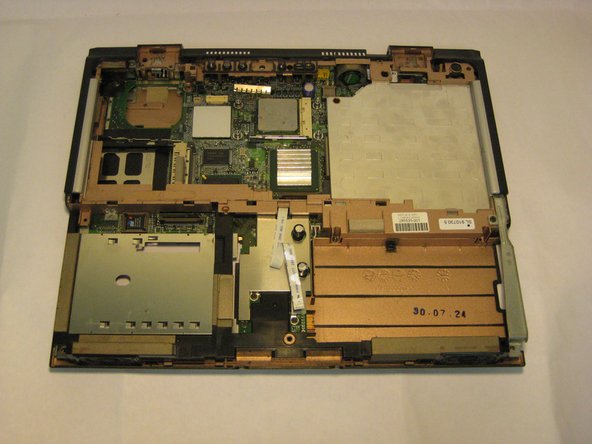
    26. Compaq Evo N1000v Fan Replacement: step 26, image 1 of 1
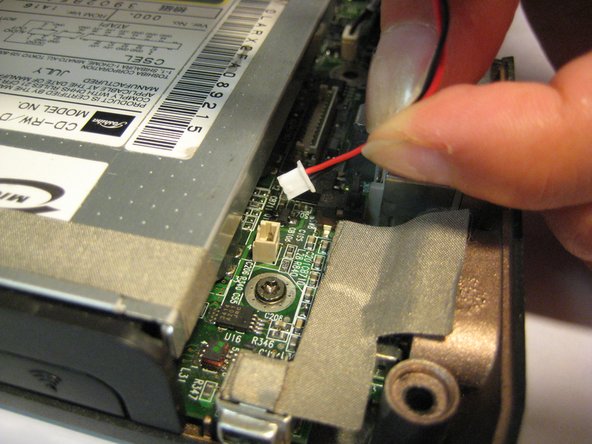
      • Lift the top cover straight up about one inch, then slide forward until the microphone cable is exposed.

      • Disconnect the microphone cable from the system board.

      Add Comment

    27. Compaq Evo N1000v Fan Replacement: step 27, image 1 of 1
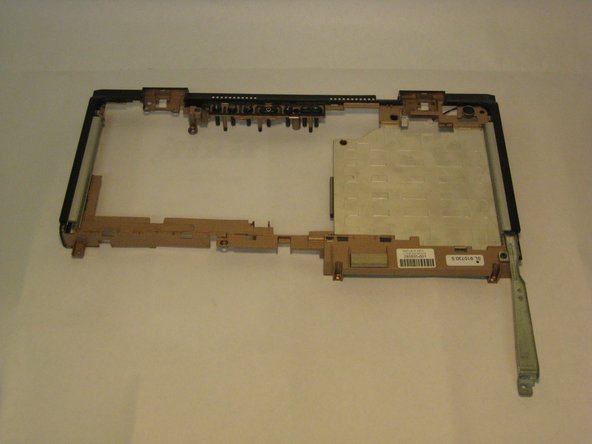
      • Remove the top cover from the base.

      Add Comment

    28. Compaq Evo N1000v Fan Replacement: step 28, image 1 of 1
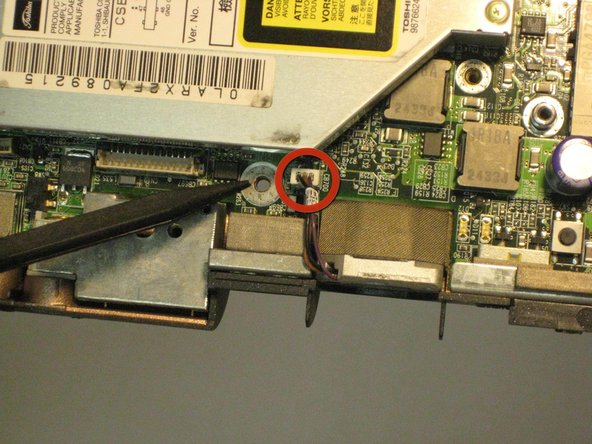
      • Disconnect the fan cable from the system board.

      Add Comment

    29. Compaq Evo N1000v Fan Replacement: step 29, image 1 of 1
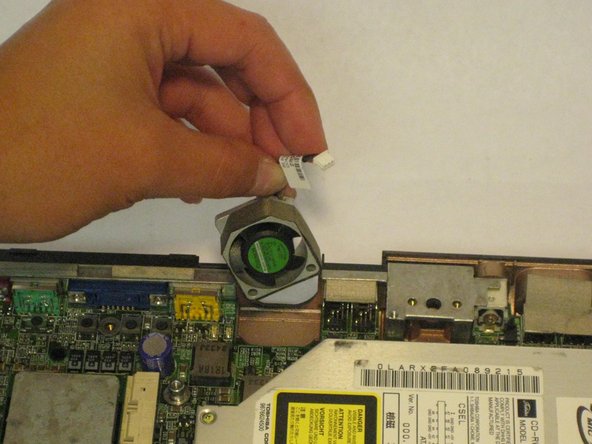
      • Remove the fan from the base.

      Add Comment

Conclusion

To reassemble your device, follow these instructions in reverse order.

Cancel: I did not complete this guide.

System

Member since: 09/24/09

2,562 Guides authored

0 Guide Comments

Add Comment

View Statistics:

Past 24 Hours: 0

Past 7 Days: 0

Past 30 Days: 0

All Time: 16