/

Dell Inspiron 8600 Upper Case Replacement

What you need

  1. Dell Inspiron 8600 Upper Case Replacement, Dell Inspiron 8600 Upper Case Replacement: step 1, image 1 of 1
    • Remove the battery from the bottom of the laptop.

    • Please click on the following link for further instruction on how to remove the battery. [invalid guide link]

    • It is important to remove the battery so that you will not be electrocuted while working with the computer's hardware.

  2. Dell Inspiron 8600 Upper Case Replacement: step 2, image 1 of 3 Dell Inspiron 8600 Upper Case Replacement: step 2, image 2 of 3 Dell Inspiron 8600 Upper Case Replacement: step 2, image 3 of 3
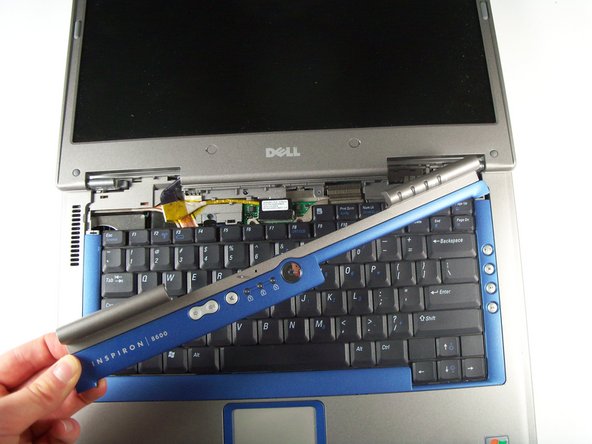
    • Insert a spludger into the notch at the far left side of the top blue panel and pry hinge cover off.

    • Note: You may need to pry the other side off by inserting the spludger between the hinge and the top cover.

    • Be careful of wire attached to underside of the hinge cover.

  3. Dell Inspiron 8600 Upper Case Replacement: step 3, image 1 of 1
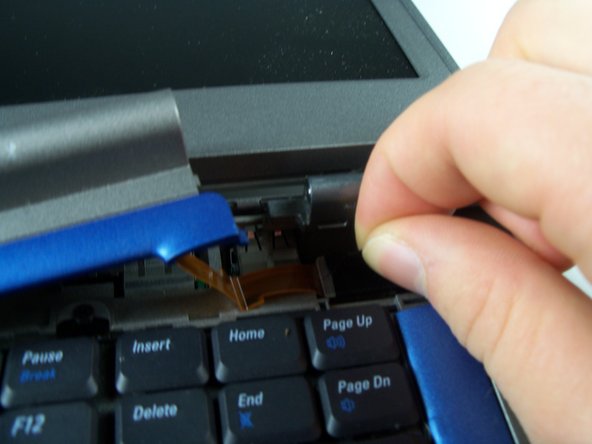
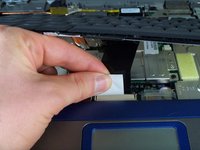
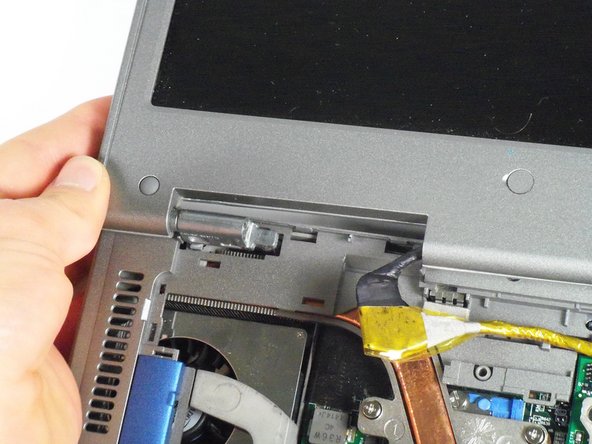
    • Pull the small black tab on the right hand side of the laptop.

    • The hinge cover has now been removed.

  4. Dell Inspiron 8600 Upper Case Replacement: step 4, image 1 of 3 Dell Inspiron 8600 Upper Case Replacement: step 4, image 2 of 3 Dell Inspiron 8600 Upper Case Replacement: step 4, image 3 of 3
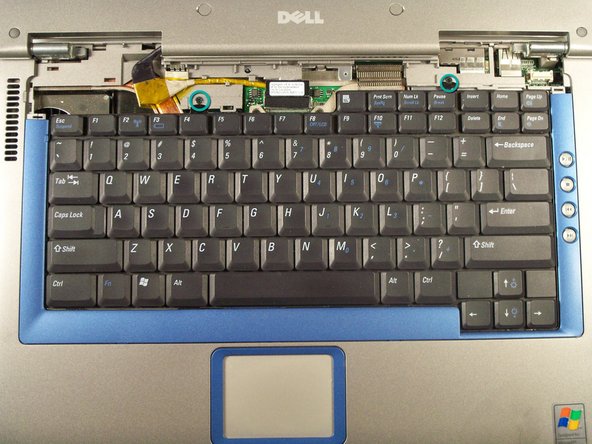
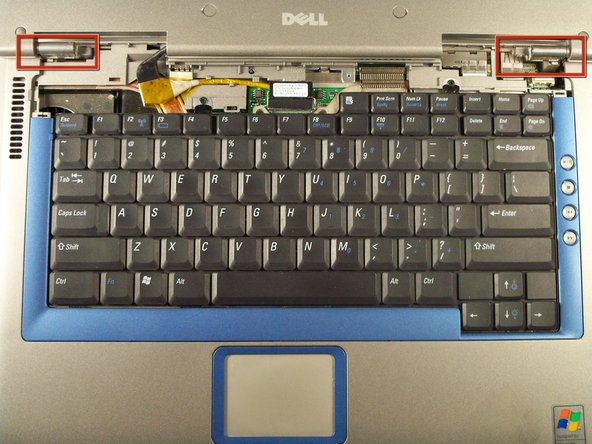
    • Remove the screws at the top of the keyboard as indicated indicated.

    • Do not just lift up, there is a tab underneath the keyboard that is still connected to the mother board.

    • You will need to pull out the white tab underneath the keyboard upwards until it pops out of its socket.

    • The keyboard should be easily removable at this point.

  5. Dell Inspiron 8600 Upper Case Replacement: step 5, image 1 of 2 Dell Inspiron 8600 Upper Case Replacement: step 5, image 2 of 2
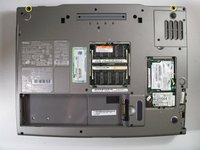
    • Flip the laptop over and remove the indicated screws.

    • Flip the laptop back over.

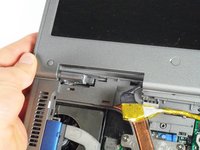
    • Find the two places where the display module is attached to the base of the computer.

  6. Dell Inspiron 8600 Upper Case Replacement: step 6, image 1 of 1
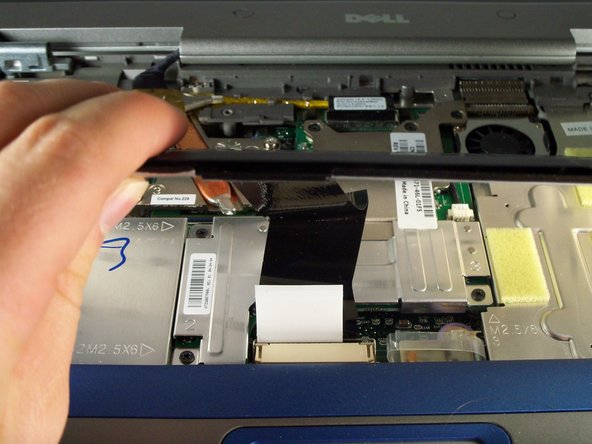
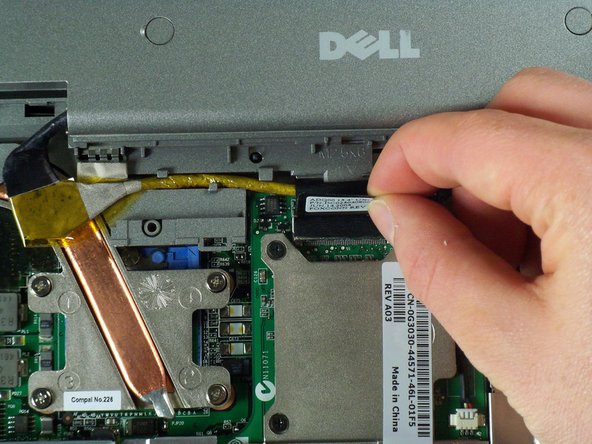
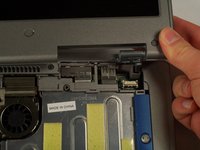
    • Disconnect the video card from the display module by gently lifting upwards on the black tab.

  7. Dell Inspiron 8600 Upper Case Replacement: step 7, image 1 of 2 Dell Inspiron 8600 Upper Case Replacement: step 7, image 2 of 2
    • Lift the display module directly upwards from the base of the computer.

  8. Dell Inspiron 8600 Upper Case Replacement: step 8, image 1 of 1
    • The display module has been removed.

  9. Dell Inspiron 8600 Upper Case Replacement: step 9, image 1 of 2 Dell Inspiron 8600 Upper Case Replacement: step 9, image 2 of 2
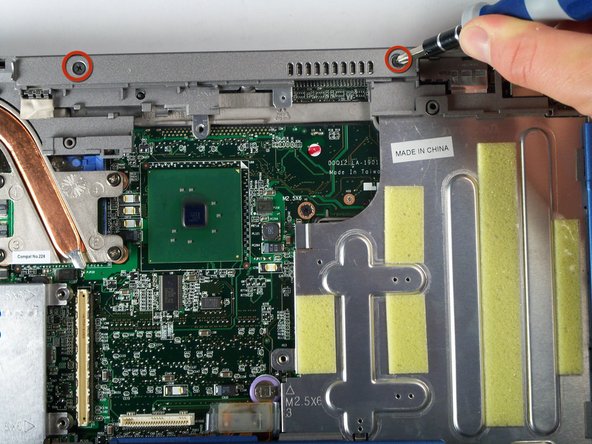
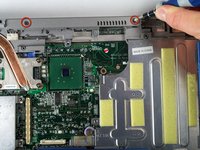
    • Remove the two screws that hold the upper case.

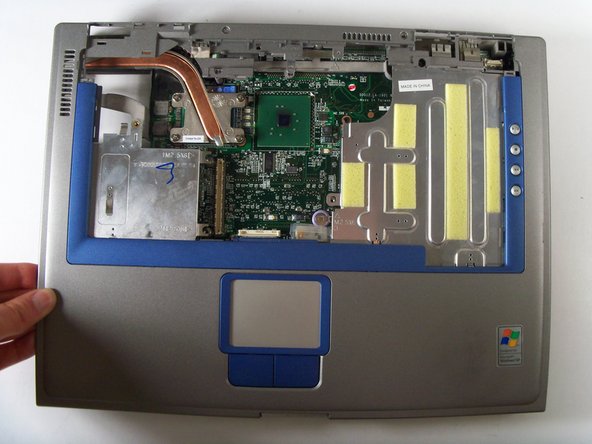
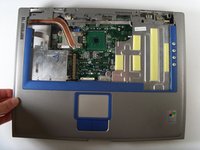
    • You can now pop up the upper case and replace.

Conclusion

To reassemble your device, follow these instructions in reverse order.

System

Member since: 09/24/09

2,562 Guides authored

0 Comments

Add Comment

View Statistics:

Past 24 Hours: 0

Past 7 Days: 0

Past 30 Days: 0

All Time: 7