/

Dell OptiPlex GX260 Optical Drive Replacement

What you need

  1. Dell OptiPlex GX260 Optical Drive Replacement, Dell OptiPlex GX260 Optical Drive Replacement: step 1, image 1 of 2 Dell OptiPlex GX260 Optical Drive Replacement, Dell OptiPlex GX260 Optical Drive Replacement: step 1, image 2 of 2
    • Lay the Dell Optiplex GX260 down on a clean flat surface with the rear towards you.

    • Push the oval shaped buttons located on the top and bottom of the PC simultaneously and lift the case straight up.

    • Note: Some force may be required to push in the oval buttons open the PC case.

  2. Dell OptiPlex GX260 Optical Drive Replacement: step 2, image 1 of 3 Dell OptiPlex GX260 Optical Drive Replacement: step 2, image 2 of 3 Dell OptiPlex GX260 Optical Drive Replacement: step 2, image 3 of 3
    • Identify the optical drive in the case.

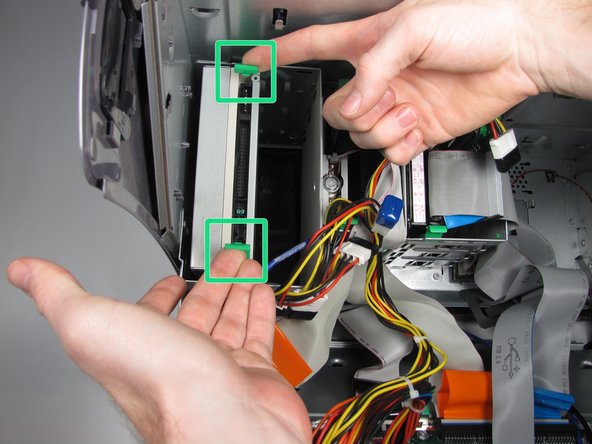
    • Remove the analog audio cable from the optical drive.

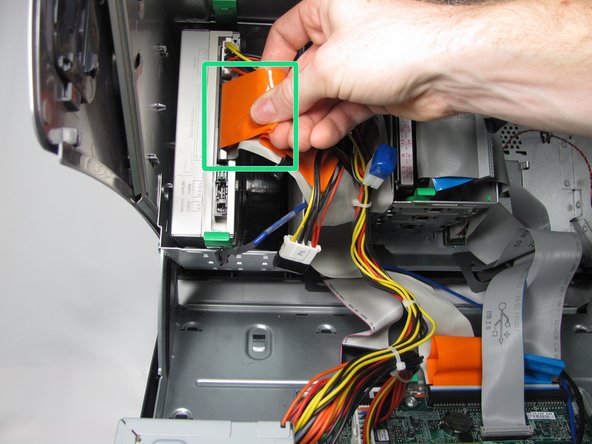
    • Remove the IDE cable form the optical drive by pulling straight up on the orange plastic tab..

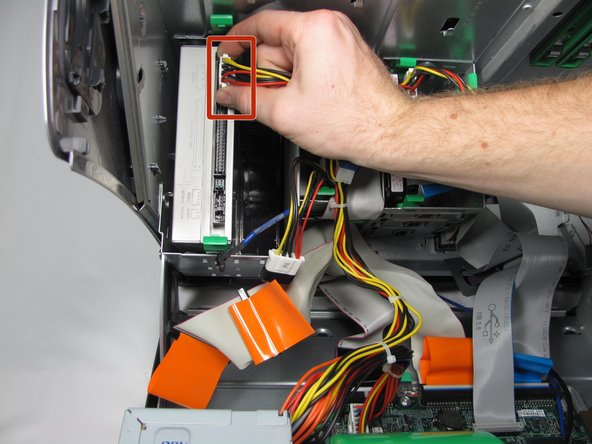
    • Remove the power cable from the optical drive.

  3. Dell OptiPlex GX260 Optical Drive Replacement: step 3, image 1 of 1
    • Push the two green tabs toward each other to release the optical drive and lift it out.

Conclusion

To reassemble your device, follow these instructions in reverse order.

System

Member since: 09/24/09

2,562 Guides authored

0 Comments

Add Comment

View Statistics:

Past 24 Hours: 0

Past 7 Days: 0

Past 30 Days: 0

All Time: 2