
Disassembling Canon PowerShot SD1100 IS LCD screen

What you need

  1. Disassembling Canon PowerShot SD1100 IS LCD screen, Disassembling Canon PowerShot SD1100 IS LCD screen: step 1, image 1 of 2 Disassembling Canon PowerShot SD1100 IS LCD screen, Disassembling Canon PowerShot SD1100 IS LCD screen: step 1, image 2 of 2
    • Remove wrist strap and battery.

  2. Disassembling Canon PowerShot SD1100 IS LCD screen: step 2, image 1 of 3 Disassembling Canon PowerShot SD1100 IS LCD screen: step 2, image 2 of 3 Disassembling Canon PowerShot SD1100 IS LCD screen: step 2, image 3 of 3
    • Remove 2 screws from each side of the camera (4 total, 0.102 in).

    • Remove 2 screws from the bottom on the camera (0.138 in).

    • Do not mix the 4 side screws with the 2 bottoms ones; they are different sizes.

  3. Disassembling Canon PowerShot SD1100 IS LCD screen: step 3, image 1 of 3 Disassembling Canon PowerShot SD1100 IS LCD screen: step 3, image 2 of 3 Disassembling Canon PowerShot SD1100 IS LCD screen: step 3, image 3 of 3
    • Gently pull off the front cover.

    • The plate on the side should come off.

    • Gently pull off the back cover.

  4. Disassembling Canon PowerShot SD1100 IS LCD screen: step 4, image 1 of 1
    • The cases should now be removed.

  5. Disassembling Canon PowerShot SD1100 IS LCD screen: step 5, image 1 of 2 Disassembling Canon PowerShot SD1100 IS LCD screen: step 5, image 2 of 2
    • Remove the top-left screw above the LCD screen (0.100 in).

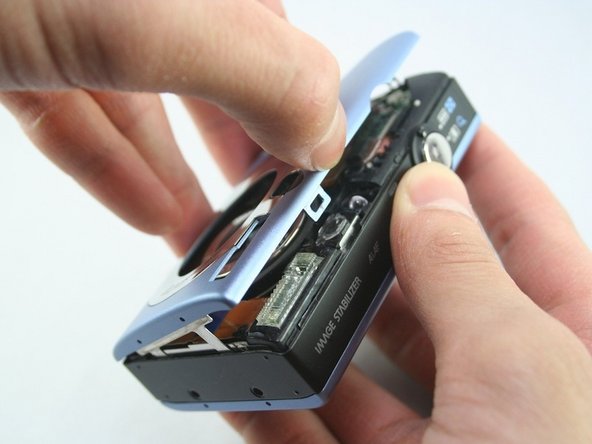
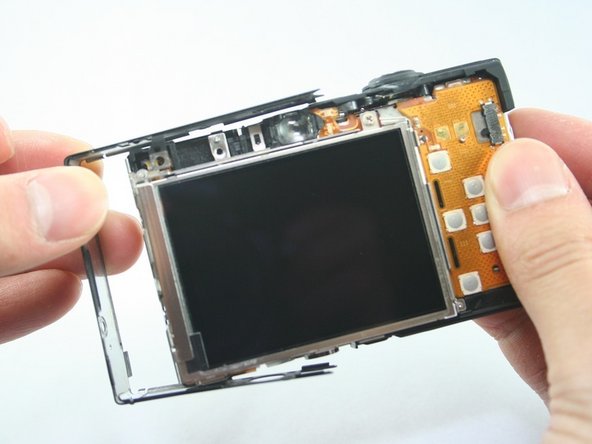
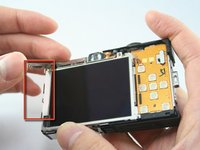
    • Remove the C-shaped plate from the side of the LCD screen.

  6. Disassembling Canon PowerShot SD1100 IS LCD screen: step 6, image 1 of 2 Disassembling Canon PowerShot SD1100 IS LCD screen: step 6, image 2 of 2
    • Remove the screw from the top-right of the LCD screen (0.098 in).

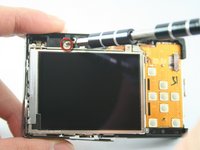
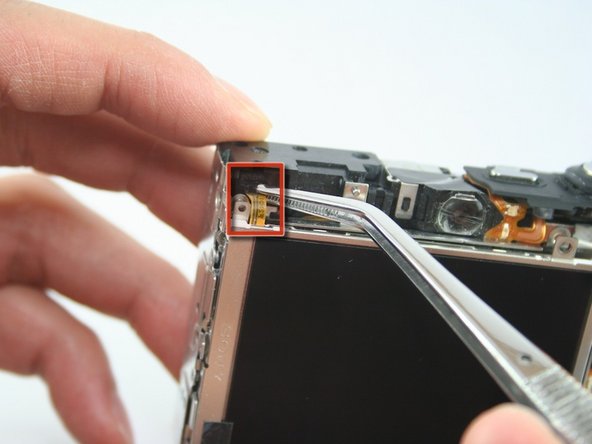
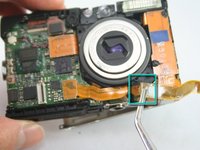
    • Remove the L-shaped bar from the right of the LCD screen.

  7. Disassembling Canon PowerShot SD1100 IS LCD screen: step 7, image 1 of 2 Disassembling Canon PowerShot SD1100 IS LCD screen: step 7, image 2 of 2
    • Use the spudger to remove the L-shaped bar from the left-side of the LCD screen.

  8. Disassembling Canon PowerShot SD1100 IS LCD screen: step 8, image 1 of 1
    • Use tweezers to remove the connector ribbon from the top-left corner above the LCD screen.

    • Be gentle. This ribbon should stay attached to the screen.

  9. Disassembling Canon PowerShot SD1100 IS LCD screen: step 9, image 1 of 3 Disassembling Canon PowerShot SD1100 IS LCD screen: step 9, image 2 of 3 Disassembling Canon PowerShot SD1100 IS LCD screen: step 9, image 3 of 3
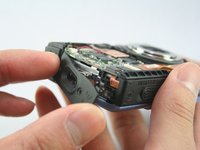
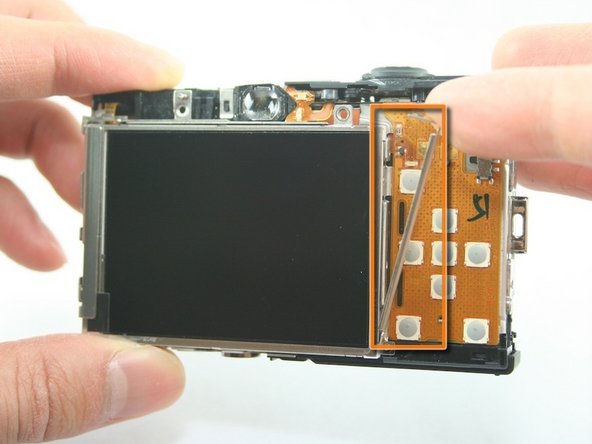
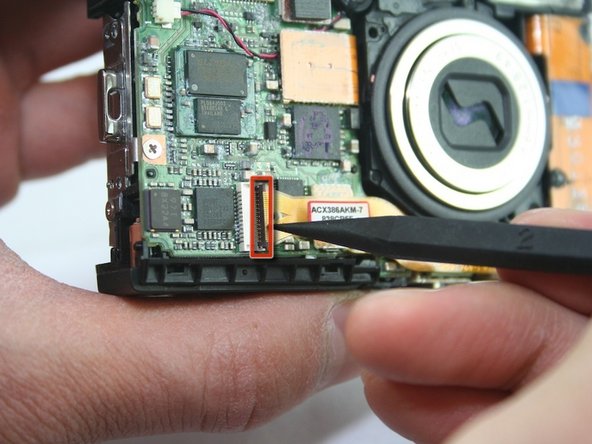
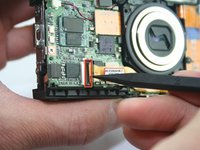
    • Use a spudger to lift the connector lock (black flap) at the end of the larger LCD connector ribbon on the front side of the camera.

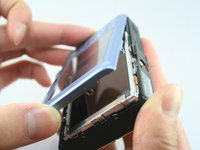
    • Use the tweezers to lift this ribbon.

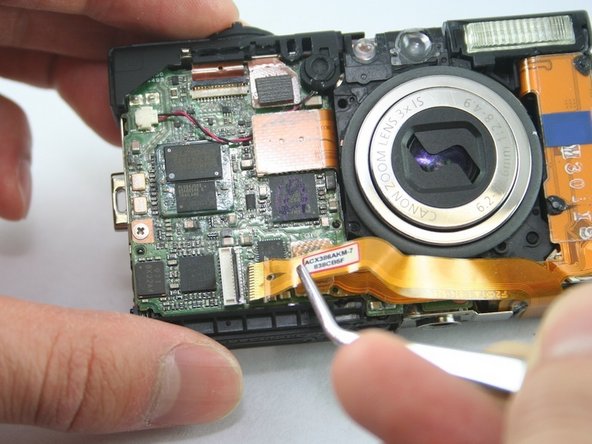
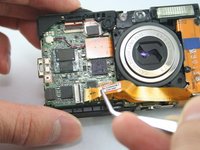
    • Use the tweezers to gently peel this ribbon from the one underneath it.
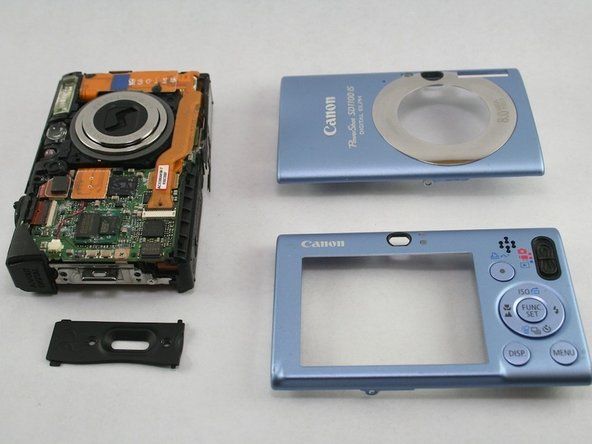
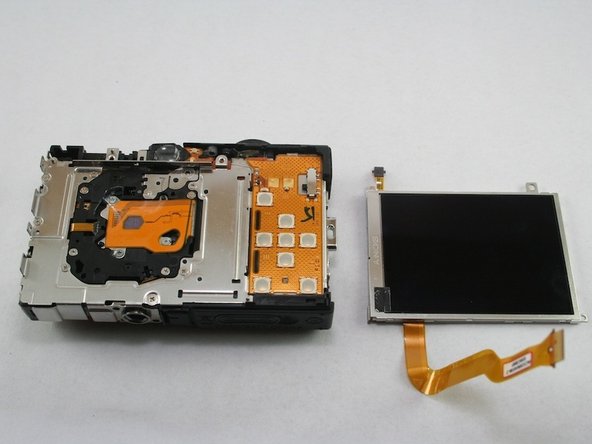
  10. Disassembling Canon PowerShot SD1100 IS LCD screen: step 10, image 1 of 1
    • The LCD screen should now be removed.

Conclusion

To reassemble your device, follow these instructions in reverse order.

System

Member since: 09/24/09

2,562 Guides authored

0 Comments

Add Comment

View Statistics:

Past 24 Hours: 0

Past 7 Days: 0

Past 30 Days: 0

All Time: 1