/

Disassembling Canon Powershot SD880 Menu Button

What you need

  1. Disassembling Canon Powershot SD880 Menu Button, Disassembling Canon Powershot SD880 Menu Button: step 1, image 1 of 3 Disassembling Canon Powershot SD880 Menu Button, Disassembling Canon Powershot SD880 Menu Button: step 1, image 2 of 3 Disassembling Canon Powershot SD880 Menu Button, Disassembling Canon Powershot SD880 Menu Button: step 1, image 3 of 3
    • Remove the 2 screws(2.41mm long) on the side of the camera next to the LCD screen.

    • Remove the 2 screws(4.08mm) on the other side. One is located under the rubber USB flap.

    • Remove the last screw(2.59mm) located on the bottom of the camera.

    • Slowly pull the back cover of the camera.

  2. Disassembling Canon Powershot SD880 Menu Button: step 2, image 1 of 3 Disassembling Canon Powershot SD880 Menu Button: step 2, image 2 of 3 Disassembling Canon Powershot SD880 Menu Button: step 2, image 3 of 3
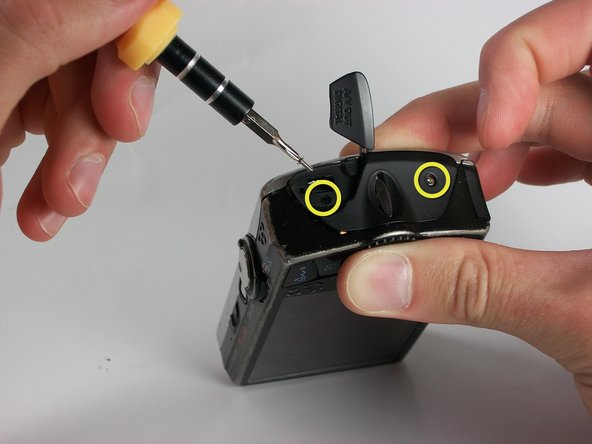
    • Remove 2 screws from back of camera using screwdriver.

    • Remove 2 screws holding metal side guard using screwdriver.

    • Remove the connecting ribbon by pulling it straight out.

Conclusion

To reassemble your device, follow these instructions in reverse order.

System

Member since: 09/24/09

2,562 Guides authored

0 Comments

Add Comment

View Statistics:

Past 24 Hours: 0

Past 7 Days: 0

Past 30 Days: 0

All Time: 1