/

Disassembling IBM ThinkPad T42 Lower Bracket

What you need

  1. Disassembling IBM ThinkPad T42 Lower Bracket, Disassembling IBM ThinkPad T42 Lower Bracket: step 1, image 1 of 1
    • Unscrew the following screws on the underside of the T42.

    • Note: for ease of reassembly, keep track of which screws go where.

  2. Disassembling IBM ThinkPad T42 Lower Bracket: step 2, image 1 of 1
    • Unscrew the 4 screws on either side of the rear end of the laptop.

  3. Disassembling IBM ThinkPad T42 Lower Bracket: step 3, image 1 of 1
    • Flip the laptop over and open the display carefully - the keyboard, palm rest and bezel will be loose.

  4. Disassembling IBM ThinkPad T42 Lower Bracket: step 4, image 1 of 2 Disassembling IBM ThinkPad T42 Lower Bracket: step 4, image 2 of 2
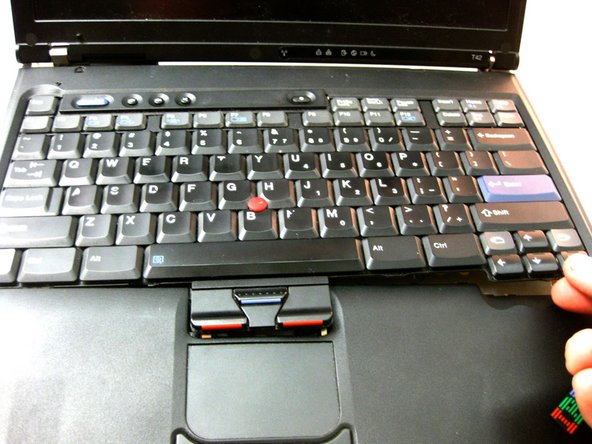
    • Maneuver the palm rest away from the keyboard carefully, both the keyboard and palm rest/trackpad will come off together.

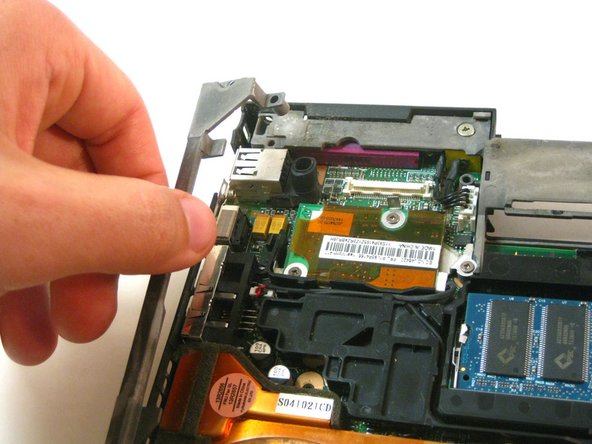
    • **WARNING** Both the keyboard and trackpad have connectors to the motherboard. Disconnect these before completely removing either component.

  5. Disassembling IBM ThinkPad T42 Lower Bracket: step 5, image 1 of 1
    • The bracket will be free to move.

  6. Disassembling IBM ThinkPad T42 Lower Bracket: step 6, image 1 of 1
    • Remove the bracket.

  7. Disassembling IBM ThinkPad T42 Lower Bracket: step 7, image 1 of 1
    • Then remove the small rubber piece covering the microphone.

Conclusion

To reassemble your device, follow these instructions in reverse order.

System

Member since: 09/24/09

2,562 Guides authored

0 Comments

Add Comment

View Statistics:

Past 24 Hours: 0

Past 7 Days: 0

Past 30 Days: 0

All Time: 2