
Introduction
Source: Dismantling Guide for IT Equipment, which was elaborated within the SRI project and financially supported by SECO and UNIDO, June 2015

World Resources Forum (WRF)
Mathias Schluep, St. Gallen / Switzerland

Dismantling and Recycling Centre (DRZ)
Markus Spitzbart, Vienna / Austria

Institute for Materials Science & Technology (Empa)
Fabian Blaser, St. Gallen / Switzerland
Health and Safety
The critical step in demanufacturing a flat screen monitor is to remove the crystal liquid containing glass and the CCFLs. Often the backlight lamps are already broken due to transportation. As these lamps contain mercury, wearing an appropriate mask is essential.
'''
Although many materials contained in LCD screens are of a high quality (e.g. electronics, highly transparent plastic within LCD module, etc.), there exist only few appropriate recovery technologies to further process them. Thus purchasers have to be selected.
What you need
-
-
Before doing anything the monitor has to be placed face down to protect the monitor screen from breaking.
-
Remove the monitor stand and dismantle it. It consists of some steel and plastic elements.
-
-
-
Remove the back casing and clean the casing properly by removing all the foreign materials in the plastic such as labels, rubber mountains etc.
-
LCD casings do not contain flame retardants and are thus adequate for plastic recycling.
-
-
-
Remove the front frame, so that you can freely remove the wires and switches.
-
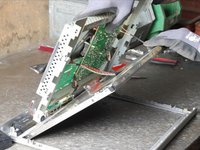
Remove the inner back casing by unscrewing all fixing screws to get access to the Printed Wiring Boards (PWBs).
-
Also cut off all wires.
-
-
-
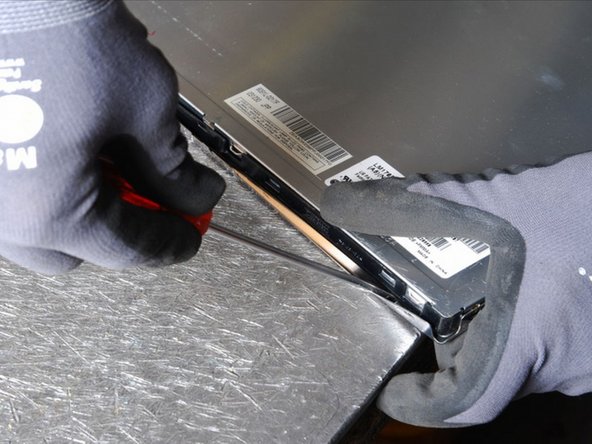
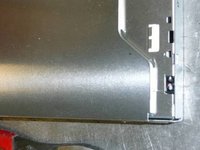
Remove the steel cover protecting the layers by releasing it with a flat screwdriver (see picture).
-
Check if the LCD is illuminated by CCFLs or by LEDs.
-
If the LCD is illuminated by CCFLs go on with step 5.
-
If the LCD is illuminated by LEDs go on with step 6.
-
-
-
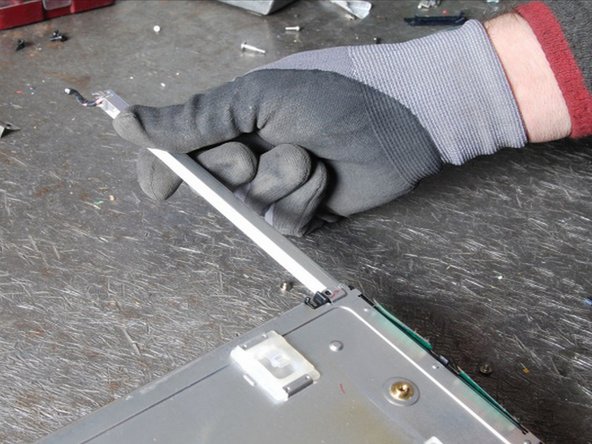
The black connection at the bottom left and right indicate where the backlight lamps are attached. Carefully lift and remove the steel cover at this point to avoid the breakage of the lamps.
-
Remove the backlights carefully and place them aside. Depending on the screen model, the backlights can be removed before or after taking apart the LCD module (see pictures).
-
Avoid the breakage of the backlight as mercury vapour can be released. The lamps should be stored in a closed container which disposes of a mechanism preventing the release of air from the inside at the insertion of further lamps.
-
-
-
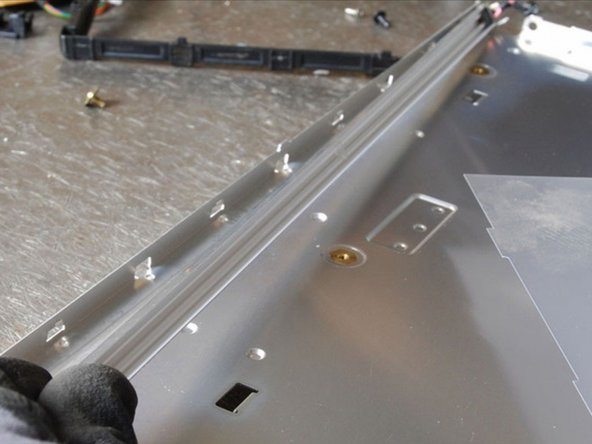
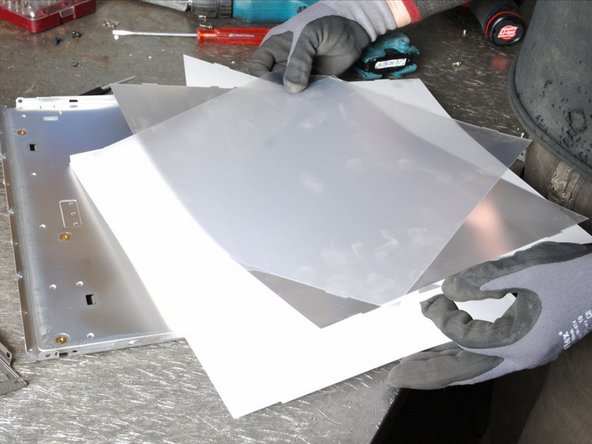
Remove the dark liquid crystal layer (foil) and other layers to get access to the backlights (see below).
-
-
-
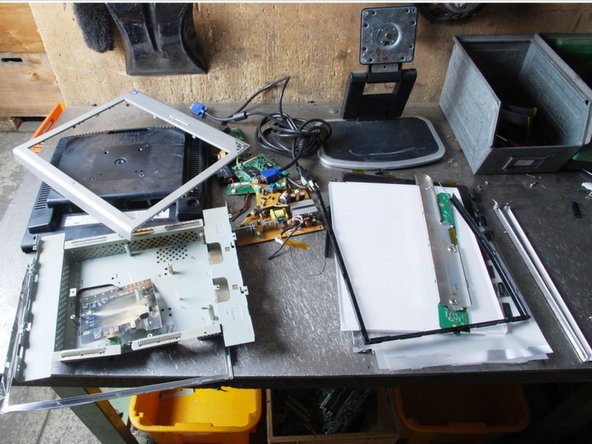
Separate the remaining materials according to their type and go on with the appropriate data sheet (e.g. aluminium, ferrous metals, plastic, further PWBs, etc.).
-
Make sure the plastic parts are completely free of metal pieces.
-
For information about storage and handling refer to chapter 3 (Output Fractions).
-


Cancel: I did not complete this guide.
One other person completed this guide.