
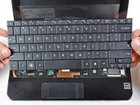
HP Mini 1000 Keyboard Replacement

Last updated on Sep 17, 2016
Views: 19
View statistics:
- Past 24 Hours:
- 0
- Past 7 Days:
- 0
- Past 30 Days:
- 0
- All Time:
- 19
Comments: 0
No one has left comments on this guide. Will you be first?
Go to guide commentsCompleted: 0 1
No one has marked this guide "completed." Will you be the first?
1 person has marked this guide "completed." It's you — great job!
Favorites: 0 1
No one has favorited (and subscribed to) this guide. Will you be the first?
1 person has favorited (and subscribed to) this guide — and that's you!
Introduction
Go to step 1 ↓Replace the keyboard in your HP Mini 1000.
What you need
-
-
-
With the case closed, place the Mini 1000 top-side down on a flat surface.
-
Push both of the battery release latches toward each other.
-
-
-
While pushing through the opening with one hand, grasp the left upper edge with the other hand and slightly pull the keyboard towards you.
-
Once an opening has been established, grasp the keyboard and slowly lift it upwards along the upper perimeter of the top edge.
-
-
-
Lift the keyboard out of the upper case, minding the cable that is still connecting it to the motherboard.
-
-
-
Use your fingernail or the flat end of a spudger to flip up the retaining flap on the keyboard cable ZIF socket.
-
Pull the cable out of its socket and remove the keyboard.
-
-


To reassemble your device, follow these instructions in reverse order.

