/

HP Pavilion dv5000 Optical Drive Replacement

What you need

  1. HP Pavilion dv5000 Optical Drive Replacement, HP Pavilion dv5000 Optical Drive Replacement: step 1, image 1 of 1
    • Turn off down the computer, and unplug the computer from all external power sources.

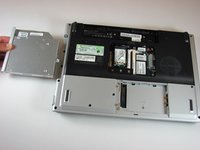
    • Shut the screen, and lay the computer face-down on a flat, sturdy surface. Orient the computer to match the image.

    • Locate the battery release switch, as indicated in the image. Sliding this switch from right to left will release the battery.

    • Remove the battery.

  2. HP Pavilion dv5000 Optical Drive Replacement: step 2, image 1 of 3 HP Pavilion dv5000 Optical Drive Replacement: step 2, image 2 of 3 HP Pavilion dv5000 Optical Drive Replacement: step 2, image 3 of 3
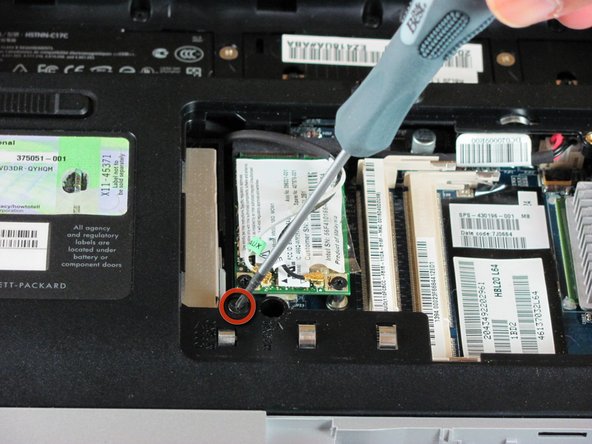
    • Remove the two 5.0mm screws securing the right side of the RAM cover to the computer frame.

    • Lift the right side of the RAM cover to remove.

  3. HP Pavilion dv5000 Optical Drive Replacement: step 3, image 1 of 1
    • Remove the 11.0mm screw securing the optical drive to the computer.

  4. HP Pavilion dv5000 Optical Drive Replacement: step 4, image 1 of 3 HP Pavilion dv5000 Optical Drive Replacement: step 4, image 2 of 3 HP Pavilion dv5000 Optical Drive Replacement: step 4, image 3 of 3
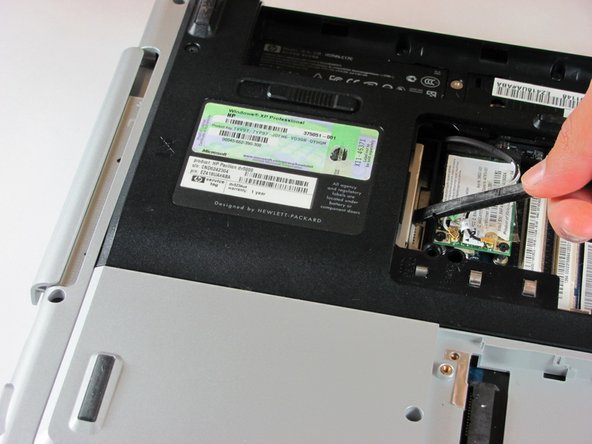
    • Locate the optical drive. The optical drive is located on the left side of the RAM bay.

    • Press the exposed edge of the optical drive gently with the spudger until the drive releases from the computer frame.

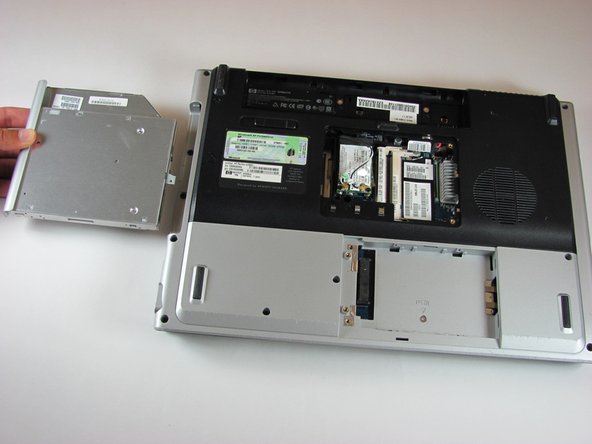
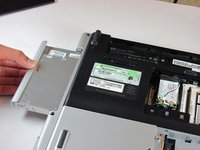
    • Pull the optical drive completely out of the computer frame.

Conclusion

To reassemble your device, follow these instructions in reverse order.

System

Member since: 09/24/09

2,562 Guides authored

0 Comments

Add Comment

View Statistics:

Past 24 Hours: 0

Past 7 Days: 0

Past 30 Days: 0

All Time: 0