Introduction
Source: Dismantling Guide for IT Equipment, which was elaborated within the SRI project and financially supported by SECO and UNIDO, June 2015

World Resources Forum (WRF)
Mathias Schluep, St. Gallen / Switzerland

Dismantling and Recycling Centre (DRZ)
Markus Spitzbart, Vienna / Austria

Institute for Materials Science & Technology (Empa)
Fabian Blaser, St. Gallen / Switzerland
Health and Safety
Dismantling keyboards is a simple task with no hazardous steps. Only very old keyboards have to be treated carefully as they contain a large amount of lead.
Composition
A keyboard weighs 1 to 3 kg and takes about 5 to 10 minutes to dismantle. The following graph shows the share by weight of the recoverable material.
What you need
-
-
Dismantling a keyboard is relatively simple. Firstly, place the keyboard on the table and cut off the power cable if not already done.
-
-
-
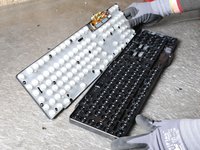
Pry the key caps out of their resting places using a small flat screwdriver. Get the screwdriver tip under the key cap first, then lower the handle onto the adjacent key cap so the screwdriver becomes a miniature prying lever. The key caps will snap out of their holders easily.
-
-
-
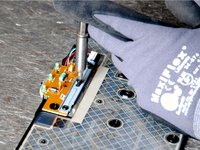
Remove the front frame, so that you can freely remove the printed wiring boards. Also remove all foreign materials such as labels, rubber mountains, etc. Sometimes steel wires are attached at the inside of the keys.
-
Especially take care to remove all metal pieces as plastic should be perfectly clean for further recycling.
-
-
-
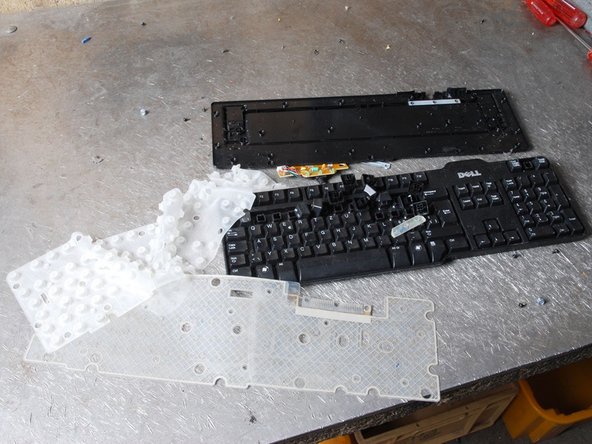
Separate all materials and introduce them into the adequate treatment. Go on with the appropriate data sheets. Make sure the plastic parts are completely free of metal pieces.
-