
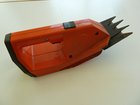
Lawn Edge Trimmer

Tobias Isakeit and one other contributor
Last updated on Sep 13, 2018
Views: 99
View statistics:
- Past 24 Hours:
- 0
- Past 7 Days:
- 0
- Past 30 Days:
- 0
- All Time:
- 99
Comments: 0
No one has left comments on this guide. Will you be first?
Go to guide commentsCompleted: 0 1
No one has marked this guide "completed." Will you be the first?
1 person has marked this guide "completed." It's you — great job!
Favorites: 0 1
No one has favorited (and subscribed to) this guide. Will you be the first?
1 person has favorited (and subscribed to) this guide — and that's you!
Introduction
Go to step 1 ↓
Dismantling and Recycling Centre (DRZ)
Katharina Lenz, Vienna / Austria
Health & Safety
Dismantling doesn't include any harmful steps. Nonetheless workers should wear personal protection equipment like gloves, goggles, apron and robust shoes.
Note: This is a general guide for most lawn edge trimmers. As the construction can differ, the dismantling steps mentioned below can vary in their order. However, the described steps show what parts the removal should focus on.
What you need


-
-
-
Separate the remaining materials according to their type and go on with the appropriate data sheet (e.g. aluminium, ferrous metals, plastic, further PWBs, etc.).
-
Make sure the plastic parts are completely free of metal pieces.
-


