Mac Mini Mid 2010 Fan Replacement

What you need

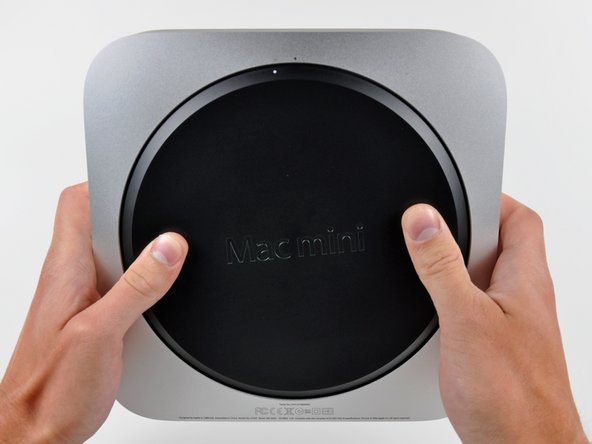
    1. Mac Mini Mid 2010 Fan Replacement, Mac Mini Mid 2010 Fan Replacement: step 1, image 1 of 2 Mac Mini Mid 2010 Fan Replacement, Mac Mini Mid 2010 Fan Replacement: step 1, image 2 of 2
      • Place your thumbs in the depressions cut into the bottom cover.

      • Rotate the bottom cover counter-clockwise until the white dot painted on the bottom cover is aligned with the ring inscribed on the outer case.

      Add Comment

    2. Mac Mini Mid 2010 Fan Replacement: step 2, image 1 of 1
      • Tilt the mini enough to allow the bottom cover to fall away from the outer case.

      • Remove the bottom cover and set it aside.

      Add Comment

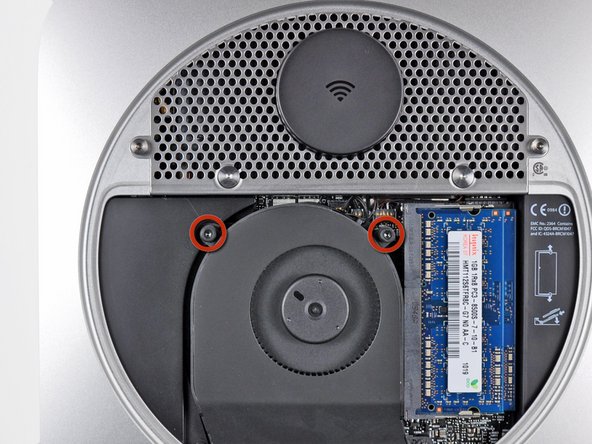
    3. Mac Mini Mid 2010 Fan Replacement: step 3, image 1 of 1
      • Remove the two 11.3 mm T6 Torx screws securing the fan to the logic board near the antenna plate.

      Add Comment

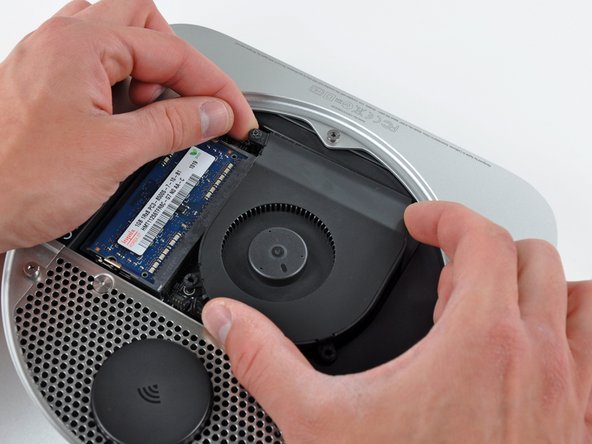
    4. Mac Mini Mid 2010 Fan Replacement: step 4, image 1 of 1
      • Lift the ear of the fan nearest the RAM up off the standoff secured to the outer case.

      Add Comment

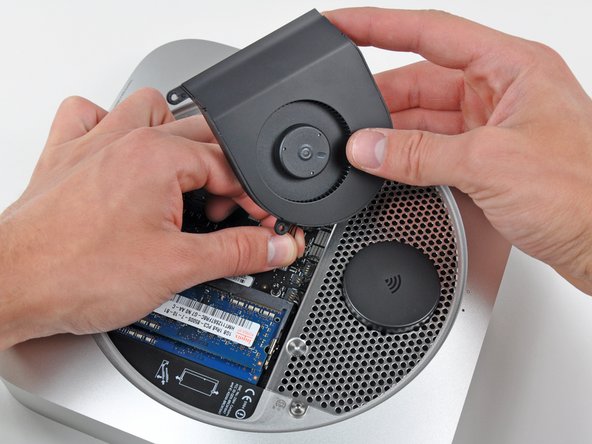
    5. Mac Mini Mid 2010 Fan Replacement: step 5, image 1 of 1
      • Lift the fan out of the mini for enough clearance to access its connector.

      • Carefully pull the fan cables upward to lift the fan connector up out of its socket on the logic board.

      • Remove the fan.

      Add Comment

Conclusion

To reassemble your device, follow these instructions in reverse order.

Cancel: I did not complete this guide.

System

Member since: 09/24/09

2,562 Guides authored

0 Guide Comments

Add Comment

View Statistics:

Past 24 Hours: 0

Past 7 Days: 0

Past 30 Days: 0

All Time: 11