
Introduction
This unit includes the hard drive, fan, and optical drive.
What you need
-
-
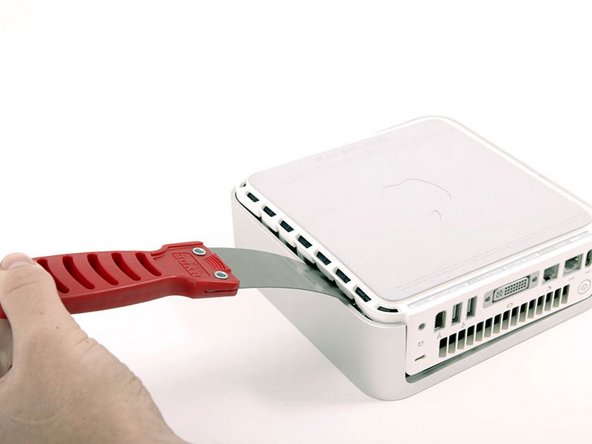
You'll need a putty knife in order to open the case. A 1.5 inch thin putty knife will work well, but you'll want to grind the edge down. Rub the putty knife's short edge back and forth on a sheet of all purpose rough grit sandpaper (100 grit will work fine) until it attains a beveled edge.
-
-
-
Place the mini upside down on a cloth and turn it so that the apple leaf faces you.
-
Insert the putty knife into the seam between silver outer case and the white plastic. If you have trouble, you can insert the putty knife at an angle or grind the knife's edge down further. Push the blade down until you meet firm resistance (roughly 3/8 of an inch).
-
-
-
Pull directly back on the putty knife until the white plastics pops up. Don't worry about bending the putty knife too far or breaking the plastic tabs. Just continue to pull back on the putty knife until the case pops free.
-
Repeat this procedure on the other side.
-
-
-
Grasp the white lower case beneath the vent and rotate it up and away from you, pulling it free of the upper case.
-
-
-
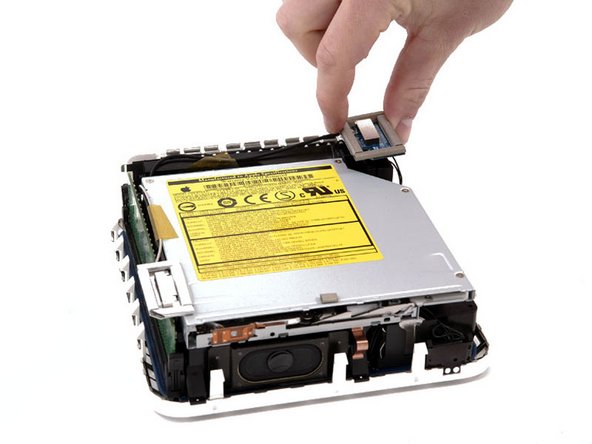
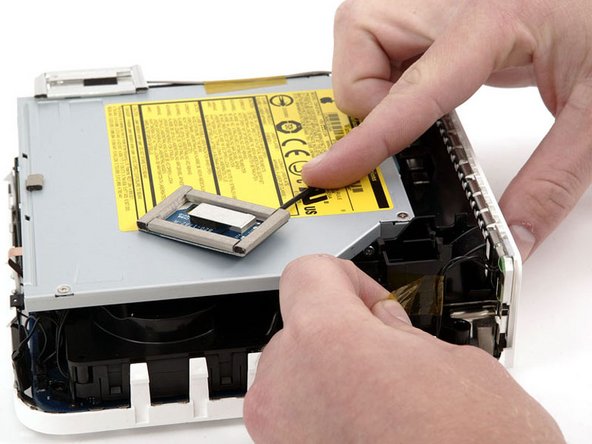
Grasp the Airport antenna board and lift it off of the two plastic posts holding it in place. You may need to push back the black plastic tab jutting through the lower left corner of the board.
-
-
-
Remove the three black Phillips screws securing the plastic framework to the logic board and lower case.
-
-
-
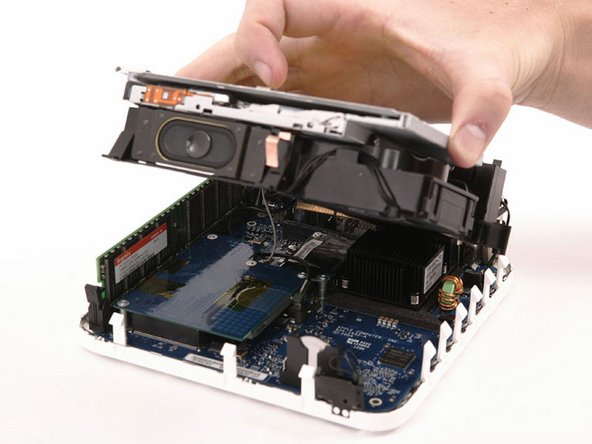
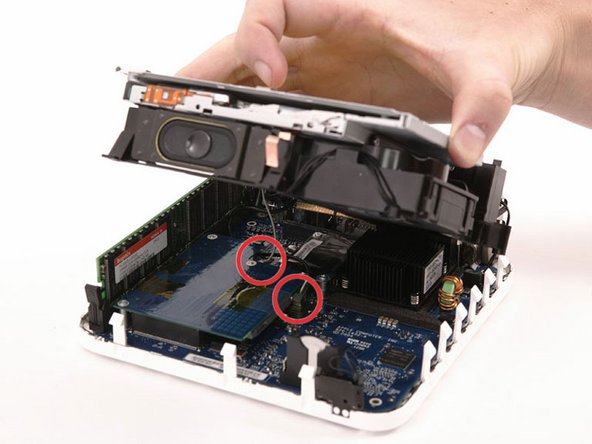
Grasp the optical drive and mass storage unit in one hand and lift up enough so that you can see beneath it.
-
-
-
With your free hand, pull the Bluetooth cable up from Bluetooth board and unplug the Airport antenna cable from the right of the Airport card. Caution: both of these connections are very small. When re-assembling unit after repair, you may want to remove the two screws holding the airport card to the assembly and lift the card up and out to re-attach the cables.
-


To reassemble your device, follow these instructions in reverse order.
