/

MacBook Air 11" Late 2010 Left Speaker Replacement

What you need

  1. MacBook Air 11" Late 2010 Left Speaker Replacement, MacBook Air 11" Late 2010 Left Speaker Replacement: step 1, image 1 of 1
    • Before proceeding, close your computer and lay it on a soft surface top-side down.

    • Remove the following ten screws:

    • Two 8 mm 5-point Pentalobe screws

    • Eight 2.5 mm 5-point Pentalobe screws

    • The special screwdriver needed to remove the eight 5-point Pentalobe screws can be found .

  2. MacBook Air 11" Late 2010 Left Speaker Replacement: step 2, image 1 of 1
    • Wedge your fingers between the display and the lower case and pull upward to pop the lower case off the Air.

    • Remove the lower case and set it aside.

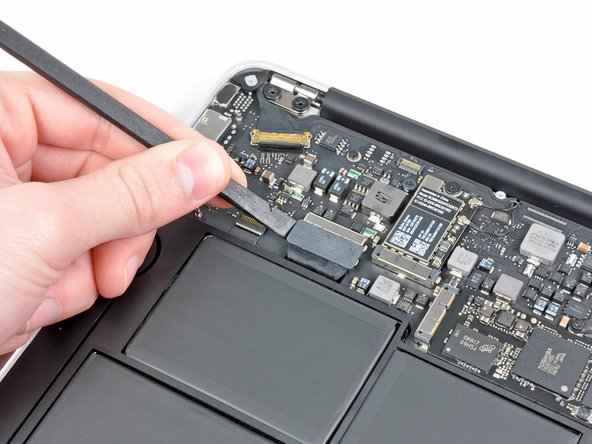
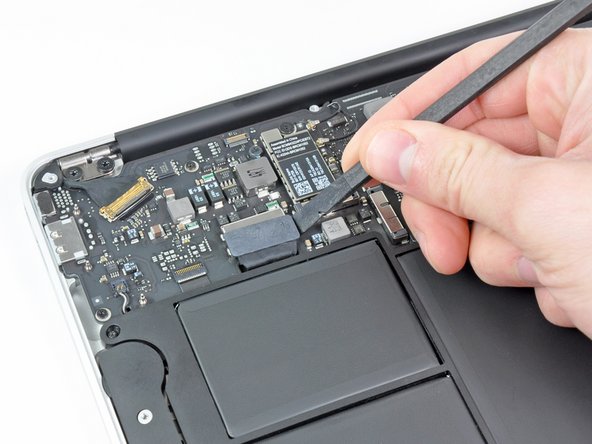
  3. MacBook Air 11" Late 2010 Left Speaker Replacement: step 3, image 1 of 2 MacBook Air 11" Late 2010 Left Speaker Replacement: step 3, image 2 of 2
    • Use the flat end of a spudger to pry both short sides of the battery connector upward to disconnect it from its socket on the logic board.

    • Bend the battery cable slightly away from the logic board so the connector will not accidentally contact its socket.

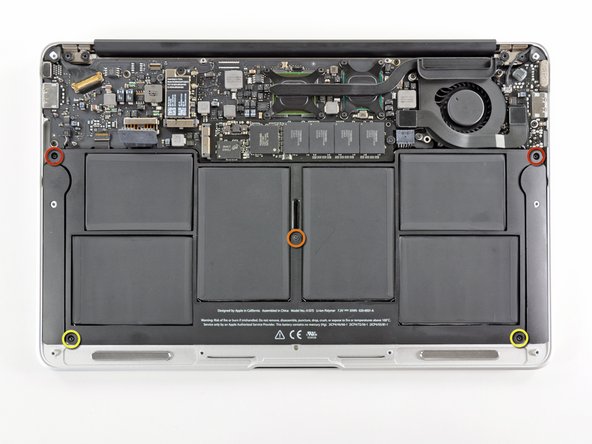
  4. MacBook Air 11" Late 2010 Left Speaker Replacement: step 4, image 1 of 1
    • Remove the following five screws securing the battery to the upper case:

    • Two 5.2 mm T5 Torx screws

    • One 6 mm T5 Torx screw

    • Two 2.6 mm T5 Torx screws

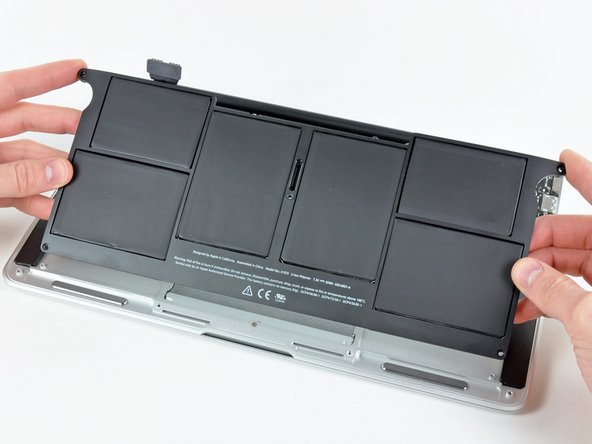
  5. MacBook Air 11" Late 2010 Left Speaker Replacement: step 5, image 1 of 1
    • When handling the battery, avoid squeezing or touching the six exposed lithium polymer cells.

    • Lift the battery from its edge nearest the logic board and remove it from the upper case.

  6. MacBook Air 11" Late 2010 Left Speaker Replacement: step 6, image 1 of 1
    • Use the flat end of a spudger to pry the I/O board cable connector upward out of its socket on the I/O board.

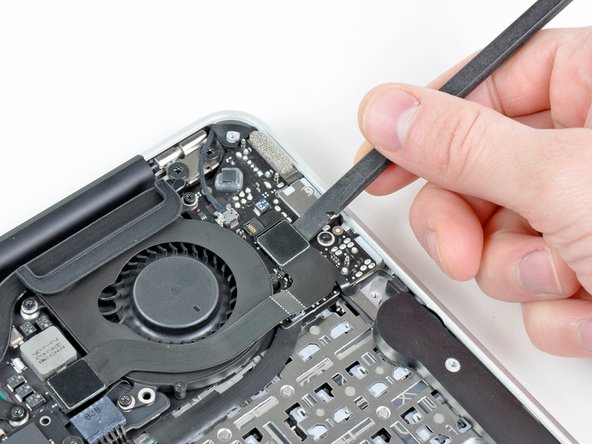
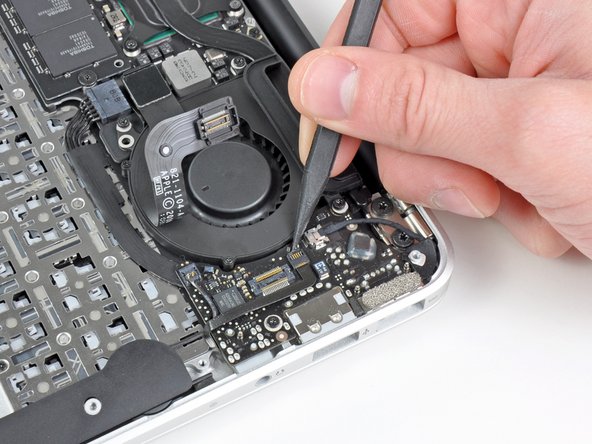
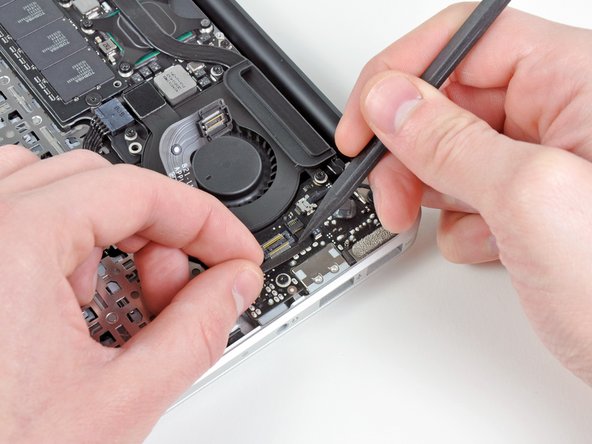
  7. MacBook Air 11" Late 2010 Left Speaker Replacement: step 7, image 1 of 3 MacBook Air 11" Late 2010 Left Speaker Replacement: step 7, image 2 of 3 MacBook Air 11" Late 2010 Left Speaker Replacement: step 7, image 3 of 3
    • Use the tip of a spudger to flip up the retaining flap on the microphone ribbon cable ZIF socket.

    • Be sure you are prying up on the hinged retaining flap, not the socket itself.

    • Pull the microphone ribbon cable straight out of its socket.

  8. MacBook Air 11" Late 2010 Left Speaker Replacement: step 8, image 1 of 1
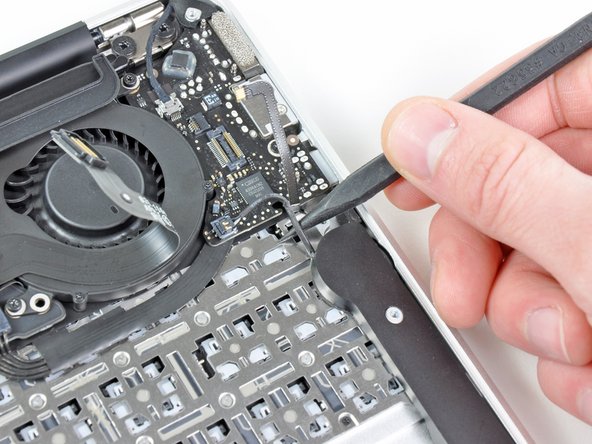
    • Use the tip of a spudger to de-route the left speaker cable from the notch cut into the edge of the I/O board.

  9. MacBook Air 11" Late 2010 Left Speaker Replacement: step 9, image 1 of 1
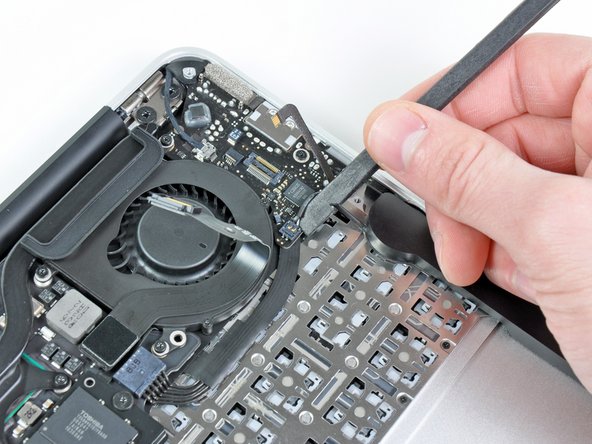
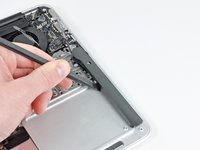
    • Use the flat end of a spudger to pry the left speaker connector up and out of its socket on the I/O board.

    • Pry upward from beneath the wires.

  10. MacBook Air 11" Late 2010 Left Speaker Replacement: step 10, image 1 of 2 MacBook Air 11" Late 2010 Left Speaker Replacement: step 10, image 2 of 2
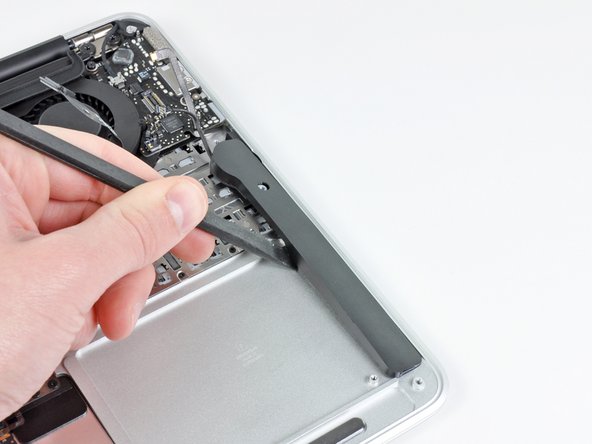
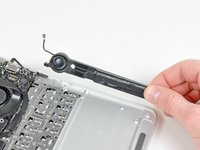
    • Use the flat end of a spudger to pry the left speaker off the adhesive securing it to the upper case.

    • Only pry up on the speaker from the areas of bare aluminum on the upper case. Prying up from the keyboard area may damage the keyboard and the speaker itself.

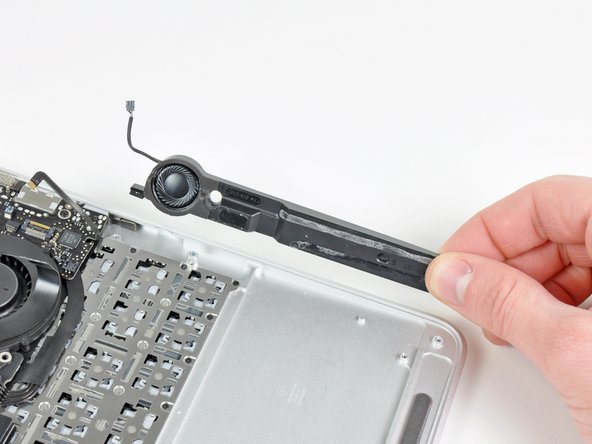
    • Remove the left speaker from the upper case.

Conclusion

To reassemble your device, follow these instructions in reverse order.

System

Member since: 09/24/09

2,562 Guides authored

0 Comments

Add Comment

View Statistics:

Past 24 Hours: 0

Past 7 Days: 0

Past 30 Days: 0

All Time: 1