
Introduction
Your Air is thirsty! Keep those electrons flowing and fix your broken DC-In board.
What you need
-
-
Remove the following 10 screws securing the lower case to the Air:
-
Six 2.8 mm Phillips screws.
-
Two 3.8 mm Phillips screws.
-
Two 5.4 mm Phillips screws.
-
-
-
Slightly lift the lower case near the vents and push it toward the rear of the computer to free the mounting tabs.
-
-
-
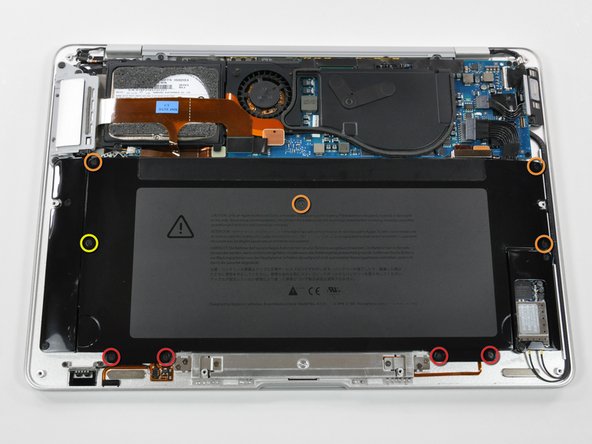
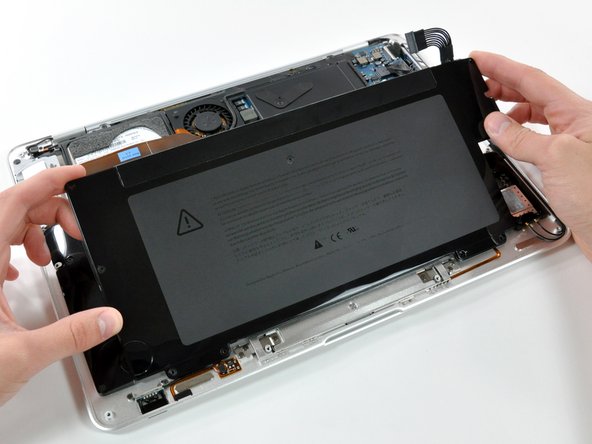
Remove the following nine screws securing the battery to the Air:
-
Four 2.9 mm Phillips.
-
Four 3.8 mm Phillips.
-
One 7.2 mm Phillips.
-
-
-
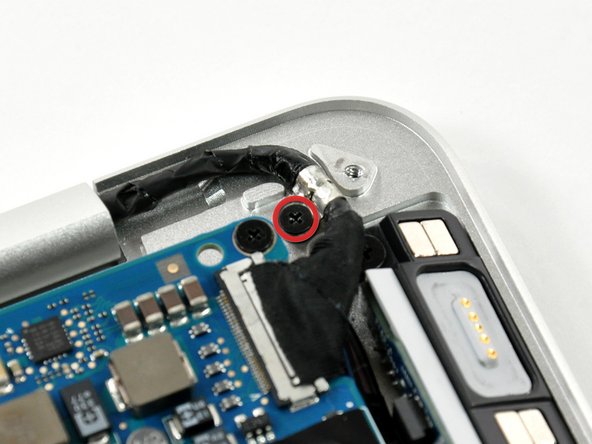
Remove the single Phillips screw securing the display data cable ground loop to the upper case.
-
-
-
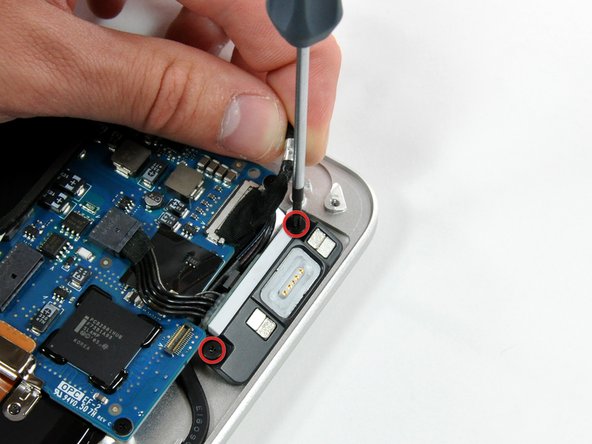
Lift the display data cable slightly for enough clearance to remove the two Phillips screws securing the DC-In board to the upper case.
-
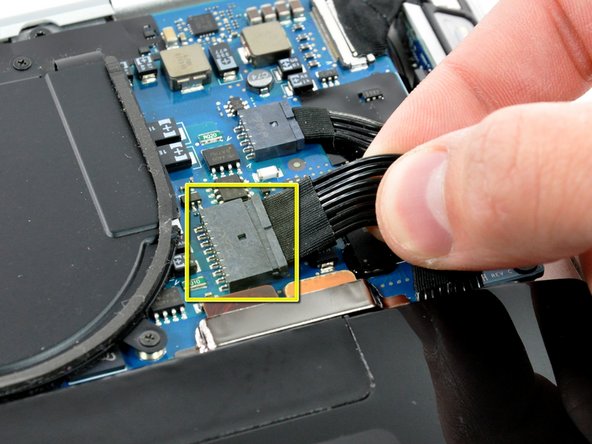
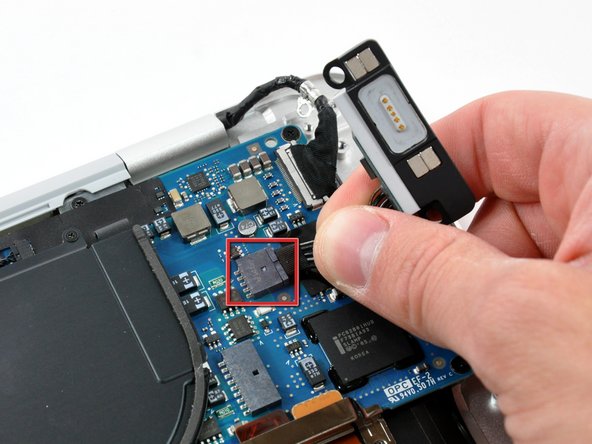
Lift the DC-In board slightly and pull its connector straight away from the socket on the logic board.
-


To reassemble your device, follow these instructions in reverse order.
To reassemble your device, follow these instructions in reverse order.
