/

MacBook Air Models A1237 and A1304 Hard Drive Replacement

Prerequisite Only
This guide is only used as a prerequisite for other guides and is not a complete or useful guide when viewed independently.

What you need

  1. MacBook Air Models A1237 and A1304 Hard Drive Replacement, MacBook Air Models A1237 and A1304 Hard Drive Replacement: step 1, image 1 of 3 MacBook Air Models A1237 and A1304 Hard Drive Replacement, MacBook Air Models A1237 and A1304 Hard Drive Replacement: step 1, image 2 of 3 MacBook Air Models A1237 and A1304 Hard Drive Replacement, MacBook Air Models A1237 and A1304 Hard Drive Replacement: step 1, image 3 of 3
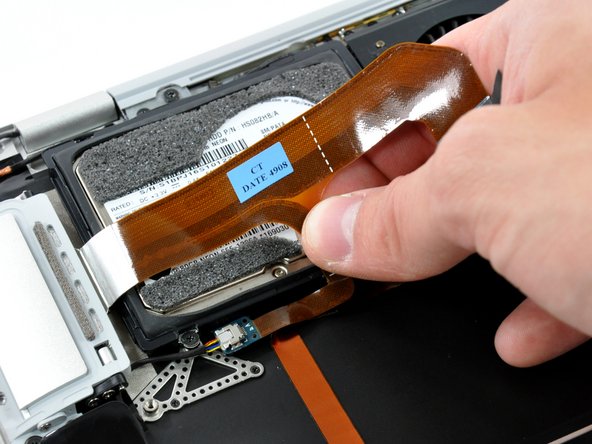
    • Disconnect the port hatch ribbon cable from the logic board by pulling it straight up by its black pull tab.

    • Pull the audio out ribbon cable off the adhesive securing it to the upper case.

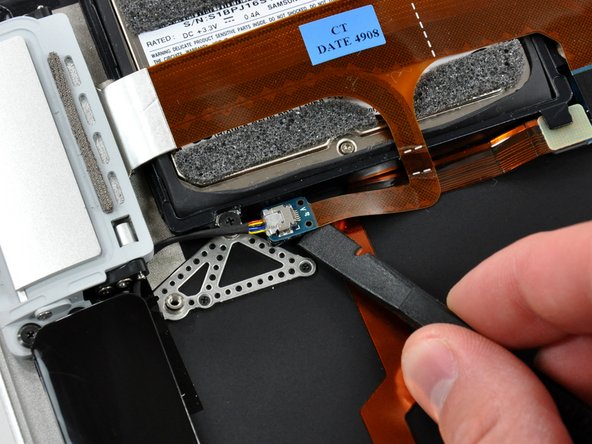
    • Use a spudger to pry the audio out ribbon cable connector board off the hard drive bracket.

  2. MacBook Air Models A1237 and A1304 Hard Drive Replacement: step 2, image 1 of 1
    • Disconnect the audio out cable from its socket on the port hatch ribbon cable.

  3. MacBook Air Models A1237 and A1304 Hard Drive Replacement: step 3, image 1 of 1
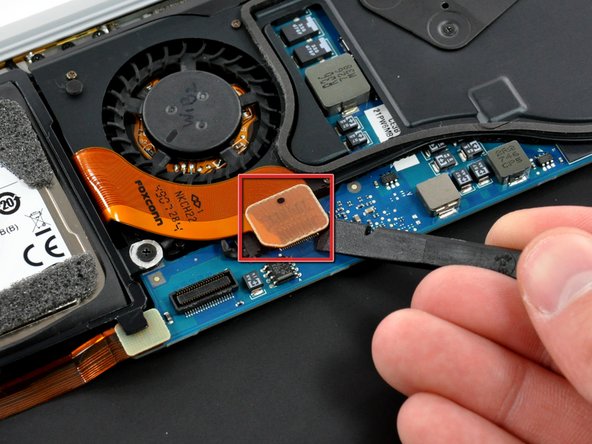
    • Use a spudger to pry the hard drive cable connector up off the logic board.

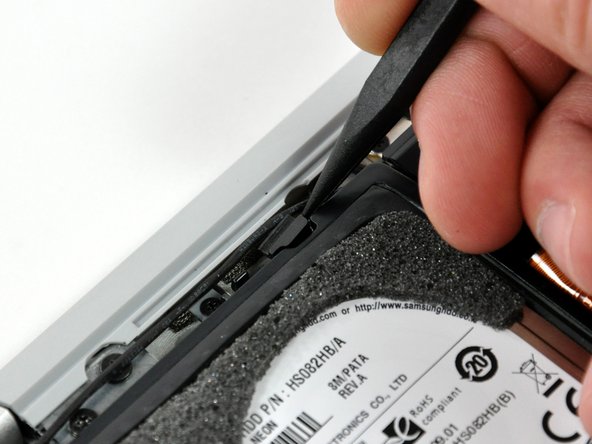
  4. MacBook Air Models A1237 and A1304 Hard Drive Replacement: step 4, image 1 of 2 MacBook Air Models A1237 and A1304 Hard Drive Replacement: step 4, image 2 of 2
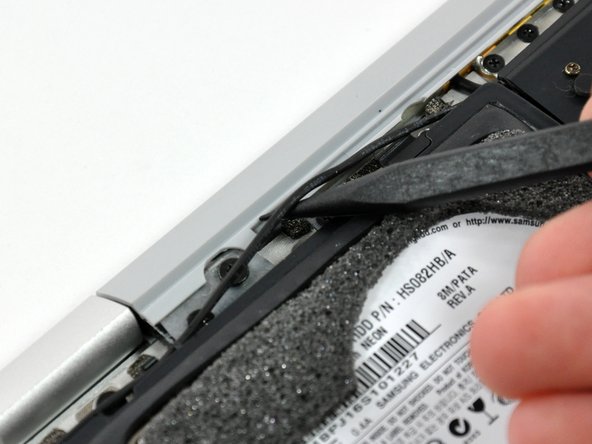
    • Use the sharp end of a spudger to de-route the microphone cable from the hard drive bracket.

    • Remove the cosmetic screw cover from the adhesive securing it to the hard drive bracket.

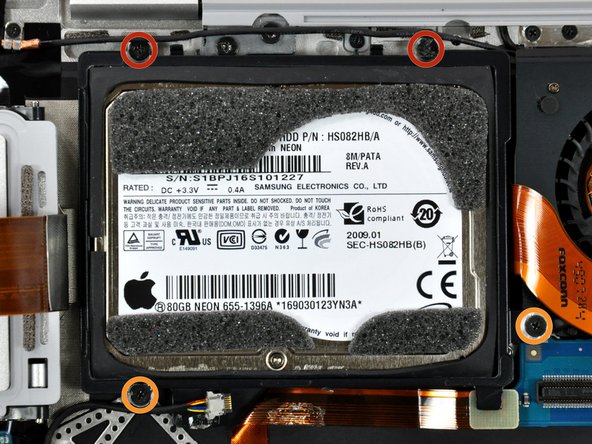
  5. MacBook Air Models A1237 and A1304 Hard Drive Replacement: step 5, image 1 of 1
    • Remove the four Phillips screws securing the hard drive assembly to the upper case:

    • Two 4.7 mm screws.

    • Two 3.9 mm screws.

  6. MacBook Air Models A1237 and A1304 Hard Drive Replacement: step 6, image 1 of 1
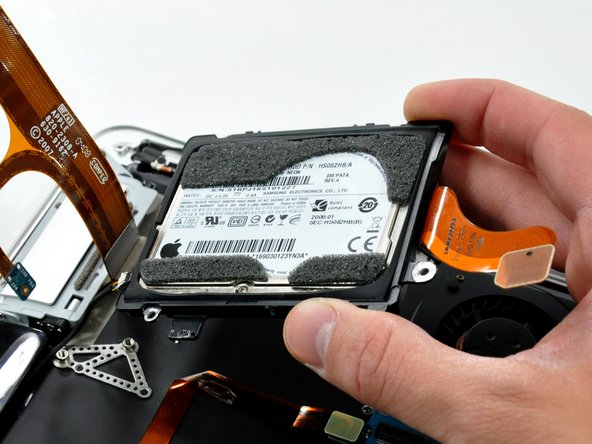
    • Lift the hard drive assembly out of the upper case.

Conclusion

To reassemble your device, follow these instructions in reverse order.

System

Member since: 09/24/09

2,562 Guides authored

0 Comments

Add Comment

View Statistics:

Past 24 Hours: 0

Past 7 Days: 0

Past 30 Days: 0

All Time: 0