
MacBook Pro 13" Unibody Mid 2010 Hard Drive Cable Replacement

What you need

  1. MacBook Pro 13" Unibody Mid 2010 Hard Drive Cable Replacement, MacBook Pro 13" Unibody Mid 2010 Hard Drive Cable Replacement: step 1, image 1 of 1
    • Remove the following 10 screws securing the lower case to the MacBook Pro 13" Unibody:

    • Seven 3 mm Phillips screws.

    • Three 13.5 mm Phillips screws.

    Add Comment

  2. MacBook Pro 13" Unibody Mid 2010 Hard Drive Cable Replacement: step 2, image 1 of 1
    • Slightly lift the lower case and push it toward the rear of the computer to free the mounting tabs.

    Add Comment

  3. MacBook Pro 13" Unibody Mid 2010 Hard Drive Cable Replacement: step 3, image 1 of 1
    • For precautionary purposes, we advise that you disconnect the battery connector from the logic board to avoid any electrical discharge.

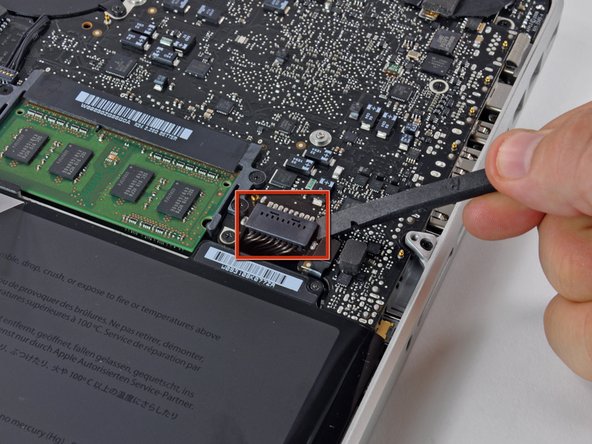
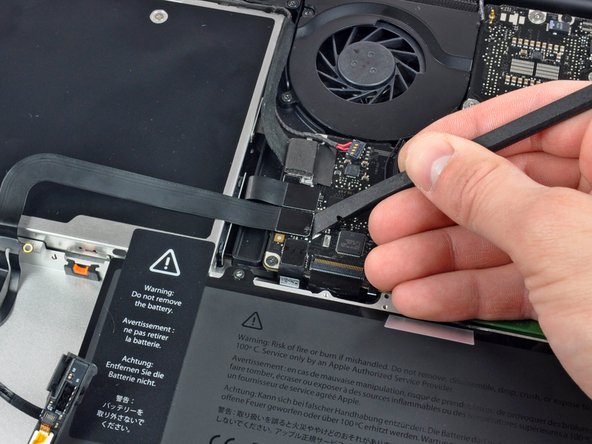
    • Use the flat end of a spudger to lift the battery connector up out of its socket on the logic board.

    Add Comment

  4. MacBook Pro 13" Unibody Mid 2010 Hard Drive Cable Replacement: step 4, image 1 of 1
    • Remove two Phillips screws securing the hard drive bracket to the upper case.

    • These screws are captive to the hard drive bracket.

    Add Comment

  5. MacBook Pro 13" Unibody Mid 2010 Hard Drive Cable Replacement: step 5, image 1 of 1
    • Lift the the retaining bracket out of the upper case.

    Add Comment

  6. MacBook Pro 13" Unibody Mid 2010 Hard Drive Cable Replacement: step 6, image 1 of 1
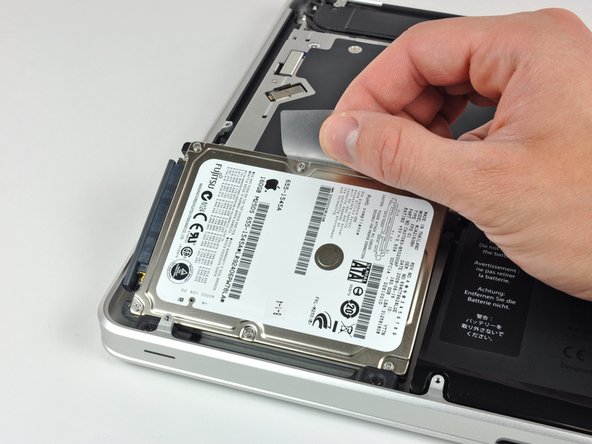
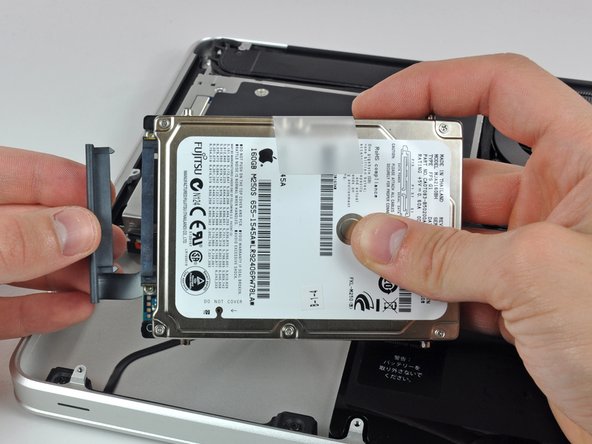
    • Lift the hard drive by its pull tab and pull it out of the chassis, minding the cable attaching it to the computer.

    Add Comment

  7. MacBook Pro 13" Unibody Mid 2010 Hard Drive Cable Replacement: step 7, image 1 of 1
    • Remove the hard drive cable by pulling its connector straight away from the hard drive.

    Add Comment

  8. MacBook Pro 13" Unibody Mid 2010 Hard Drive Cable Replacement: step 8, image 1 of 1
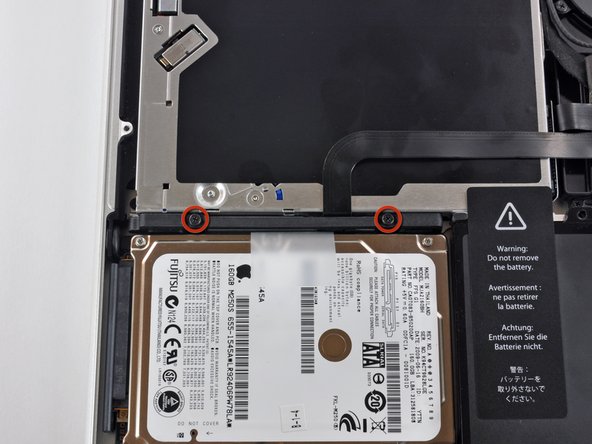
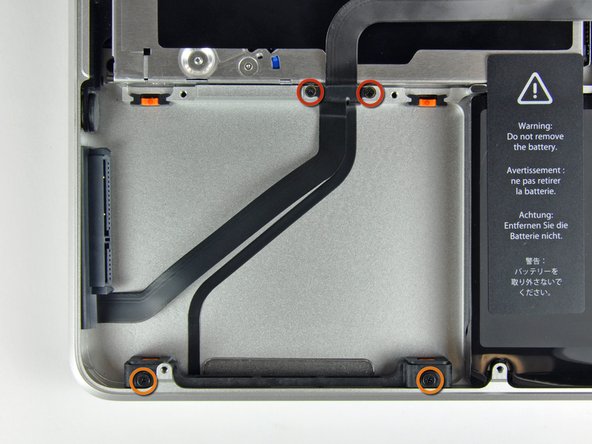
    • Remove the following four screws securing the hard drive and IR sensor cable to the upper case:

    • Two 1.5 mm Phillips screws.

    • Two 9.5 mm Phillips screws.

    Add Comment

  9. MacBook Pro 13" Unibody Mid 2010 Hard Drive Cable Replacement: step 9, image 1 of 2 MacBook Pro 13" Unibody Mid 2010 Hard Drive Cable Replacement: step 9, image 2 of 2
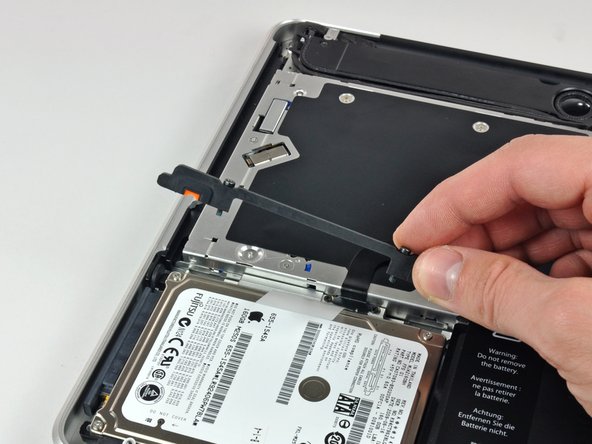
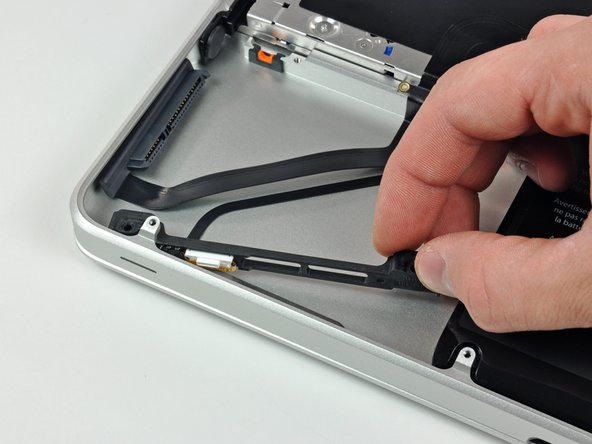
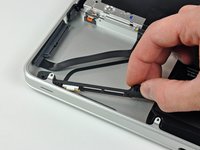
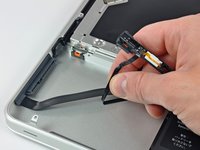
    • Slide the hard drive and IR sensor bracket away from the edge of the upper case.

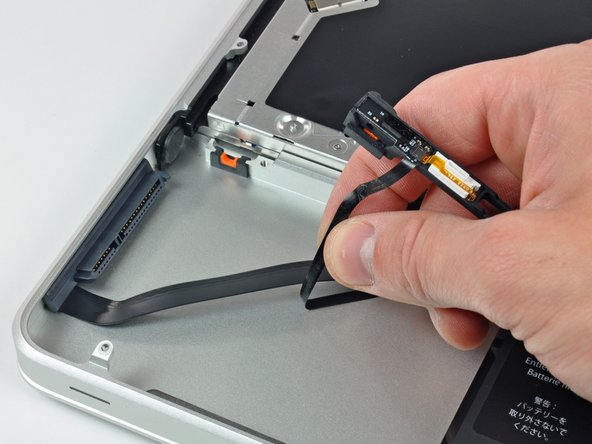
    • Carefully peel the hard drive and IR sensor cable from the upper case.

    Add Comment

  10. MacBook Pro 13" Unibody Mid 2010 Hard Drive Cable Replacement: step 10, image 1 of 1
    • Use the flat end of a spudger to pry the hard drive cable connector up off the logic board.

    Add Comment

  11. MacBook Pro 13" Unibody Mid 2010 Hard Drive Cable Replacement: step 11, image 1 of 1
    • Lift the hard drive/IR sensor cable assembly out of the upper case.

    • If your replacement part does not come with the hard drive bracket and indicator light, you will need to pull those off of the part you are removing and install them on the new part.

    • Your replacement part may come with several adhesive foam bumpers. These are to ensure a snug fit of both bracket and hard drive. Apply only as needed.

    Add Comment

Conclusion

To reassemble your device, follow these instructions in reverse order.

Cancel: I did not complete this guide.

System

Member since: 09/24/09

2,562 Guides authored

0 Guide Comments

Add Comment

View Statistics:

Past 24 Hours: 0

Past 7 Days: 0

Past 30 Days: 4

All Time: 35