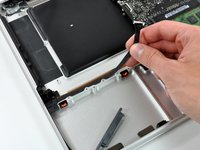
MacBook Pro 15" Unibody Late 2008 and Early 2009 Hard Drive Cable Replacement

What you need

    1. MacBook Pro 15" Unibody Late 2008 and Early 2009 Hard Drive Cable Replacement, MacBook Pro 15" Unibody Late 2008 and Early 2009 Hard Drive Cable Replacement: step 1, image 1 of 2 MacBook Pro 15" Unibody Late 2008 and Early 2009 Hard Drive Cable Replacement, MacBook Pro 15" Unibody Late 2008 and Early 2009 Hard Drive Cable Replacement: step 1, image 2 of 2
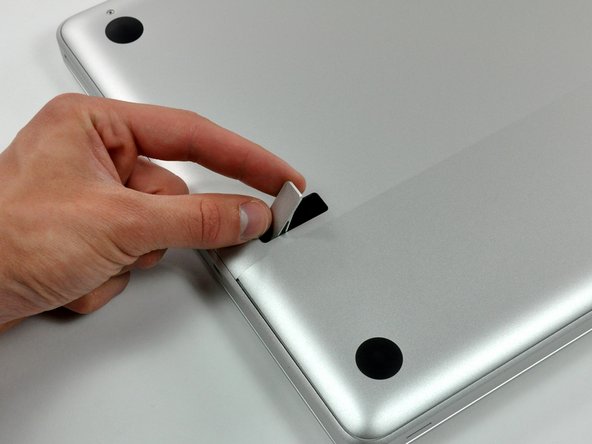
      • With the case closed, place the Unibody top-side down on a flat surface.

      • Depress the grooved side of the access door release latch enough to grab the free end. Lift the release latch until it is vertical.

      Add Comment

    2. MacBook Pro 15" Unibody Late 2008 and Early 2009 Hard Drive Cable Replacement: step 2, image 1 of 1
      • The access door should now be raised enough to lift it up and out of the Unibody.

      Add Comment

    3. MacBook Pro 15" Unibody Late 2008 and Early 2009 Hard Drive Cable Replacement: step 3, image 1 of 1
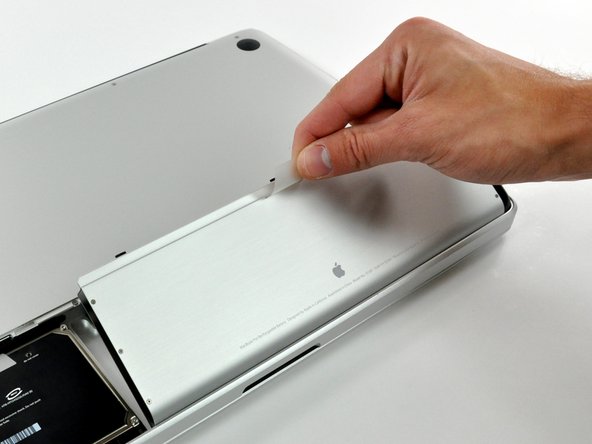
      • Be sure the access door release latch is vertical before proceeding.

      • Grab the translucent plastic tab and pull the battery up and out of the Unibody.

      • If the latch is depressed it will lock the battery in place.

      Add Comment

    4. MacBook Pro 15" Unibody Late 2008 and Early 2009 Hard Drive Cable Replacement: step 4, image 1 of 1
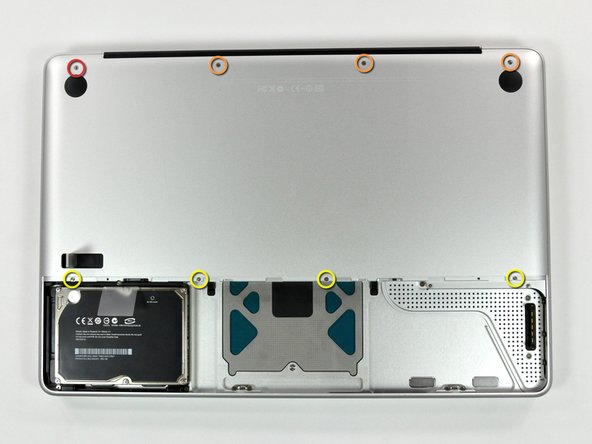
      • Remove the following eight screws securing the lower case to the chassis:

      • One 5.4 mm Phillips screw.

      • Three 14 mm Phillips screws.

      • Four 3.5 mm Phillips screws.

      Add Comment

    5. MacBook Pro 15" Unibody Late 2008 and Early 2009 Hard Drive Cable Replacement: step 5, image 1 of 1
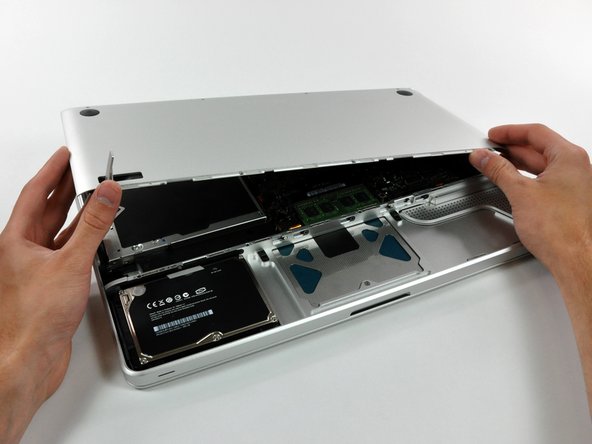
      • Using both hands, lift and remove the lower case off the upper case.

      Add Comment

    6. MacBook Pro 15" Unibody Late 2008 and Early 2009 Hard Drive Cable Replacement: step 6, image 1 of 1
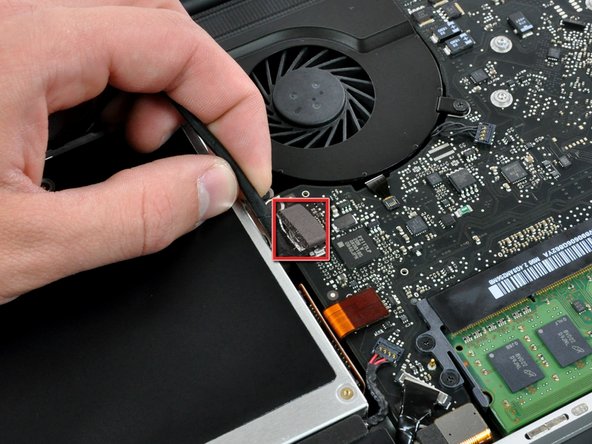
      • Disconnect the camera cable by pulling the male end straight away from its socket.

      Add Comment

    7. MacBook Pro 15" Unibody Late 2008 and Early 2009 Hard Drive Cable Replacement: step 7, image 1 of 1
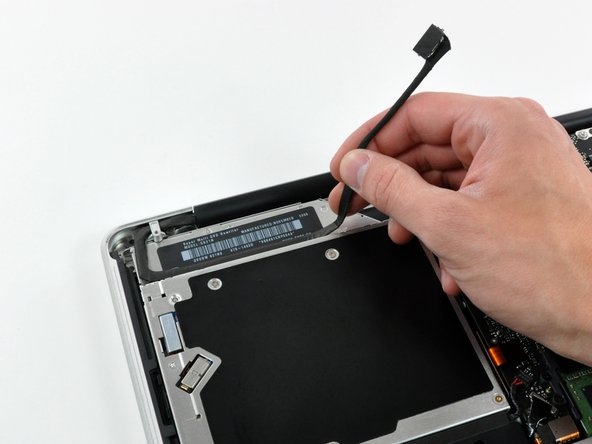
      • Deroute the camera data cable from the channel in the optical drive.

      Add Comment

    8. MacBook Pro 15" Unibody Late 2008 and Early 2009 Hard Drive Cable Replacement: step 8, image 1 of 1
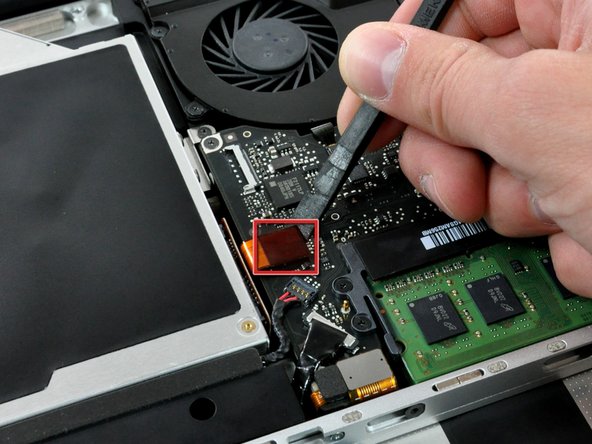
      • Use a spudger to pry the optical drive connector straight up off the logic board.

      Add Comment

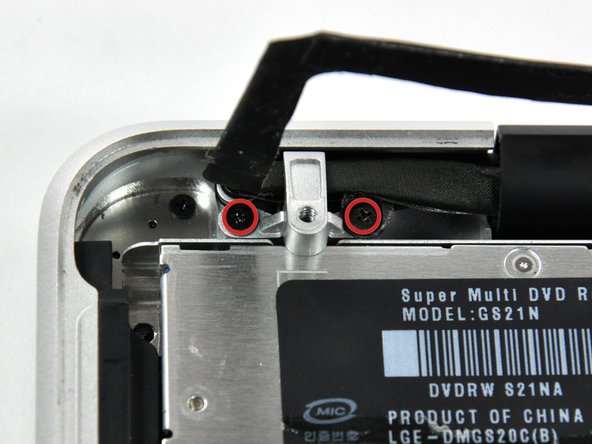
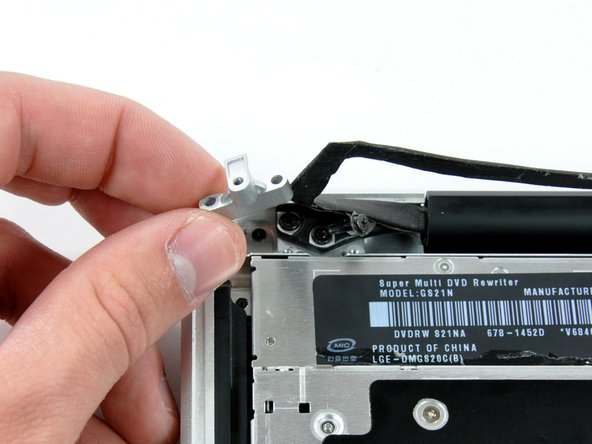
    9. MacBook Pro 15" Unibody Late 2008 and Early 2009 Hard Drive Cable Replacement: step 9, image 1 of 2 MacBook Pro 15" Unibody Late 2008 and Early 2009 Hard Drive Cable Replacement: step 9, image 2 of 2
      • Remove two 8 mm Phillips screws securing the camera cable bracket to the upper case.

      • The rightmost screw may remain captive in the camera cable.

      • Lift the camera cable bracket out from the upper case.

      Add Comment

    10. MacBook Pro 15" Unibody Late 2008 and Early 2009 Hard Drive Cable Replacement: step 10, image 1 of 1
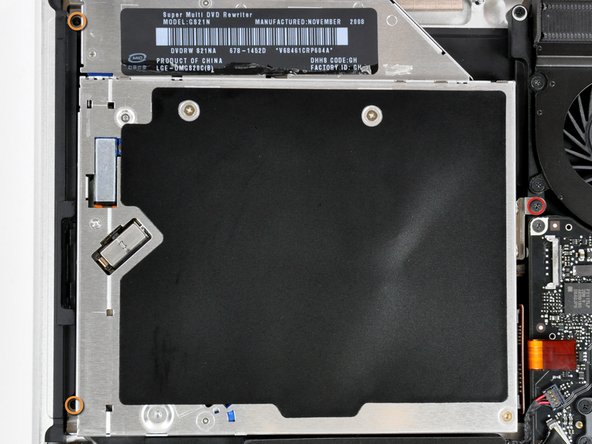
      • Remove the following three Phillips screws securing the optical drive to the upper case:

      • One 3.5 mm Phillips screw.

      • Two 2.5 mm Phillips screws.

      Add Comment

    11. MacBook Pro 15" Unibody Late 2008 and Early 2009 Hard Drive Cable Replacement: step 11, image 1 of 1
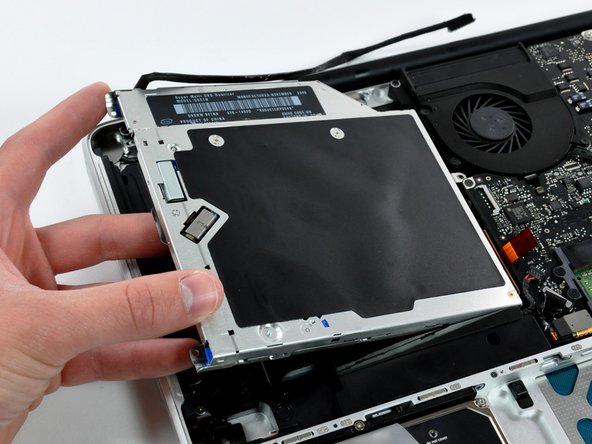
      • Lift the optical drive from its left edge and pull it out of the computer.

      Add Comment

    12. MacBook Pro 15" Unibody Late 2008 and Early 2009 Hard Drive Cable Replacement: step 12, image 1 of 1
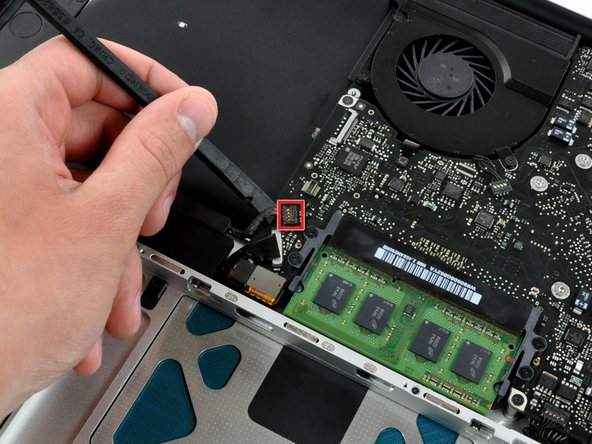
      • Using the flat end of a spudger, pry the subwoofer connector straight up off the logic board.

      Add Comment

    13. MacBook Pro 15" Unibody Late 2008 and Early 2009 Hard Drive Cable Replacement: step 13, image 1 of 1
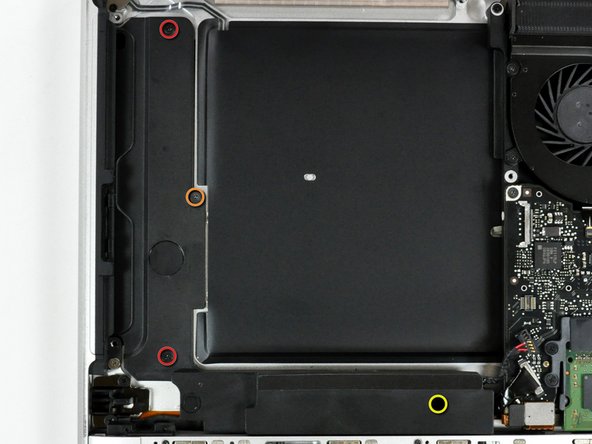
      • Remove the following four screws securing the subwoofer and right speaker to the upper case:

      • Two 3.2 mm Phillips screws.

      • One 2.6 mm Phillips screw.

      • One 5 mm Phillips screw.

      Add Comment

    14. MacBook Pro 15" Unibody Late 2008 and Early 2009 Hard Drive Cable Replacement: step 14, image 1 of 1
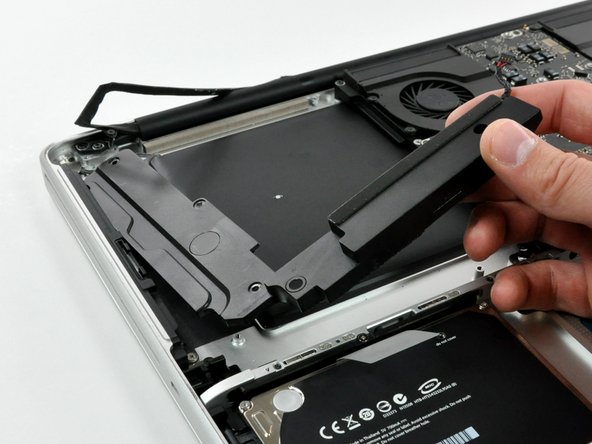
      • Lift the subwoofer and right speaker assembly out of the upper case.

      Add Comment

    15. MacBook Pro 15" Unibody Late 2008 and Early 2009 Hard Drive Cable Replacement: step 15, image 1 of 1
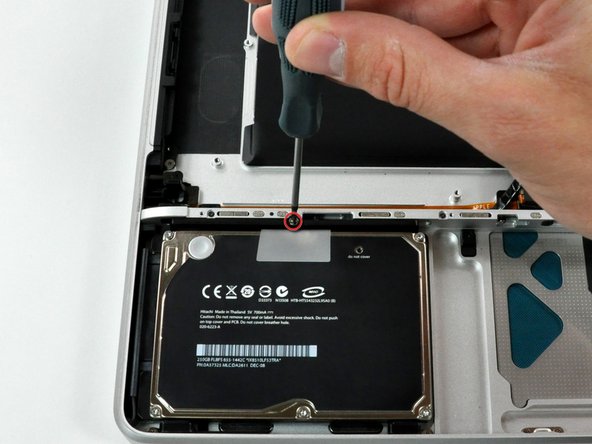
      • Remove the single Phillips screw securing the hard drive bracket to the upper case.

      • This screw is captive in the hard drive bracket.

      Add Comment

    16. MacBook Pro 15" Unibody Late 2008 and Early 2009 Hard Drive Cable Replacement: step 16, image 1 of 1
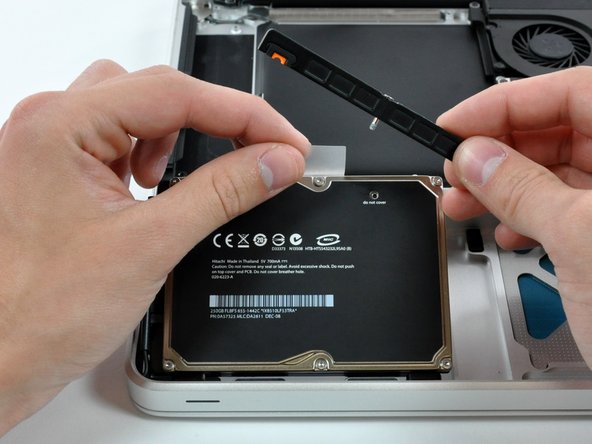
      • Lift the hard drive by its plastic pull tab and remove the freed hard drive bracket.

      Add Comment

    17. MacBook Pro 15" Unibody Late 2008 and Early 2009 Hard Drive Cable Replacement: step 17, image 1 of 1
      • Lift the hard drive out of its supports and disconnect the SATA cable by pulling the connector straight away from the hard drive.

      Add Comment

    18. MacBook Pro 15" Unibody Late 2008 and Early 2009 Hard Drive Cable Replacement: step 18, image 1 of 1
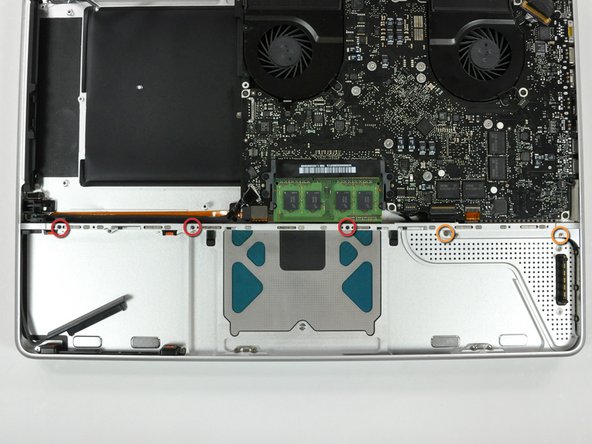
      • Remove the following 5 screws securing the mid wall to the upper case:

      • Three 10.5 mm Phillips screws.

      • Two 3.7 mm Phillips screws.

      • Lift the mid wall out of the upper case.

      Add Comment

    19. MacBook Pro 15" Unibody Late 2008 and Early 2009 Hard Drive Cable Replacement: step 19, image 1 of 1
      • Lift the mid wall out of the upper case.

      Add Comment

    20. MacBook Pro 15" Unibody Late 2008 and Early 2009 Hard Drive Cable Replacement: step 20, image 1 of 1
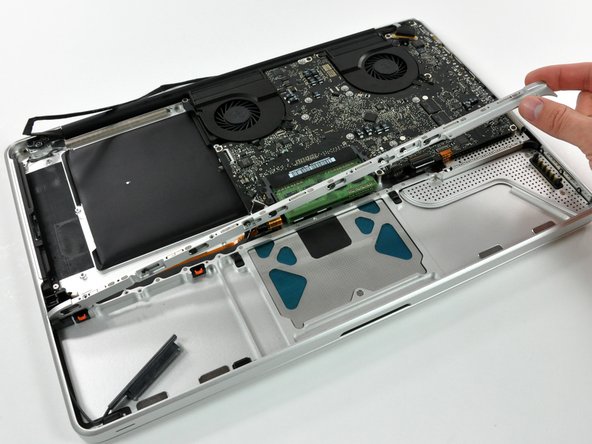
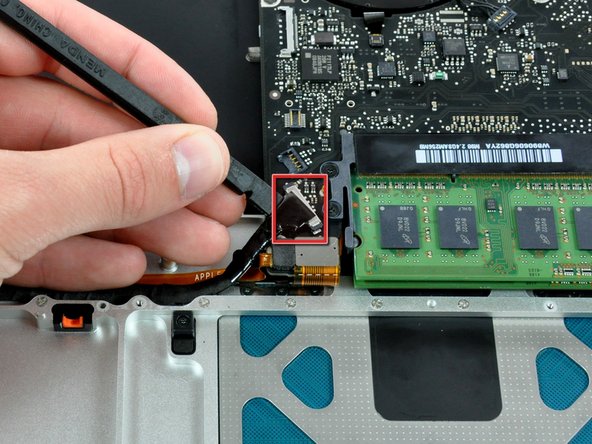
      • Use a spudger to pry the hard drive cable connector straight up off the logic board.

      Add Comment

    21. MacBook Pro 15" Unibody Late 2008 and Early 2009 Hard Drive Cable Replacement: step 21, image 1 of 2 MacBook Pro 15" Unibody Late 2008 and Early 2009 Hard Drive Cable Replacement: step 21, image 2 of 2
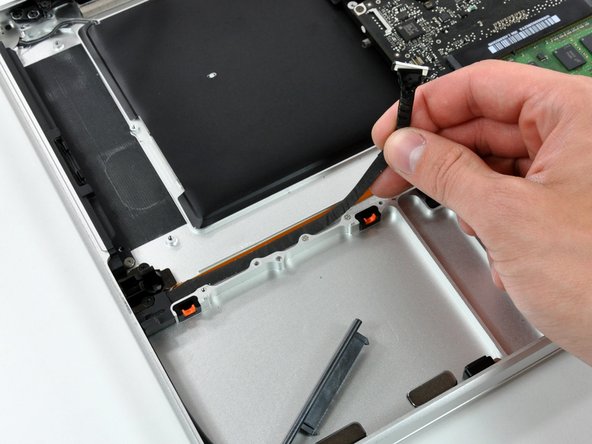
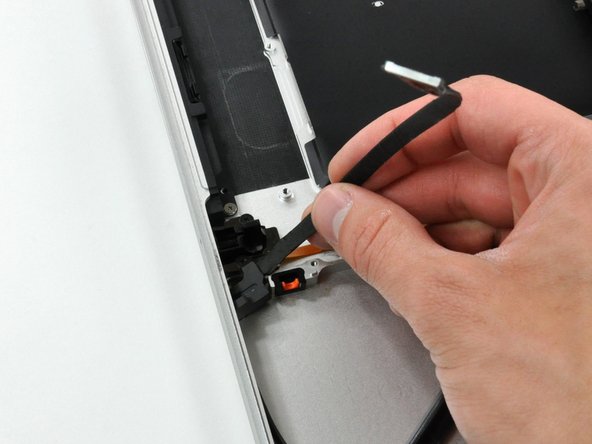
      • Peel the hard drive cable from the adhesive securing it to the upper case, and maneuver the plastic retaining block out of the upper case.

      Add Comment

Conclusion

To reassemble your device, follow these instructions in reverse order.

Cancel: I did not complete this guide.

System

Member since: 09/24/09

2,562 Guides authored

0 Guide Comments

Add Comment

View Statistics:

Past 24 Hours: 0

Past 7 Days: 0

Past 30 Days: 0

All Time: 27