/

MacBook Pro 15" Unibody Mid 2009 Left Fan Replacement

What you need

  1. MacBook Pro 15" Unibody Mid 2009 Left Fan Replacement, MacBook Pro 15" Unibody Mid 2009 Left Fan Replacement: step 1, image 1 of 1
    • Remove the following ten screws securing the lower case to the upper case:

    • Seven 3 mm Phillips screws.

    • Three 13.5 mm Phillips screws.

  2. MacBook Pro 15" Unibody Mid 2009 Left Fan Replacement: step 2, image 1 of 2 MacBook Pro 15" Unibody Mid 2009 Left Fan Replacement: step 2, image 2 of 2
    • Using both hands, lift the lower case near the vent to pop it off two clips securing it to the upper case.

    • Remove the lower case and set it aside.

  3. MacBook Pro 15" Unibody Mid 2009 Left Fan Replacement: step 3, image 1 of 3 MacBook Pro 15" Unibody Mid 2009 Left Fan Replacement: step 3, image 2 of 3 MacBook Pro 15" Unibody Mid 2009 Left Fan Replacement: step 3, image 3 of 3
    • Use the flat end of a spudger to disconnect the left fan connector from the logic board.

    • It is useful to twist the spudger axially from beneath the fan cable wires to release the connector.

    • The fan socket and the fan connector can be seen in the second and third pictures. Be careful not to break the plastic fan socket off the logic board as you use your spudger to lift the fan connector straight up and out of its socket. The layout of the logic board shown in the second picture may look slightly different than your machine but the fan socket is the same.

  4. MacBook Pro 15" Unibody Mid 2009 Left Fan Replacement: step 4, image 1 of 2 MacBook Pro 15" Unibody Mid 2009 Left Fan Replacement: step 4, image 2 of 2
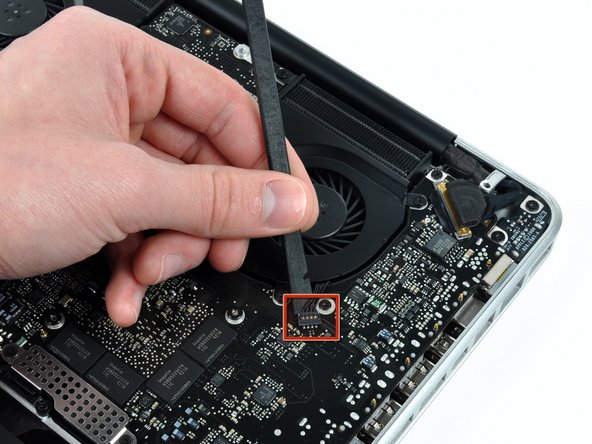
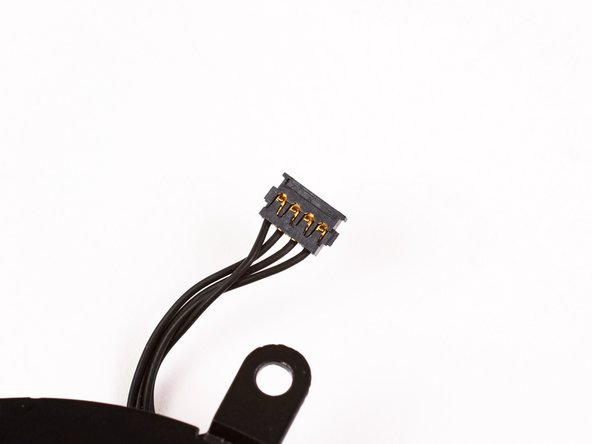
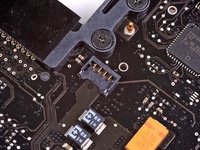
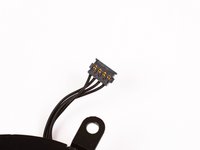
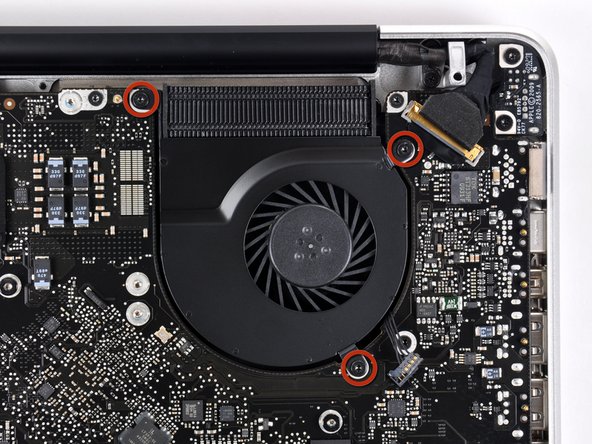
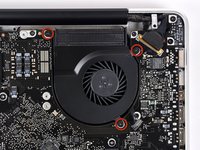
    • Remove three T6 Torx screws securing the left fan to the logic board.

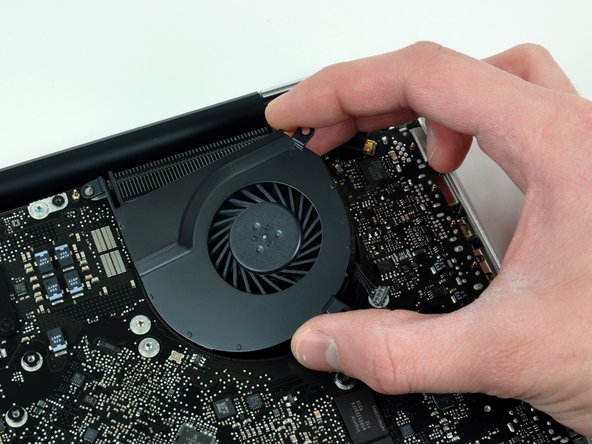
    • Lift the left fan out of the upper case.

Conclusion

To reassemble your device, follow these instructions in reverse order.

System

Member since: 09/24/09

2,562 Guides authored

0 Comments

Add Comment

View Statistics:

Past 24 Hours: 0

Past 7 Days: 0

Past 30 Days: 0

All Time: 0