MacBook Unibody Model A1342 Rear Vent Replacement

What you need

    1. MacBook Unibody Model A1342 Rear Vent Replacement, MacBook Unibody Model A1342 Rear Vent Replacement: step 1, image 1 of 1
      • Remove the eight 4 mm Phillips screws securing the lower case to the MacBook.

      Add Comment

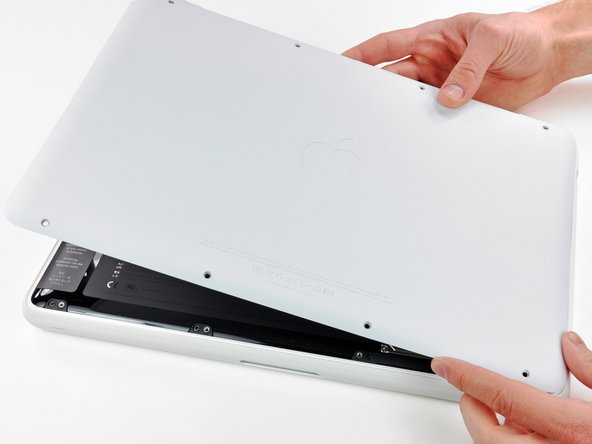
    2. MacBook Unibody Model A1342 Rear Vent Replacement: step 2, image 1 of 3 MacBook Unibody Model A1342 Rear Vent Replacement: step 2, image 2 of 3 MacBook Unibody Model A1342 Rear Vent Replacement: step 2, image 3 of 3
      • The lower case is constructed of rubber-coated aluminum. Do not excessively bend the aluminum during removal, as any permanent deformation will cause tolerance issues after reassembly.

      • Slightly lift the lower case near the vent opening.

      • Continue running your fingers between the lower and upper cases until the upper case pops off its retaining clips.

      • The location of these three clips is shown in the third picture.

      Add Comment

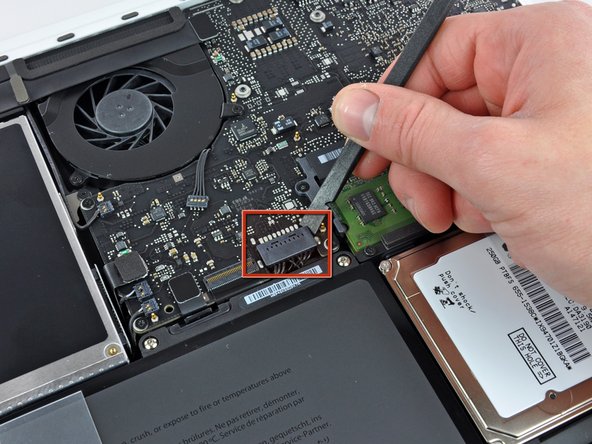
    3. MacBook Unibody Model A1342 Rear Vent Replacement: step 3, image 1 of 1
      • For precautionary purposes, we advise that you disconnect the battery connector from the logic board to avoid any electrical discharge. This step is optional and is not required.

      • Use the flat end of a spudger to lift the battery connector up out of its socket on the logic board.

      • It may be easier to use your fingernails to lift up on both sides of the connector.

      Add Comment

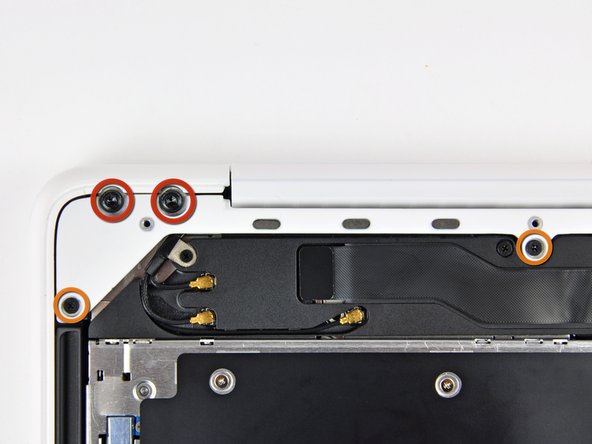
    4. MacBook Unibody Model A1342 Rear Vent Replacement: step 4, image 1 of 1
      • Remove the following screws from the optical drive side of the rear vent:

      • Two 10 mm T8 Torx

      • Two 5.2 mm Phillips

      Add Comment

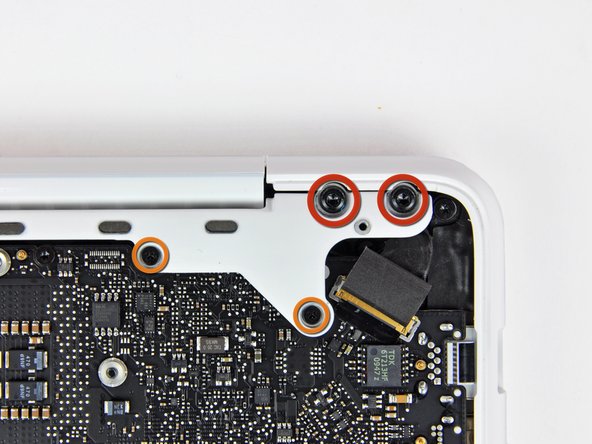
    5. MacBook Unibody Model A1342 Rear Vent Replacement: step 5, image 1 of 1
      • Remove the following screws from the port side of rear vent:

      • Two 10 mm T8 Torx

      • Two 5.2 mm Phillips

      Add Comment

    6. MacBook Unibody Model A1342 Rear Vent Replacement: step 6, image 1 of 1
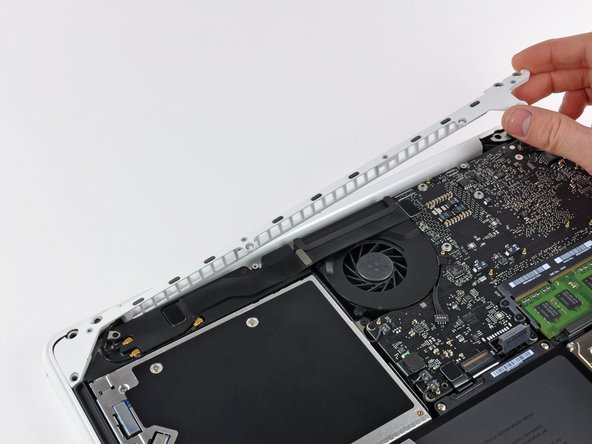
      • Carefully lift the rear vent out of the upper case.

      Add Comment

Conclusion

To reassemble your device, follow these instructions in reverse order.

Cancel: I did not complete this guide.

System

Member since: 09/24/09

2,562 Guides authored

0 Guide Comments

Add Comment

View Statistics:

Past 24 Hours: 0

Past 7 Days: 0

Past 30 Days: 3

All Time: 26