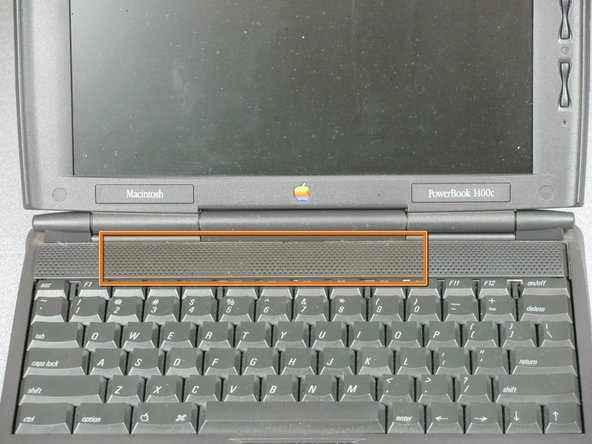
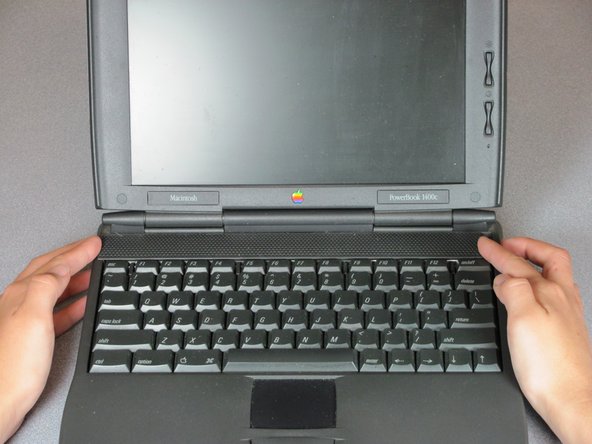
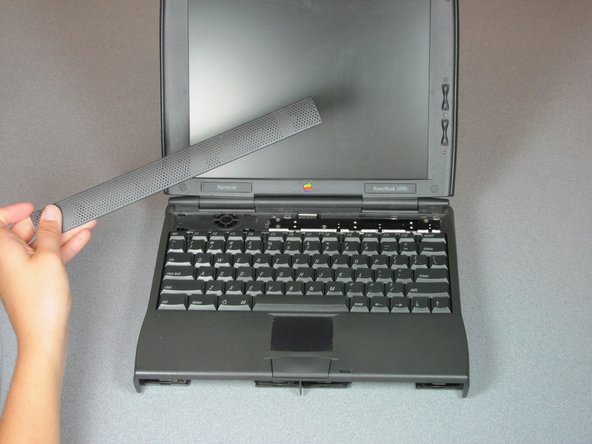
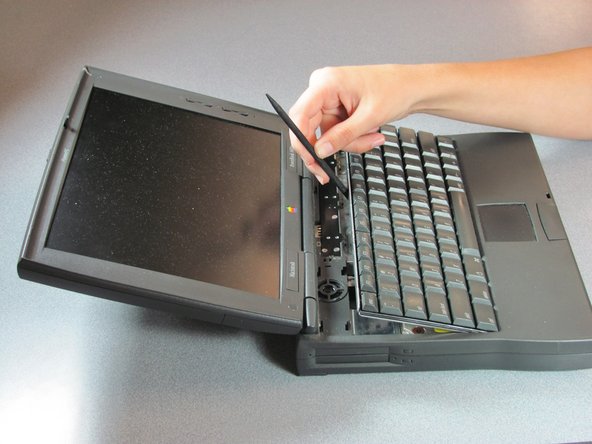
Macintosh PowerBook 1400 Series RAM Replacement

What you need

  1. Macintosh PowerBook 1400 Series RAM Replacement, Macintosh PowerBook 1400 Series RAM Replacement: step 1, image 1 of 1
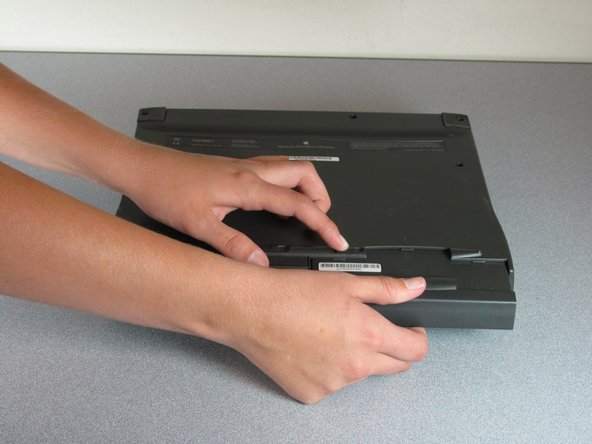
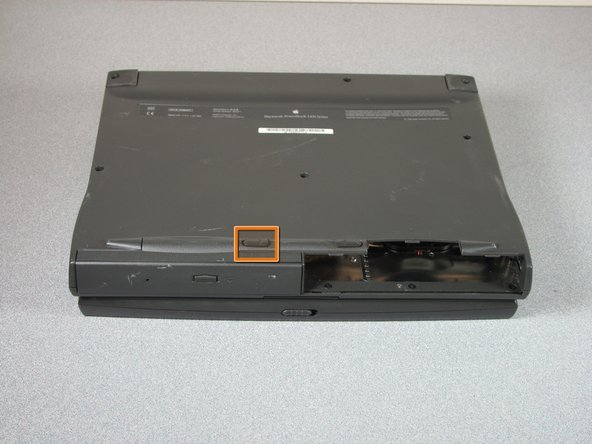
    • On the bottom of the device, locate the battery release latch near the front.

    Add Comment

  2. Macintosh PowerBook 1400 Series RAM Replacement: step 2, image 1 of 1
    • In order to release the batter, slide the latch to the left.

    Add Comment

  3. Macintosh PowerBook 1400 Series RAM Replacement: step 3, image 1 of 1
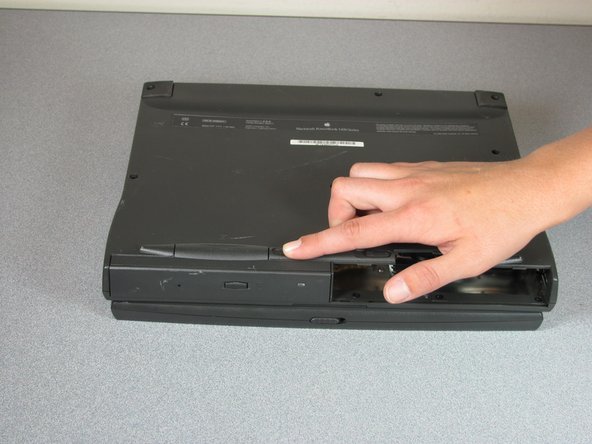
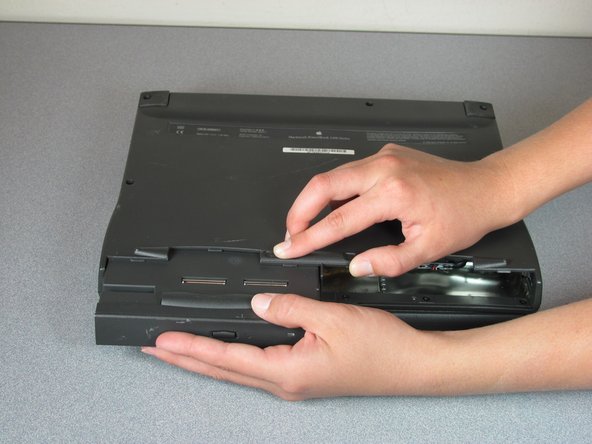
    • While still holding the latch, grasp the battery and gently pull on the battery enclosure until it begins to slide out from the front of the device.

    • Place the battery aside

    Add Comment

  4. Macintosh PowerBook 1400 Series RAM Replacement: step 4, image 1 of 1
    • Once you remove the battery, identify CD-ROM Drive latch.

    Add Comment

  5. Macintosh PowerBook 1400 Series RAM Replacement: step 5, image 1 of 1
    • Pull latch to the right.

    Add Comment

  6. Macintosh PowerBook 1400 Series RAM Replacement: step 6, image 1 of 1
    • While still pulling the latch, pull the CD-ROM Drive out.

    • You have now removed the CD-ROM Drive.

    Add Comment

  7. Macintosh PowerBook 1400 Series RAM Replacement: step 7, image 1 of 1
    • Locate speaker cover.

    Add Comment

  8. Macintosh PowerBook 1400 Series RAM Replacement: step 8, image 1 of 1
    • Grab each end of cover and slide left.

    Add Comment

  9. Macintosh PowerBook 1400 Series RAM Replacement: step 9, image 1 of 1
    • Pull up speaker cover and remove.

    Add Comment

  10. Macintosh PowerBook 1400 Series RAM Replacement: step 10, image 1 of 1
    • Using a spudger lift keyboard up from back with spudger.

    Add Comment

  11. Macintosh PowerBook 1400 Series RAM Replacement: step 11, image 1 of 1
    • Pull up until only ribbon cable remains attached.

    Add Comment

  12. Macintosh PowerBook 1400 Series RAM Replacement: step 12, image 1 of 1
    • Lift up and tilt forward keyboard.

    Add Comment

  13. Macintosh PowerBook 1400 Series RAM Replacement: step 13, image 1 of 1
    • Locate screws on heat sink.

    Add Comment

  14. Macintosh PowerBook 1400 Series RAM Replacement: step 14, image 1 of 1
    • Use Philips #1 screwdriver to remove screws from heat sink.

    Add Comment

  15. Macintosh PowerBook 1400 Series RAM Replacement: step 15, image 1 of 1
    • Lift heat sink from back.

    Add Comment

  16. Macintosh PowerBook 1400 Series RAM Replacement: step 16, image 1 of 1
    • Remove heat sink.

    Add Comment

  17. Macintosh PowerBook 1400 Series RAM Replacement: step 17, image 1 of 1
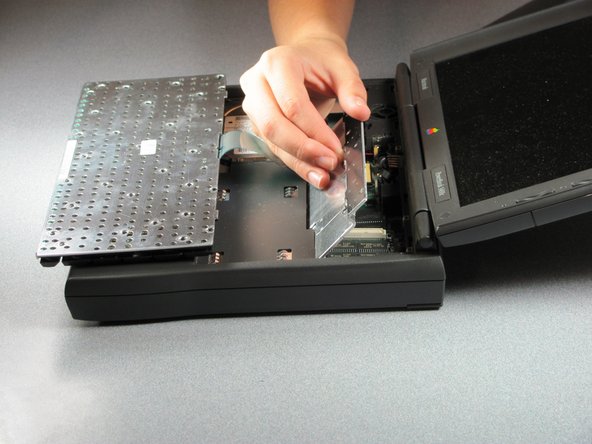
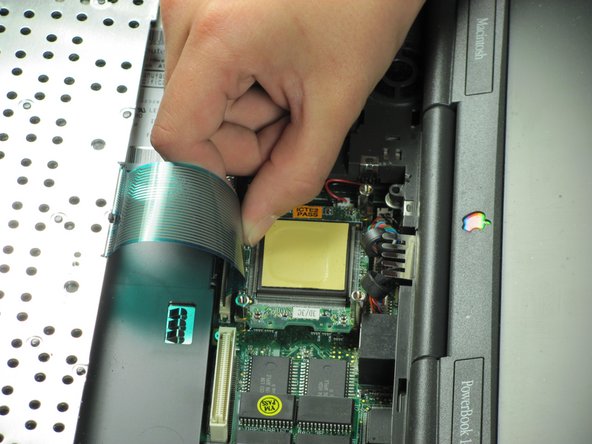
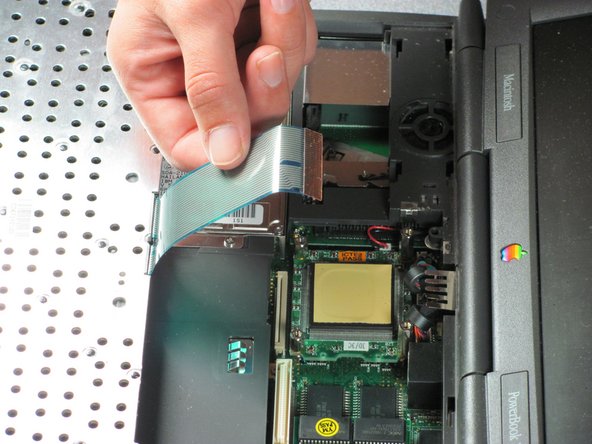
    • Gently pull up beige ribbon lock on each side to unlock ribbon cable from its connector. The lock only pulls up a short distance and the cable will be free.

    Add Comment

  18. Macintosh PowerBook 1400 Series RAM Replacement: step 18, image 1 of 1
    • Remove ribbon cable.

    Add Comment

  19. Macintosh PowerBook 1400 Series RAM Replacement: step 19, image 1 of 1
    • Completely remove keyboard.

    Add Comment

  20. Macintosh PowerBook 1400 Series RAM Replacement: step 20, image 1 of 1
    • Identify RAM Memory stick

    • These are the upgradeable RAM Memory sticks, they must be removed first

    Add Comment

  21. Macintosh PowerBook 1400 Series RAM Replacement: step 21, image 1 of 1
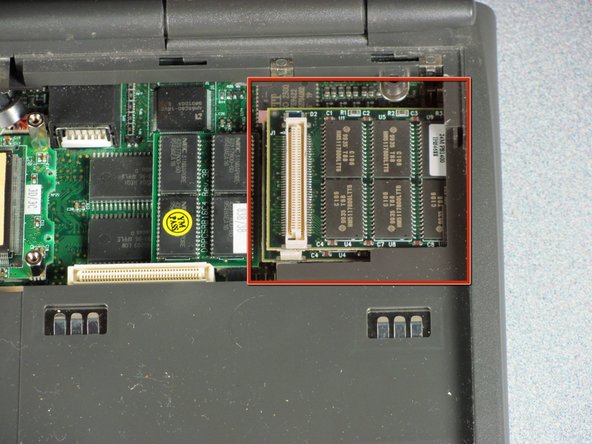
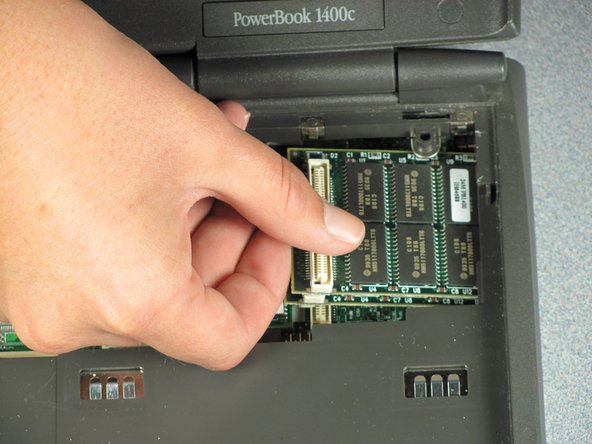
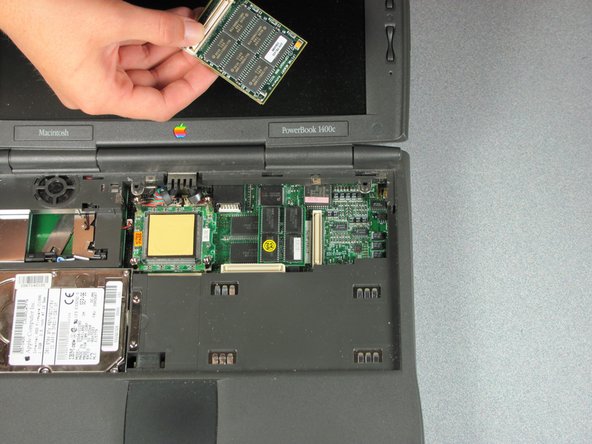
    • Gently grasp the ram on the far end as shown in the picture and then pull up and away from the right side of the computer

    Add Comment

  22. Macintosh PowerBook 1400 Series RAM Replacement: step 22, image 1 of 1
    • Remove the upgradeable RAM stick

    • If the upgradeable RAM stick is all you are repairing you can end the guide here, however to remove the factory installed RAM please continue

    Add Comment

  23. Macintosh PowerBook 1400 Series RAM Replacement: step 23, image 1 of 1
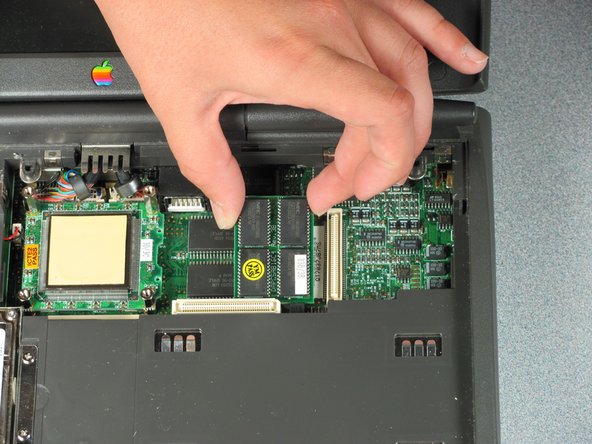
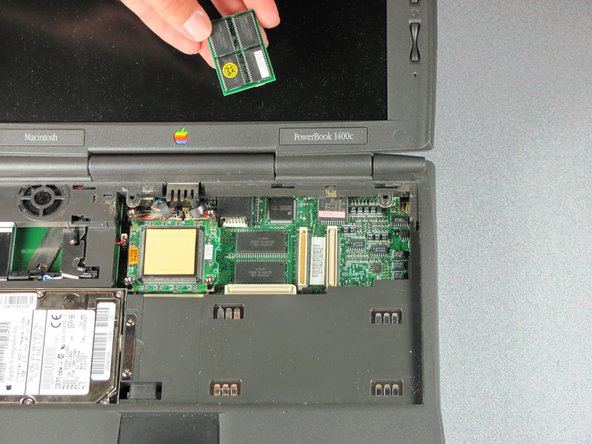
    • Gently grasp the factory installed RAM by grabbing each end as shown in the picture and pull the stick directly up

    Add Comment

  24. Macintosh PowerBook 1400 Series RAM Replacement: step 24, image 1 of 1
    • Remove the factory installed RAM memory module

    Add Comment

Conclusion

To reassemble your device, follow these instructions in reverse order.

Cancel: I did not complete this guide.

System

Member since: 09/24/09

2,562 Guides authored

0 Guide Comments

Add Comment

View Statistics:

Past 24 Hours: 0

Past 7 Days: 0

Past 30 Days: 5

All Time: 41