/

Nikon Coolpix S220 Lens Replacement

What you need

  1. Nikon Coolpix S220 Lens Replacement, Nikon Coolpix S220 Lens Replacement: step 1, image 1 of 1
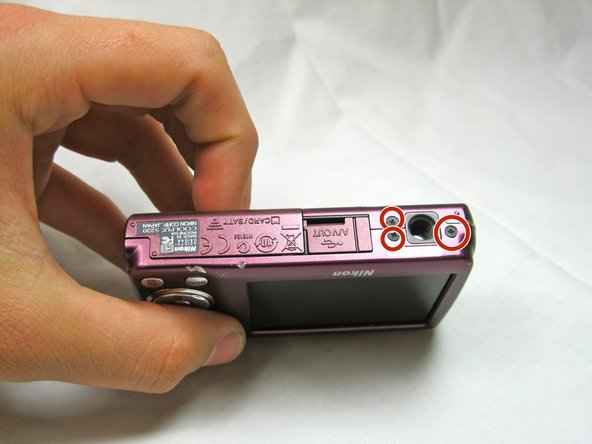
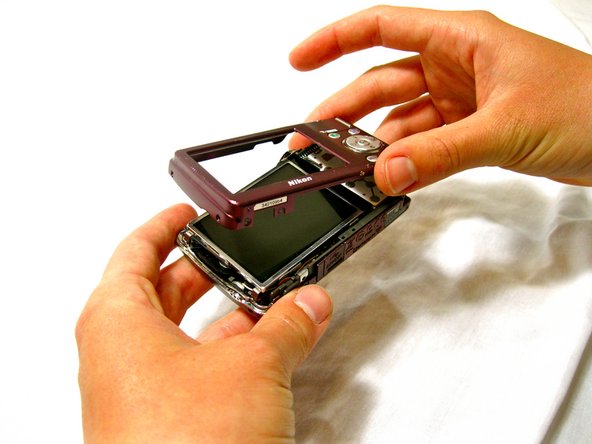
    • Remove the two 2.8 mm screws on the left side of the camera.

  2. Nikon Coolpix S220 Lens Replacement: step 2, image 1 of 1
    • Remove the four 2.8 mm screws on the right side of the camera.

  3. Nikon Coolpix S220 Lens Replacement: step 3, image 1 of 1
    • Remove the three 4.1 mm screws on the bottom of the camera.

  4. Nikon Coolpix S220 Lens Replacement: step 4, image 1 of 1
    • Gently lift the rear cover from the camera.

  5. Nikon Coolpix S220 Lens Replacement: step 5, image 1 of 1
    • Gently lift the screen out of its place.

    • You will need to hold the screen slightly above the camera because it will still be attached to the camera by an orange ribbon cable.

  6. Nikon Coolpix S220 Lens Replacement: step 6, image 1 of 1
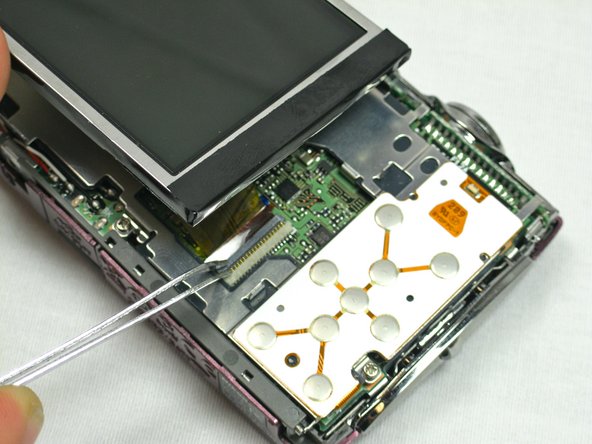
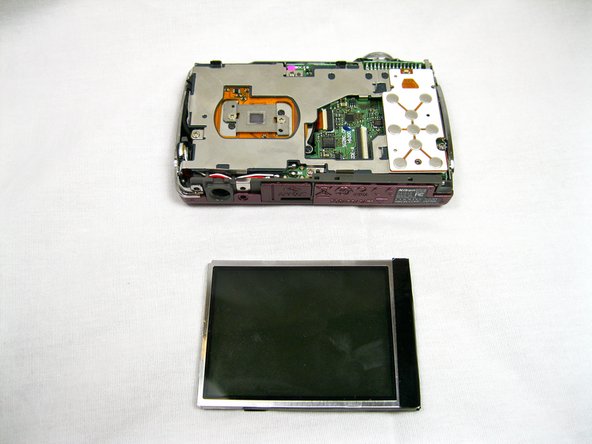
    • Use the tweezers to lift the ZIF connector which is holding the ribbon cables that connect the LCD screen to the motherboard.

  7. Nikon Coolpix S220 Lens Replacement: step 7, image 1 of 1
    • Slowly pull the screen from the camera.

  8. Nikon Coolpix S220 Lens Replacement: step 8, image 1 of 1
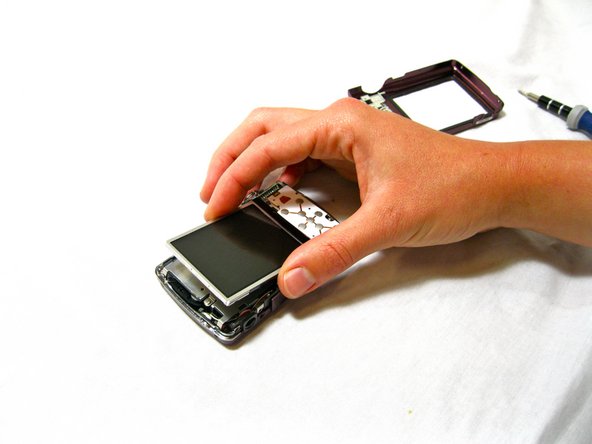
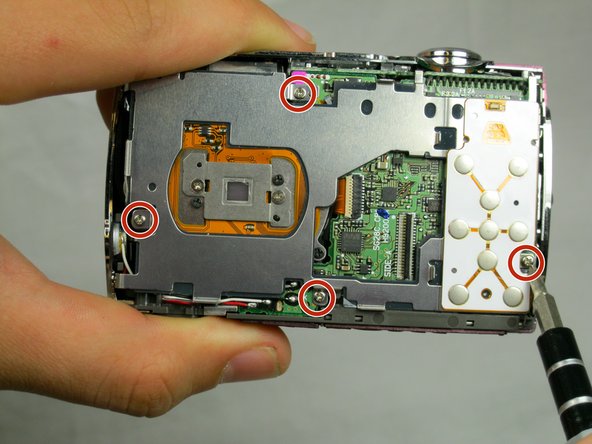
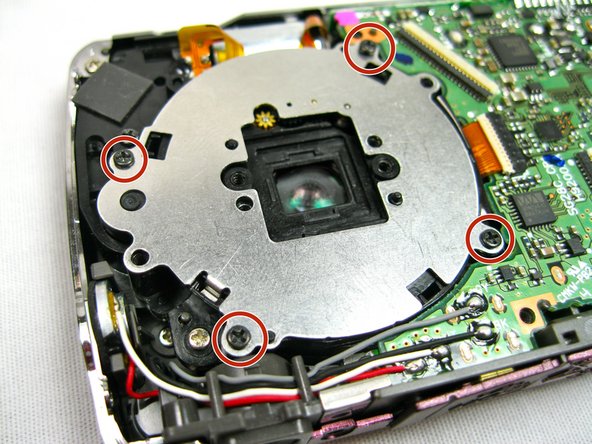
    • Remove the four 3.8 mm screws located near the bottom right and top left of the LCD base plate.

  9. Nikon Coolpix S220 Lens Replacement: step 9, image 1 of 1
    • Lift up silver LCD base plate

  10. Nikon Coolpix S220 Lens Replacement: step 10, image 1 of 2 Nikon Coolpix S220 Lens Replacement: step 10, image 2 of 2
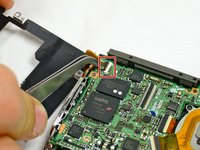
    • Using tweezers, lift up the retaining flap on the ZIF connector securing the button panel ribbon cable.

    • Slide the button panel ribbon cable out of its socket on the motherboard.

  11. Nikon Coolpix S220 Lens Replacement: step 11, image 1 of 1
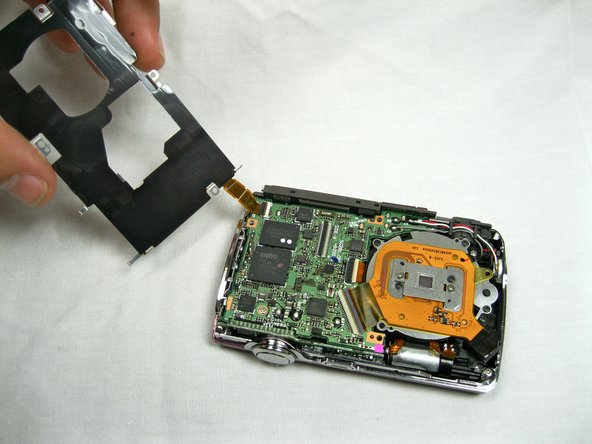
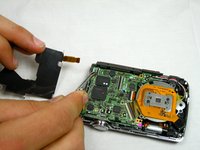
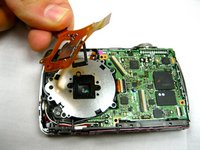
    • The black tape connecting it to the camera will lift up and allow you to release the left side of the rectangular plate.

  12. Nikon Coolpix S220 Lens Replacement: step 12, image 1 of 1
    • Remove the two 3.1 mm screws on the orange rectangular plate over the lens.

  13. Nikon Coolpix S220 Lens Replacement: step 13, image 1 of 2 Nikon Coolpix S220 Lens Replacement: step 13, image 2 of 2
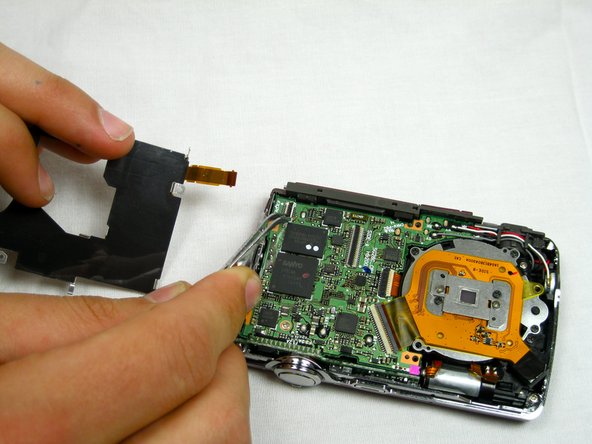
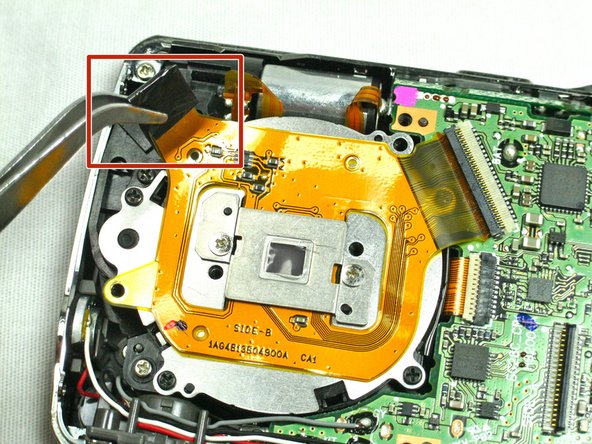
    • Use tweezers to lift up the retaining flap on the ribbon cable's ZIF connector.

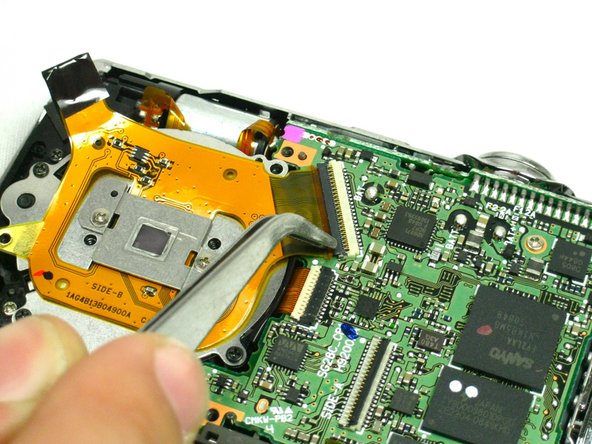
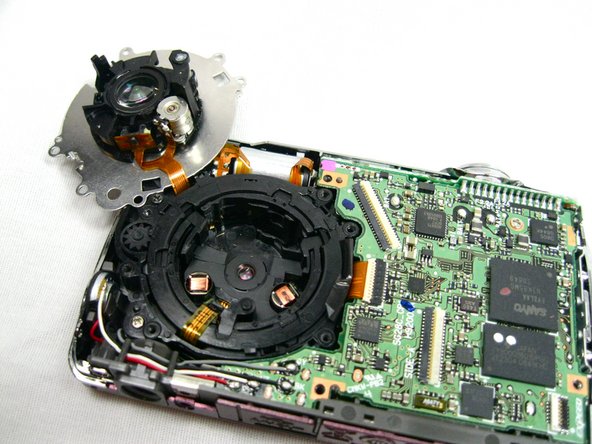
    • Gently pull the ribbon cable from its socket on the motherboard and remove the plate assembly.

  14. Nikon Coolpix S220 Lens Replacement: step 14, image 1 of 1
    • Remove four 3.4 mm black screws from around the perimeter of the silver plate.

  15. Nikon Coolpix S220 Lens Replacement: step 15, image 1 of 1
    • Carefully pull out the plate the attached lens.

    • The lens will not completely be removed, but it will be accessible for cleaning.

Conclusion

To reassemble your device, follow these instructions in reverse order.

System

Member since: 09/24/09

2,562 Guides authored

0 Comments

Add Comment

View Statistics:

Past 24 Hours: 0

Past 7 Days: 0

Past 30 Days: 0

All Time: 1