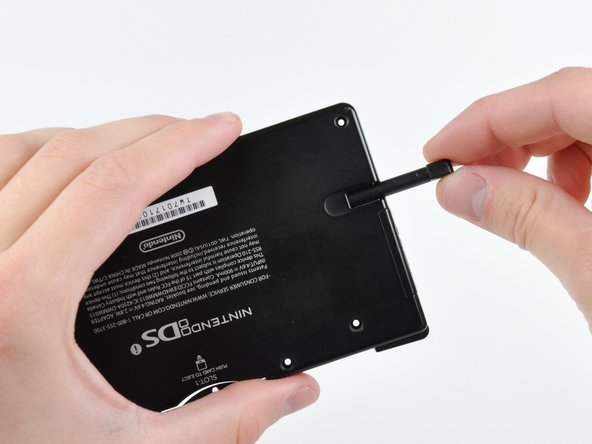
/

Nintendo DSi Stylus Housing Replacement

What you need

  1. Nintendo DSi Stylus Housing Replacement, Nintendo DSi Stylus Housing Replacement: step 1, image 1 of 2 Nintendo DSi Stylus Housing Replacement, Nintendo DSi Stylus Housing Replacement: step 1, image 2 of 2
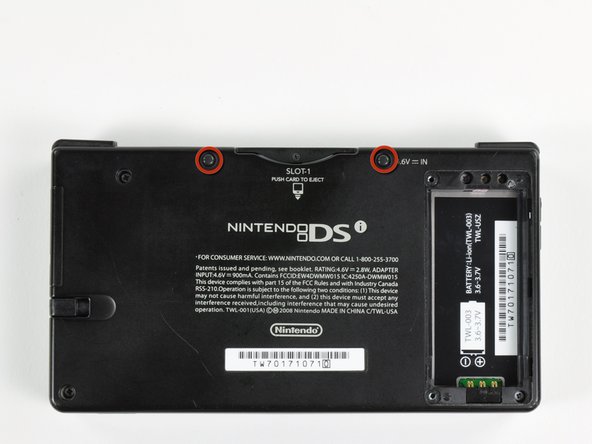
    • Unscrew the two Phillips screws securing the battery cover to the lower case.

    • The screws remain captive to the battery cover.

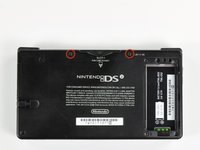
    • Grasp the battery cover and lift out of the lower case.

  2. Nintendo DSi Stylus Housing Replacement: step 2, image 1 of 2 Nintendo DSi Stylus Housing Replacement: step 2, image 2 of 2
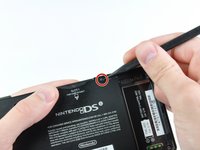
    • Wedge the edge of a spudger in between the top of the battery and its lower case housing and pry upwards to dislodge the battery.

    • Grasp the battery and remove it from the DSi.

  3. Nintendo DSi Stylus Housing Replacement: step 3, image 1 of 2 Nintendo DSi Stylus Housing Replacement: step 3, image 2 of 2
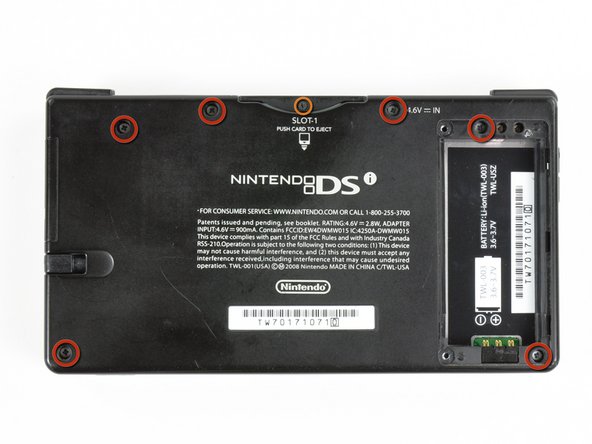
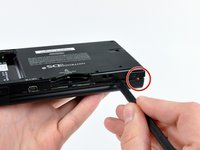
    • Two screws are hidden underneath two rubber feet highlighted in red.

    • Use the tip of a spudger to pry the rubber feet out of the lower case.

  4. Nintendo DSi Stylus Housing Replacement: step 4, image 1 of 1
    • Remove the following screws securing the lower case to the body of the DSi:

    • Six 5.2 mm Phillips screws.

    • One 2.7 mm Phillips screw.

  5. Nintendo DSi Stylus Housing Replacement: step 5, image 1 of 3 Nintendo DSi Stylus Housing Replacement: step 5, image 2 of 3 Nintendo DSi Stylus Housing Replacement: step 5, image 3 of 3
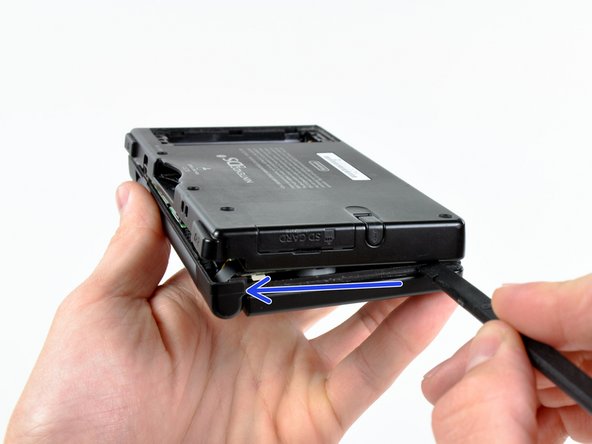
    • Insert the spudger in between the lower casing and lower panel near the top right corner of the DSi.

    • Carefully run the spudger along the edge of the outer casing, creating an opening between the body and the casing.

    • Continue running the spudger around the body of the DSi until the majority of the lower case has been separated.

  6. Nintendo DSi Stylus Housing Replacement: step 6, image 1 of 2 Nintendo DSi Stylus Housing Replacement: step 6, image 2 of 2
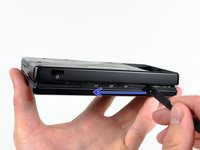
    • Carefully lift the lower casing from its bottom edge.

    • The lower case is still attached to the motherboard by the volume and SD board cable highlighted in red. Do not try to completely remove the lower case of the DSi yet.

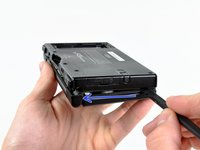
    • Pry the volume and SD board cable up from its socket on the motherboard with the flat edge of a screwdriver.

    • once the cable, highlighted in the orange box, is completely removed then you may take off the entire outer casing.

  7. Nintendo DSi Stylus Housing Replacement: step 7, image 1 of 1
    • Pull the stylus straight out its housing and remove it from the rear case.

  8. Nintendo DSi Stylus Housing Replacement: step 8, image 1 of 1
    • Remove the five 3.9 mm Phillips screws securing the stylus holder to the rear case.

  9. Nintendo DSi Stylus Housing Replacement: step 9, image 1 of 2 Nintendo DSi Stylus Housing Replacement: step 9, image 2 of 2
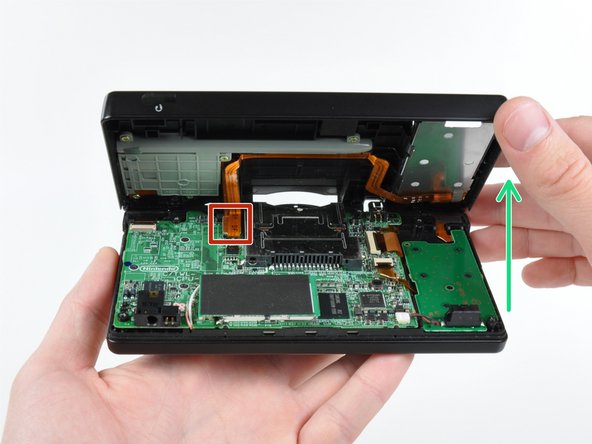
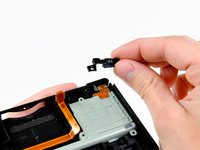
    • Lift and remove the left plastic protector from the DSi's rear case.

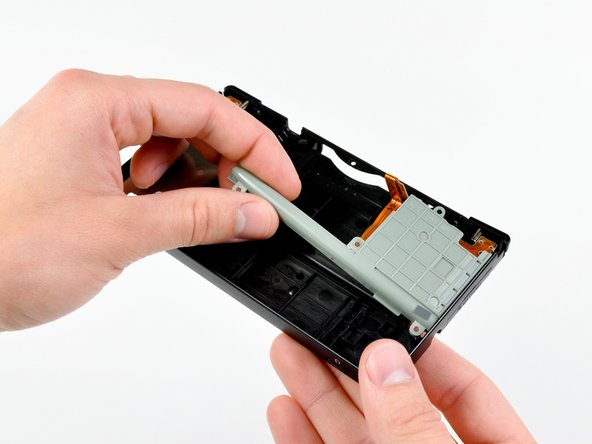
    • Grasp the stylus holder from the left side and lift upwards to remove it from the DSi.

Conclusion

To reassemble your device, follow these instructions in reverse order.

System

Member since: 09/24/09

2,562 Guides authored

0 Comments

Add Comment

View Statistics:

Past 24 Hours: 0

Past 7 Days: 0

Past 30 Days: 0

All Time: 2