Nintendo DSi XL Wi-Fi Antenna Replacement

What you need

    1. Nintendo DSi XL Wi-Fi Antenna Replacement, Nintendo DSi XL Wi-Fi Antenna Replacement: step 1, image 1 of 2 Nintendo DSi XL Wi-Fi Antenna Replacement, Nintendo DSi XL Wi-Fi Antenna Replacement: step 1, image 2 of 2
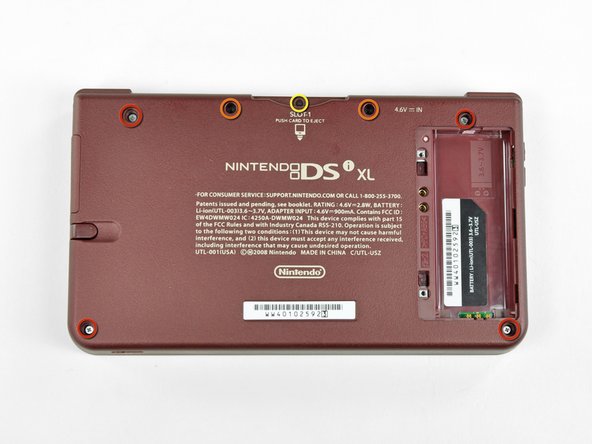
      • Remove the two Phillips screws securing the battery cover to the back of the handheld console.

      • Lift the battery cover off the back of the DSi XL.

      Add Comment

    2. Nintendo DSi XL Wi-Fi Antenna Replacement: step 2, image 1 of 1
      • Lift the battery from the DSi XL.

      Add Comment

    3. Nintendo DSi XL Wi-Fi Antenna Replacement: step 3, image 1 of 3 Nintendo DSi XL Wi-Fi Antenna Replacement: step 3, image 2 of 3 Nintendo DSi XL Wi-Fi Antenna Replacement: step 3, image 3 of 3
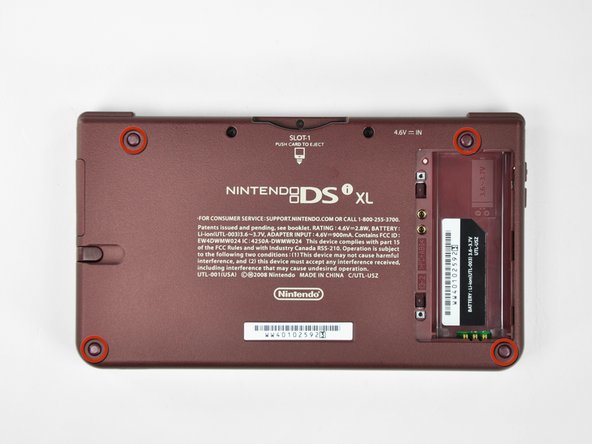
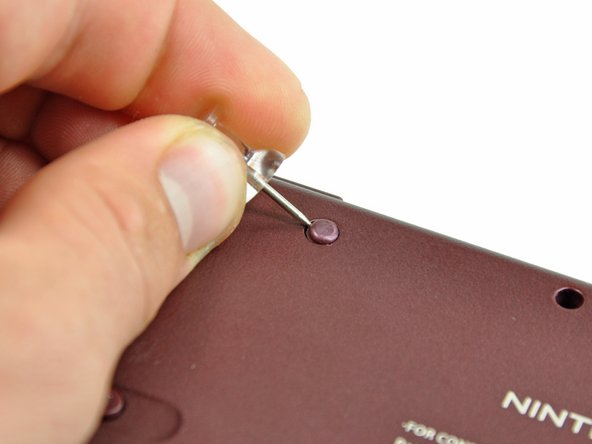
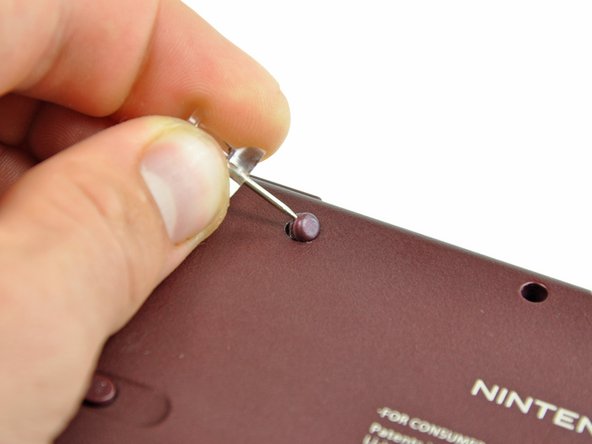
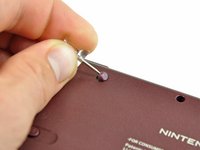
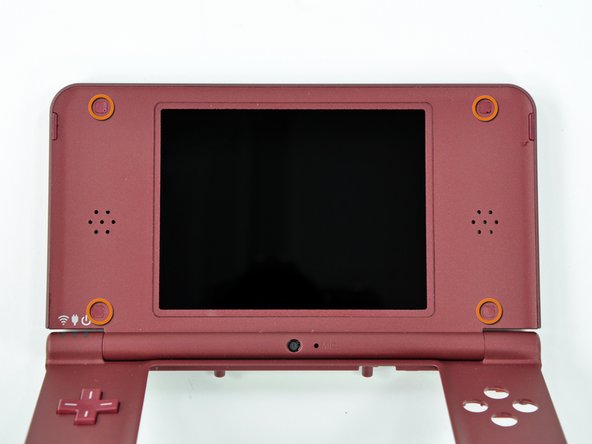
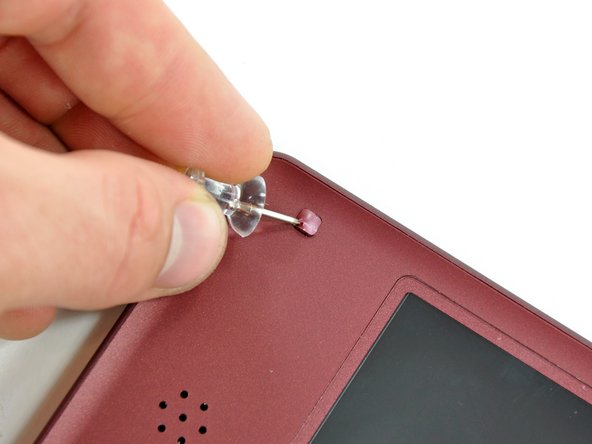
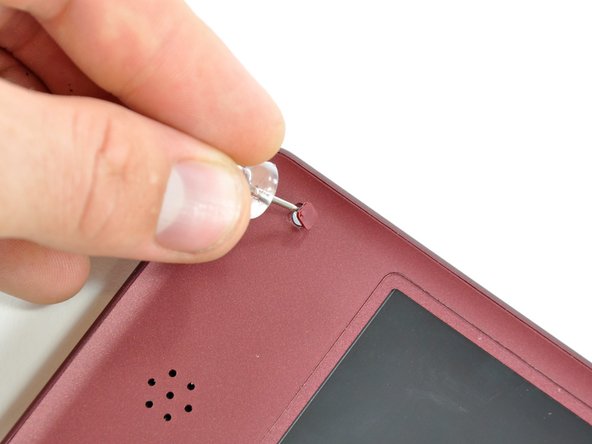
      • Remove the four rubber screw covers on the lower case by prying them up with a push pin.

      Add Comment

    4. Nintendo DSi XL Wi-Fi Antenna Replacement: step 4, image 1 of 1
      • Remove the following seven Phillips screws that secure the lower case to the rest of the DSi XL:

      • Four silver 5.3 mm screws

      • Two black 5.3 mm screws

      • One black 2.5 mm screw

      Add Comment

    5. Nintendo DSi XL Wi-Fi Antenna Replacement: step 5, image 1 of 3 Nintendo DSi XL Wi-Fi Antenna Replacement: step 5, image 2 of 3 Nintendo DSi XL Wi-Fi Antenna Replacement: step 5, image 3 of 3
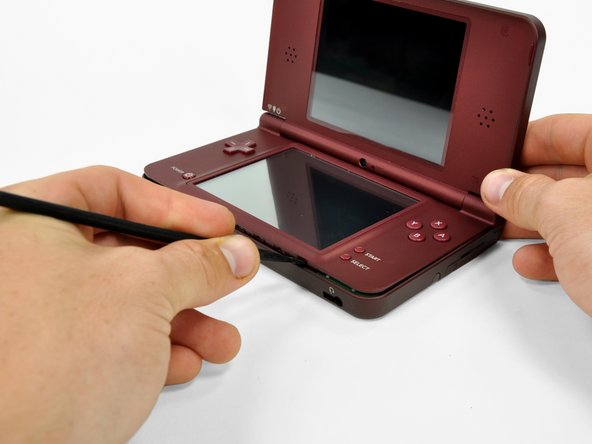
      • Turn the DSi XL over, and open the display.

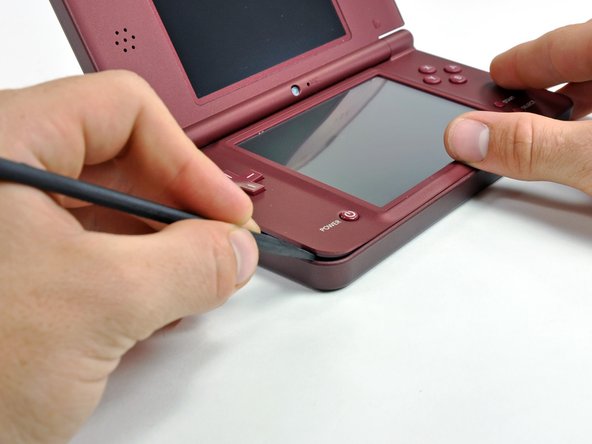
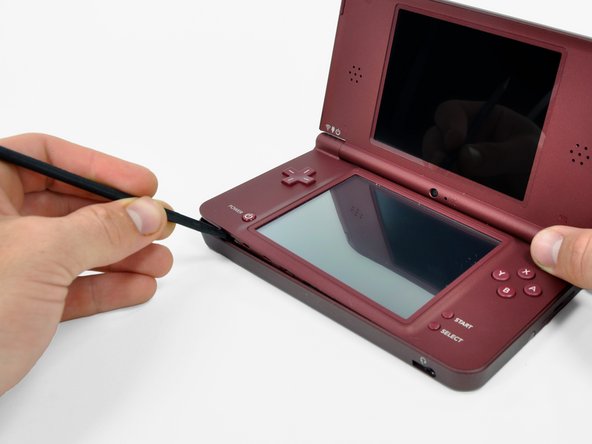
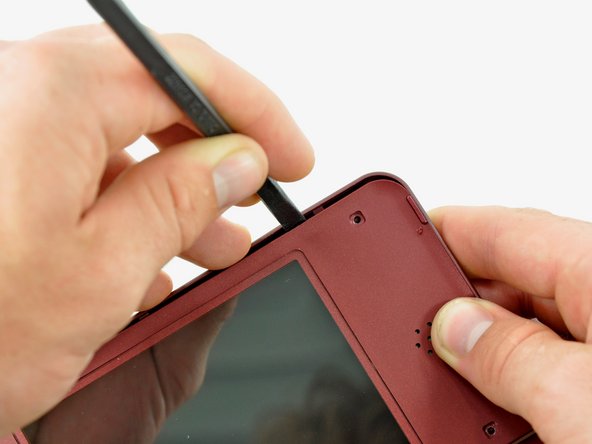
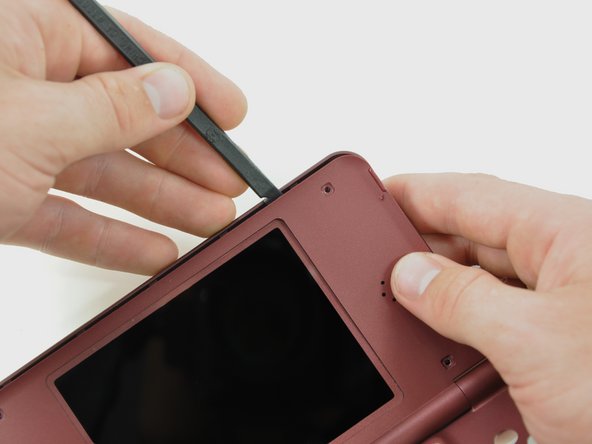
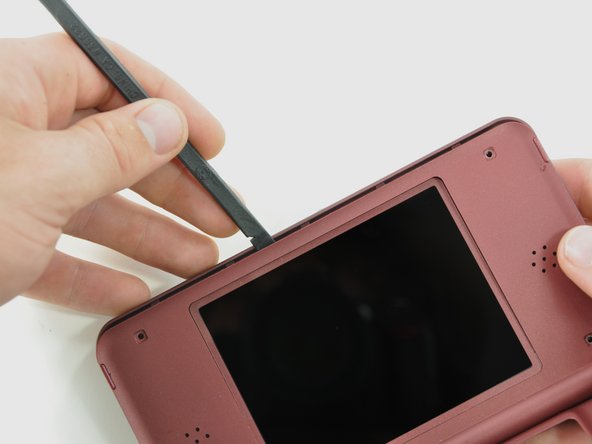
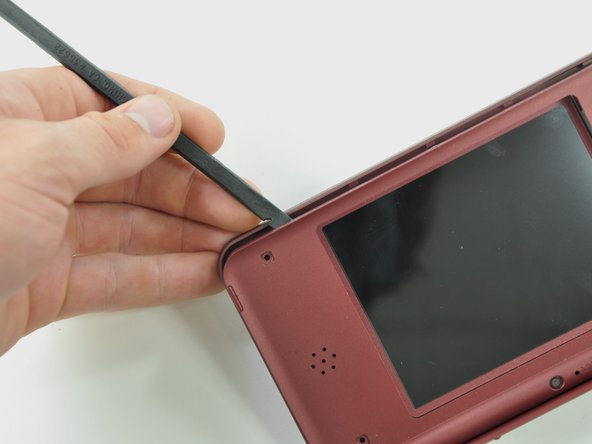
      • Insert a spudger between the upper and lower case at the bottom left corner of the DSi.

      • Slide the spudger along the bottom edge of the upper case to release the latches securing the upper case to the lower case.

      Add Comment

    6. Nintendo DSi XL Wi-Fi Antenna Replacement: step 6, image 1 of 2 Nintendo DSi XL Wi-Fi Antenna Replacement: step 6, image 2 of 2
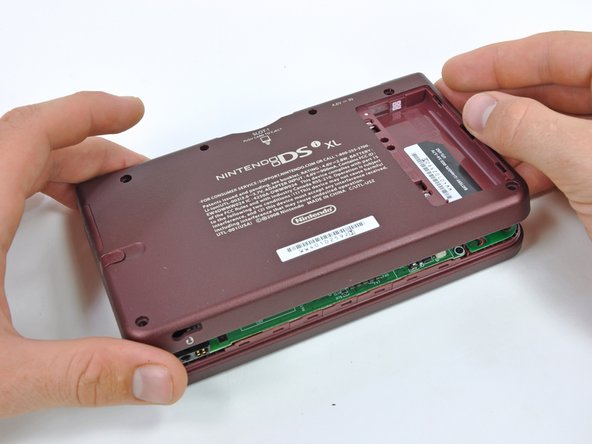
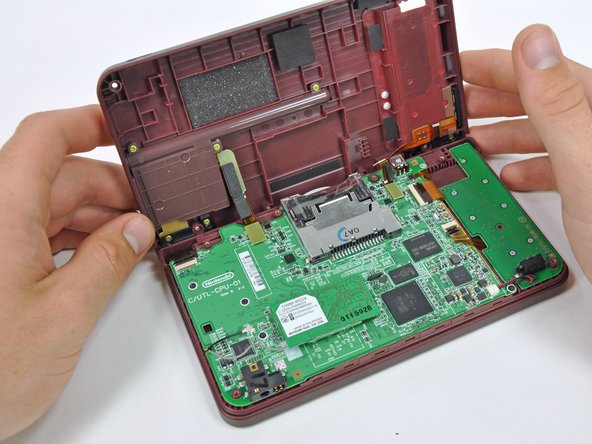
      • Close the display and turn the DSi XL over.

      • Lift the lower case from the front edge.

      • Rotate the lower case away from the DSi.

      • The lower case cannot be completely removed yet, since it is still connected to the motherboard.

      Add Comment

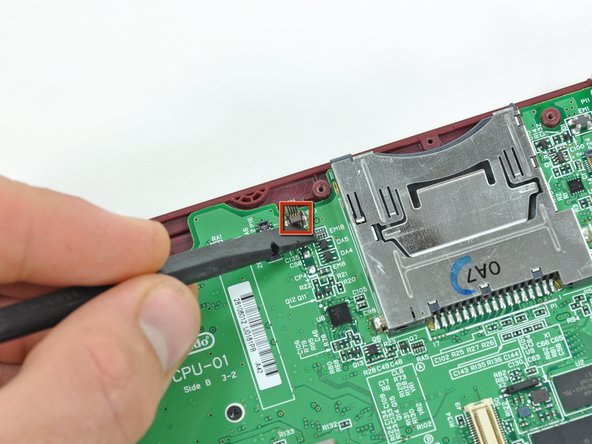
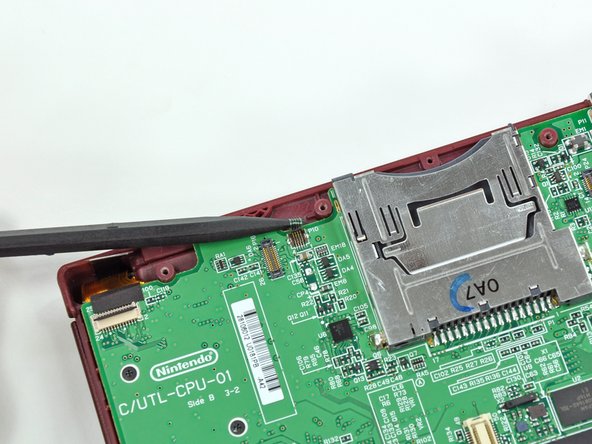
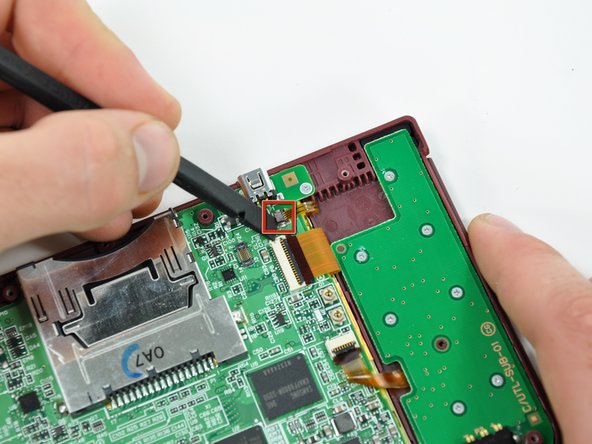
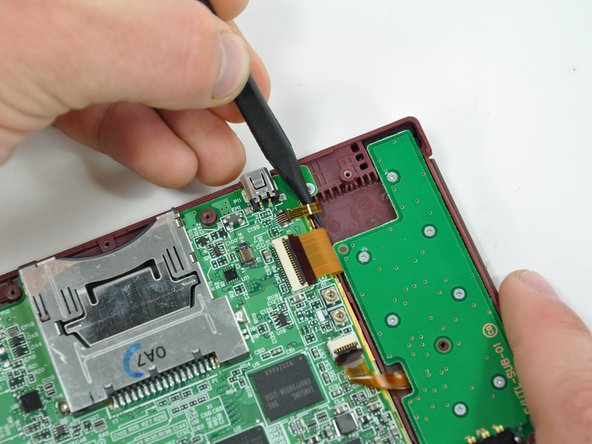
    7. Nintendo DSi XL Wi-Fi Antenna Replacement: step 7, image 1 of 2 Nintendo DSi XL Wi-Fi Antenna Replacement: step 7, image 2 of 2
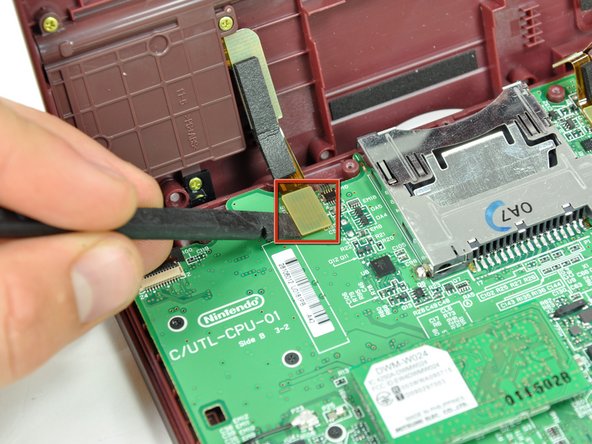
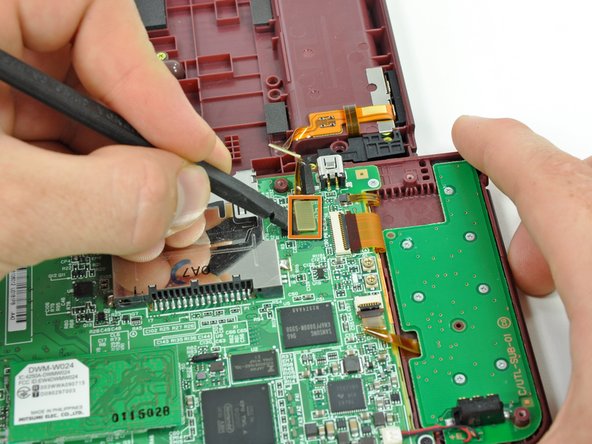
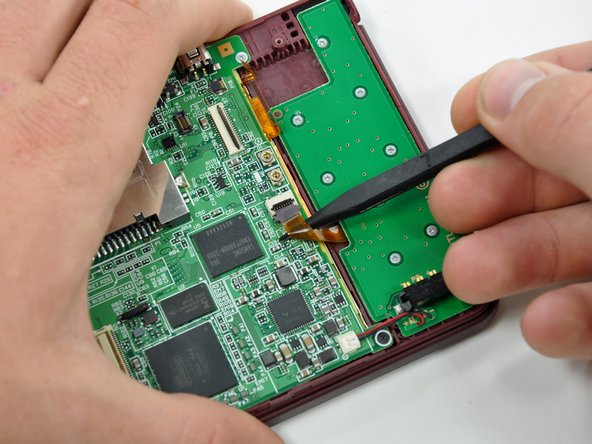
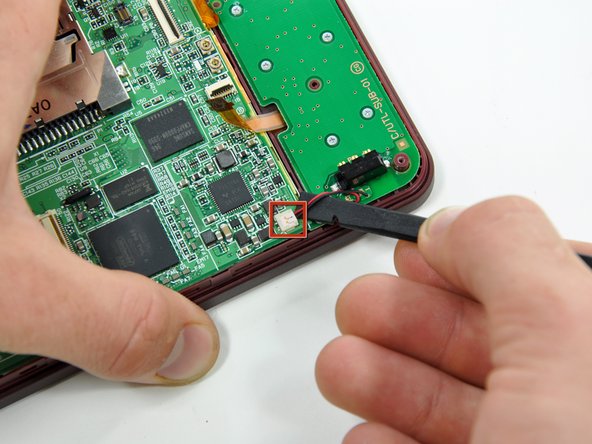
      • Using a spudger, pry the SD card/right shoulder button connector off its socket.

      • Pry the volume button/left shoulder button connector off its socket on the motherboard with a spudger.

      Add Comment

    8. Nintendo DSi XL Wi-Fi Antenna Replacement: step 8, image 1 of 1
      • Use a spudger to pry the microphone cable off the motherboard.

      • Pry from underneath the cable.

      Add Comment

    9. Nintendo DSi XL Wi-Fi Antenna Replacement: step 9, image 1 of 2 Nintendo DSi XL Wi-Fi Antenna Replacement: step 9, image 2 of 2
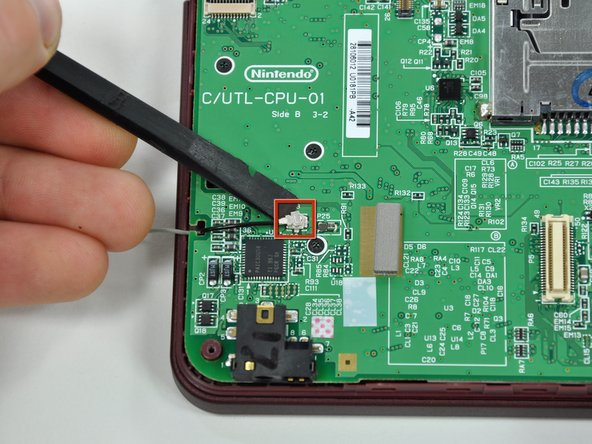
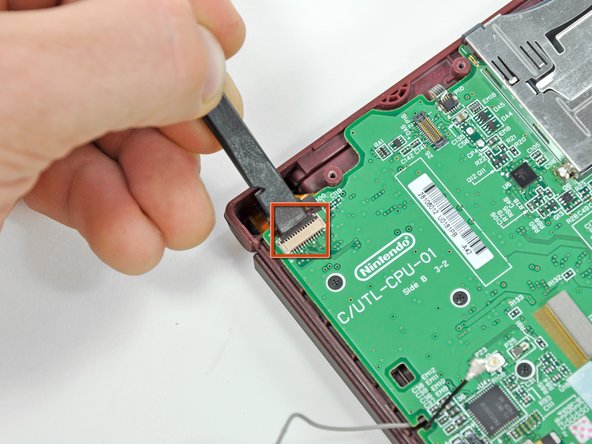
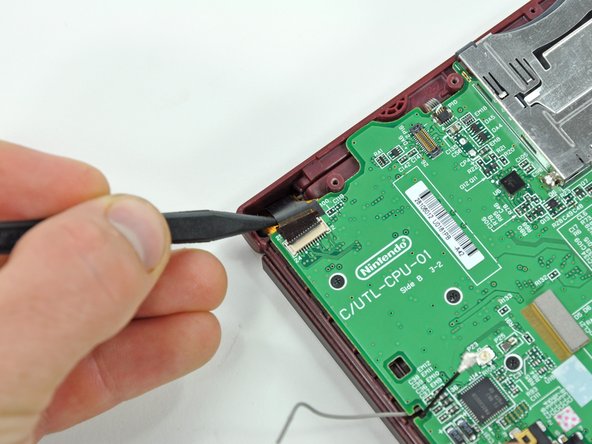
      • Using the flat end of a spudger, flip up the retaining flap on the camera ribbon ZIF connector.

      • Use the pointed end of a spudger to pull the camera ribbon from the ZIF connector.

      Add Comment

    10. Nintendo DSi XL Wi-Fi Antenna Replacement: step 10, image 1 of 2 Nintendo DSi XL Wi-Fi Antenna Replacement: step 10, image 2 of 2
      • Using the flat end of a spudger, flip up the retaining flap on the touchscreen cable ZIF connector.

      • With the pointed end of the spudger, pull the touchscreen cable from its connector on the motherboard.

      Add Comment

    11. Nintendo DSi XL Wi-Fi Antenna Replacement: step 11, image 1 of 2 Nintendo DSi XL Wi-Fi Antenna Replacement: step 11, image 2 of 2
      • Using the flat end of a spudger, flip up the retaining flap on the backlight cable ZIF connector.

      • With the pointed end of the spudger, pull the backlight cable from its connector on the motherboard.

      Add Comment

    12. Nintendo DSi XL Wi-Fi Antenna Replacement: step 12, image 1 of 2 Nintendo DSi XL Wi-Fi Antenna Replacement: step 12, image 2 of 2
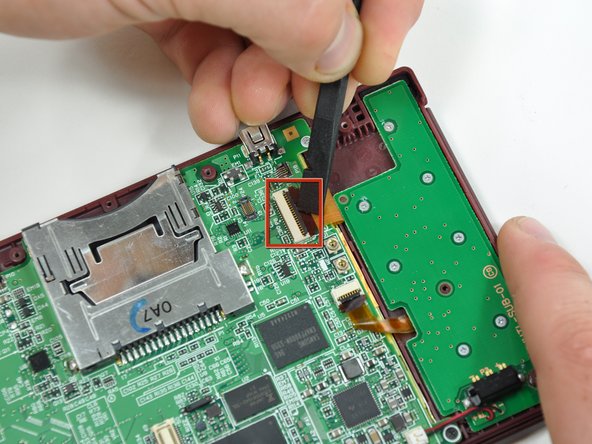
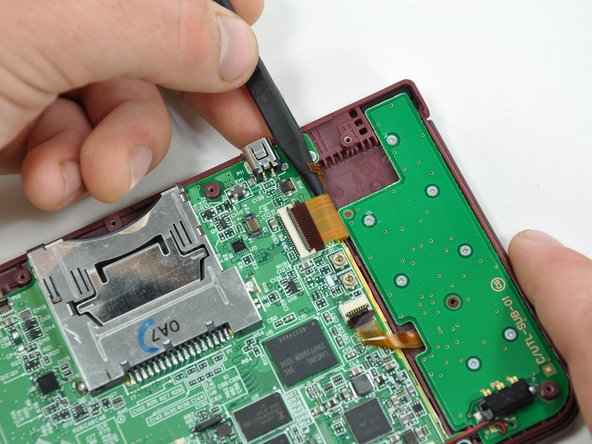
      • Using the flat end of a spudger, flip up the retaining flap on the lower display data cable ZIF connector.

      • With the pointed end of the spudger, pull the lower display data cable from its connector on the motherboard.

      Add Comment

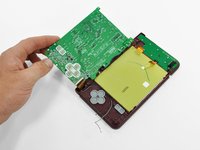
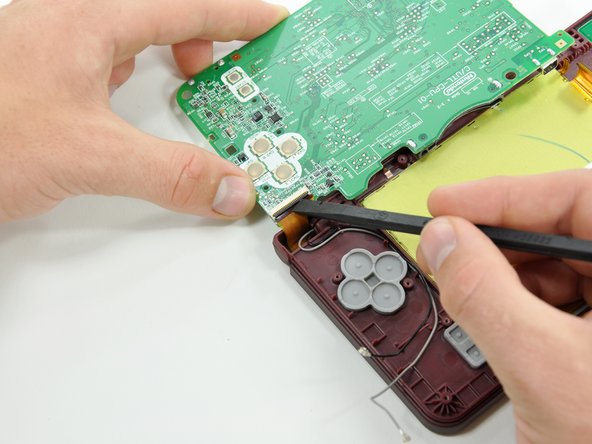
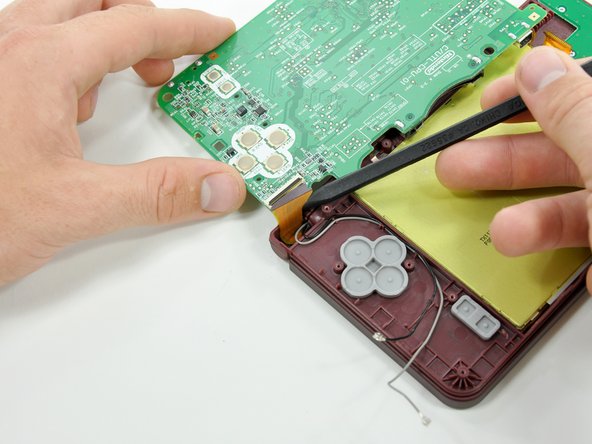
    13. Nintendo DSi XL Wi-Fi Antenna Replacement: step 13, image 1 of 2 Nintendo DSi XL Wi-Fi Antenna Replacement: step 13, image 2 of 2
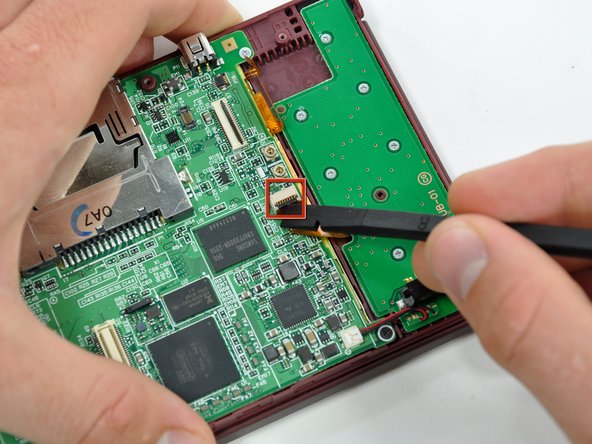
      • Using the flat end of a spudger, flip up the retaining flap on the ZIF connector for the D-Pad/power button cable.

      • With the pointed end of the spudger, pull the D-Pad/power button cable from its connector on the motherboard.

      Add Comment

    14. Nintendo DSi XL Wi-Fi Antenna Replacement: step 14, image 1 of 1
      • Using the flat end of the spudger, pry the battery cable up off its socket on the motherboard.

      Add Comment

    15. Nintendo DSi XL Wi-Fi Antenna Replacement: step 15, image 1 of 1
      • Remove the screws securing the motherboard to the upper case:

      • A single 2.5 mm silver Phillips screw

      • Four 3.7 mm black Phillips screws

      Add Comment

    16. Nintendo DSi XL Wi-Fi Antenna Replacement: step 16, image 1 of 1
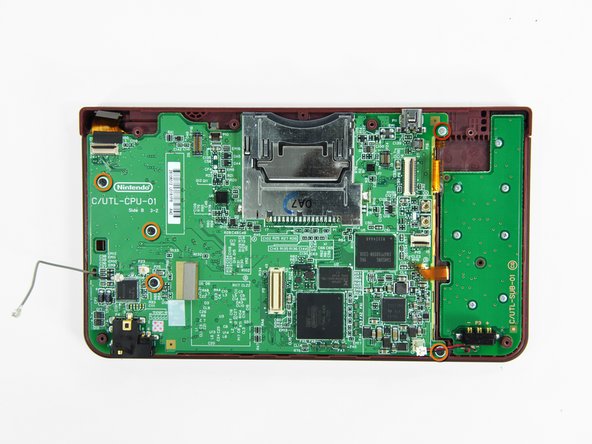
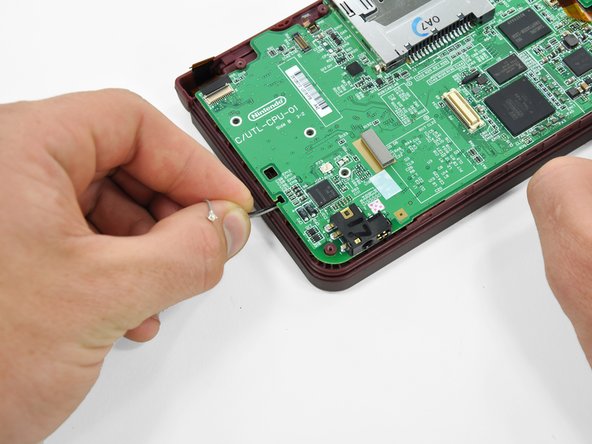
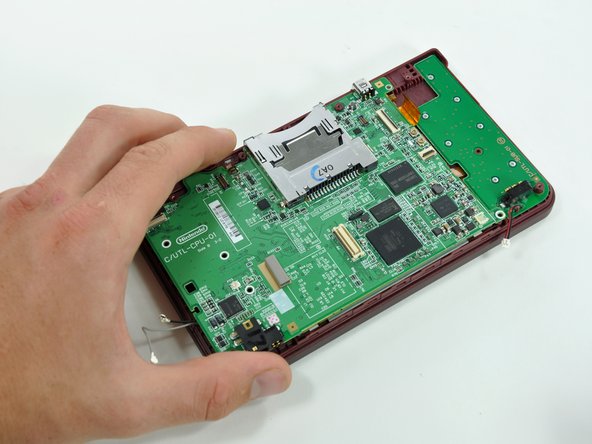
      • Deroute the microphone and antenna cables through the slot in the motherboard.

      Add Comment

    17. Nintendo DSi XL Wi-Fi Antenna Replacement: step 17, image 1 of 2 Nintendo DSi XL Wi-Fi Antenna Replacement: step 17, image 2 of 2
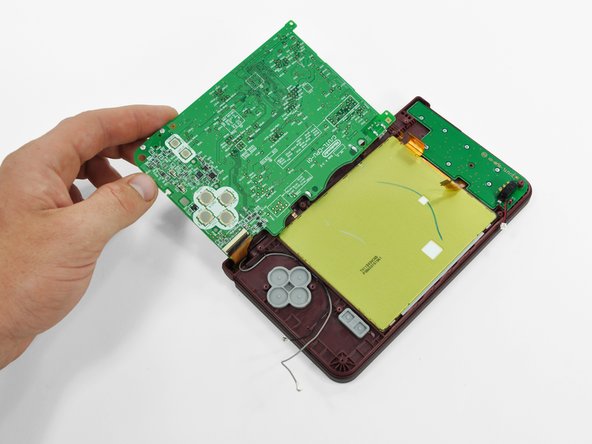
      • Rotate the motherboard off the lower case.

      • The motherboard cannot be completely removed yet. It is still attached by the upper LCD's display data ribbon cable.

      Add Comment

    18. Nintendo DSi XL Wi-Fi Antenna Replacement: step 18, image 1 of 2 Nintendo DSi XL Wi-Fi Antenna Replacement: step 18, image 2 of 2
      • Using the flat end of a spudger, flip up the retaining flap on the upper display data cable ZIF connector.

      • With the pointed end of the spudger, pull the upper display data cable from its connector on the underside of the motherboard.

      • The motherboard is now free from the upper case.

      Add Comment

    19. Nintendo DSi XL Wi-Fi Antenna Replacement: step 19, image 1 of 2 Nintendo DSi XL Wi-Fi Antenna Replacement: step 19, image 2 of 2
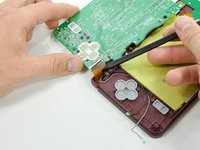
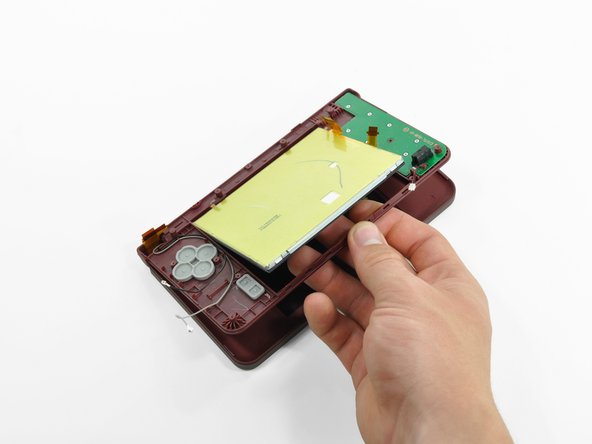
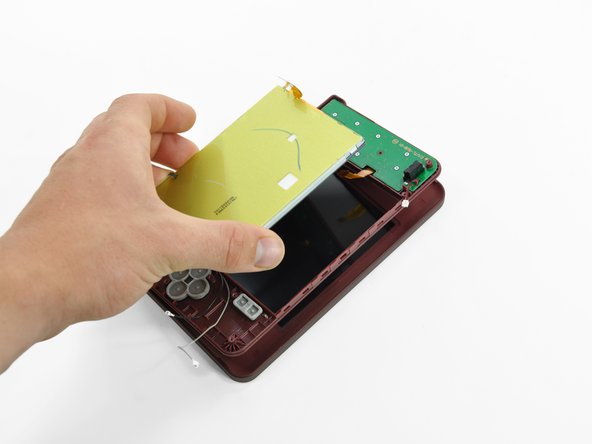
      • With the console still upside-down, open the DSi XL slightly.

      • Push the lower display away from the upper case.

      • Remove the lower display from the DSi XL.

      Add Comment

    20. Nintendo DSi XL Wi-Fi Antenna Replacement: step 20, image 1 of 3 Nintendo DSi XL Wi-Fi Antenna Replacement: step 20, image 2 of 3 Nintendo DSi XL Wi-Fi Antenna Replacement: step 20, image 3 of 3
      • Turn the DSi XL over and open the display.

      • When re-assembling the device, be sure to re-install the ABXY and Start/Select buttons, as they are likely to fall out once the handheld console is turned over.

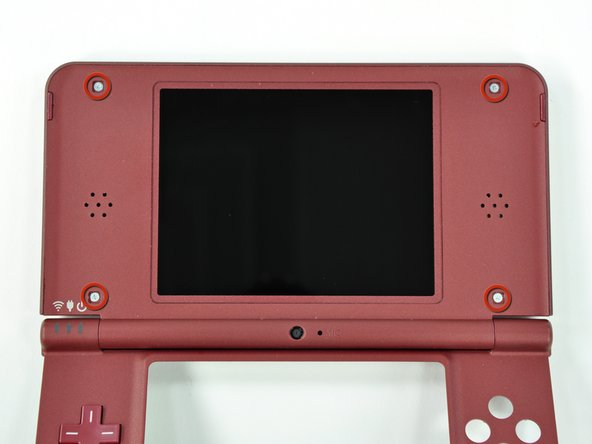
      • Use a pushpin to remove the four plastic screw covers on the front bezel.

      Add Comment

    21. Nintendo DSi XL Wi-Fi Antenna Replacement: step 21, image 1 of 1
      • Remove the four 3.5 mm silver Phillips screws securing the rear bezel to the front bezel.

      Add Comment

    22. Nintendo DSi XL Wi-Fi Antenna Replacement: step 22, image 1 of 2 Nintendo DSi XL Wi-Fi Antenna Replacement: step 22, image 2 of 2
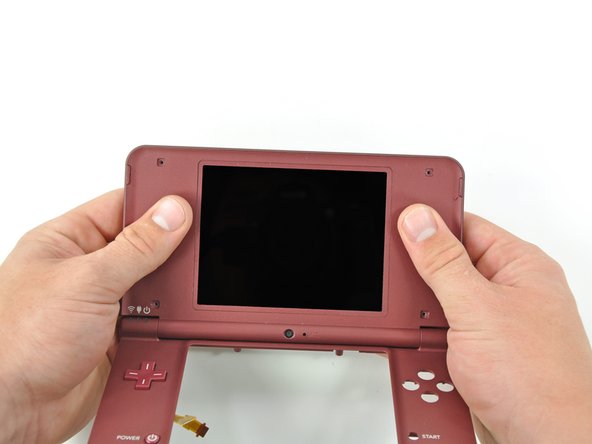
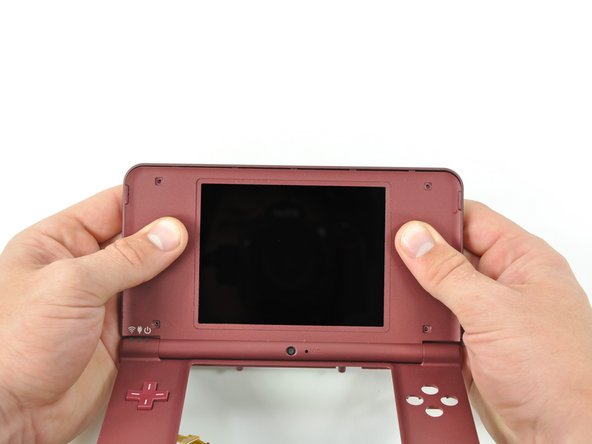
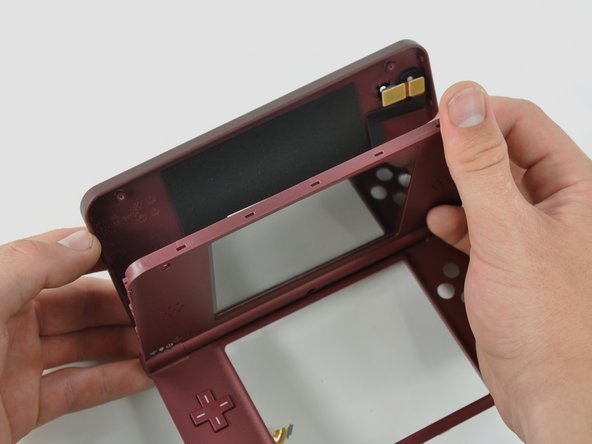
      • Using two hands, gently slide the rear bezel upwards.

      • The rear bezel will move only about 2 mm.

      Add Comment

    23. Nintendo DSi XL Wi-Fi Antenna Replacement: step 23, image 1 of 2 Nintendo DSi XL Wi-Fi Antenna Replacement: step 23, image 2 of 2
      • Insert a spudger into the gap between the front and rear bezel.

      • Rotate the spudger away from the DSi XL, prying the two bezels apart.

      Add Comment

    24. Nintendo DSi XL Wi-Fi Antenna Replacement: step 24, image 1 of 2 Nintendo DSi XL Wi-Fi Antenna Replacement: step 24, image 2 of 2
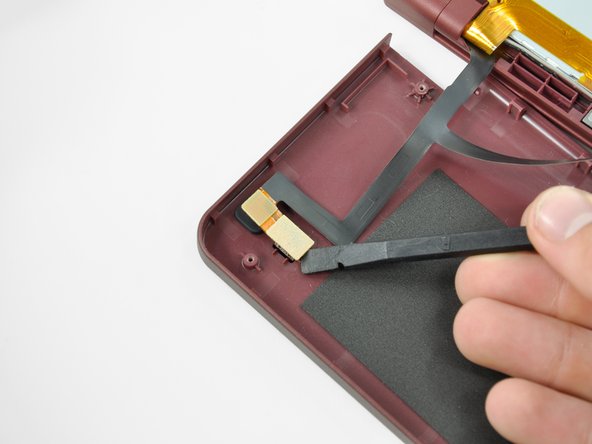
      • In the same manner as described above, continue prying along the top edge of the front and rear bezels.

      Add Comment

    25. Nintendo DSi XL Wi-Fi Antenna Replacement: step 25, image 1 of 1
      • Separate the rear bezel from the front bezel.

      • Do not attempt to completely remove the rear bezel yet. It is still attached to the front bezel by the rear-facing camera.

      Add Comment

    26. Nintendo DSi XL Wi-Fi Antenna Replacement: step 26, image 1 of 1
      • Using the flat end of a spudger, pry the rear camera off the rear bezel.

      • Remove the rear bezel.

      Add Comment

    27. Nintendo DSi XL Wi-Fi Antenna Replacement: step 27, image 1 of 2 Nintendo DSi XL Wi-Fi Antenna Replacement: step 27, image 2 of 2
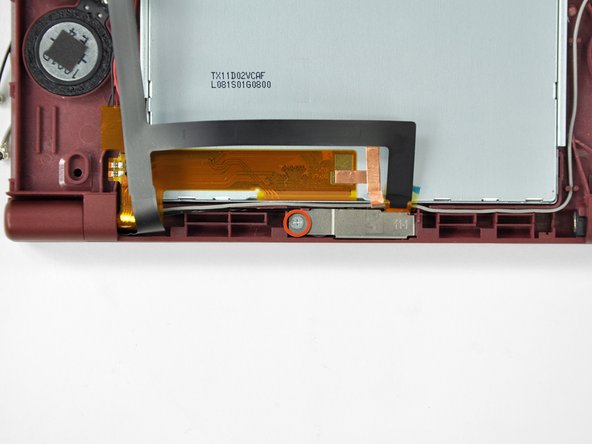
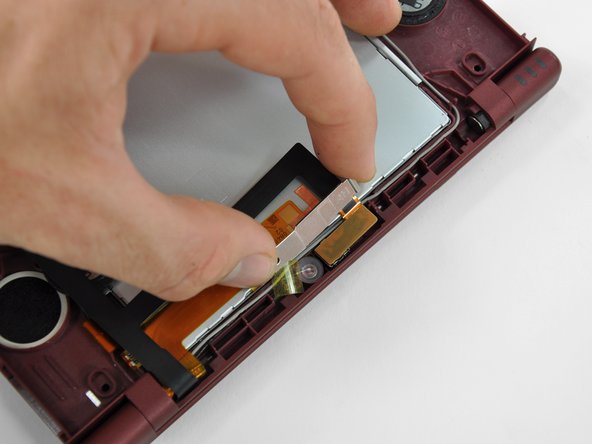
      • Remove the Phillips screw holding the metal securing bracket in place.

      • Lift the metal bracket off the camera.

      Add Comment

    28. Nintendo DSi XL Wi-Fi Antenna Replacement: step 28, image 1 of 2 Nintendo DSi XL Wi-Fi Antenna Replacement: step 28, image 2 of 2
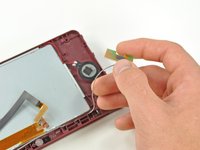
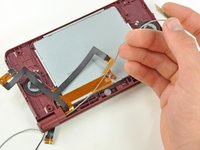
      • Lift the Wi-Fi antenna off the front display bezel.

      • De-route the Wi-Fi antenna cable from its grooves at the bottom of the front display bezel.

      Add Comment

    29. Nintendo DSi XL Wi-Fi Antenna Replacement: step 29, image 1 of 3 Nintendo DSi XL Wi-Fi Antenna Replacement: step 29, image 2 of 3 Nintendo DSi XL Wi-Fi Antenna Replacement: step 29, image 3 of 3
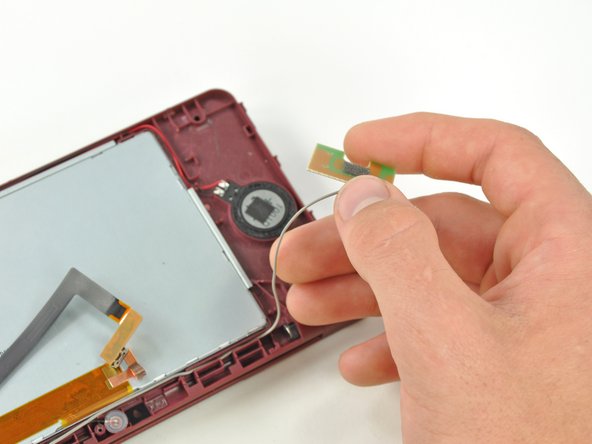
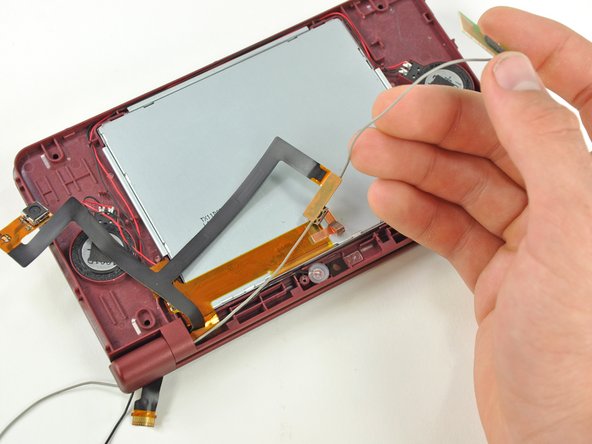
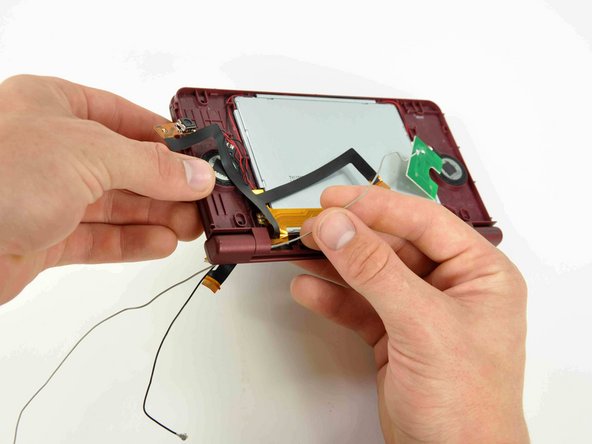
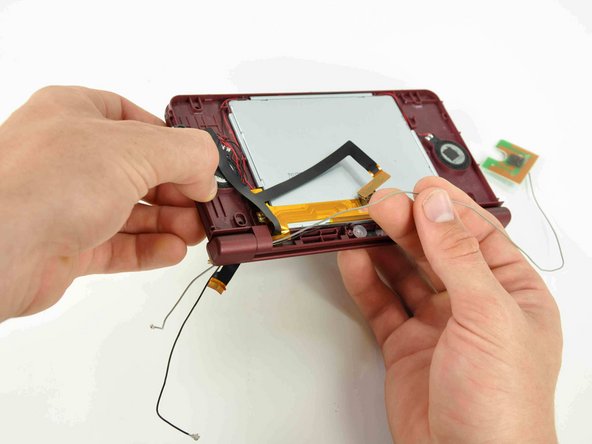
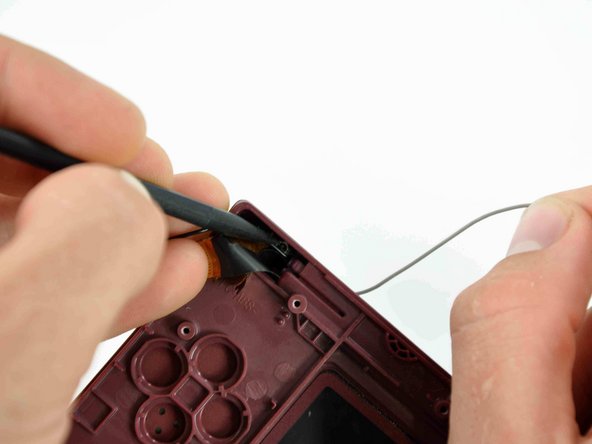
      • Pull the Wi-Fi antenna cable through the right hinge connecting the front bezel and upper case.

      • Use the pointed end of a spudger to guide the connector at the end of the Wi-Fi antenna cable through the hinge.

      • To replace the antenna, use a pair of tweezers to guide the connector through the hinge.

      Add Comment

Conclusion

To reassemble your device, follow these instructions in reverse order.

Cancel: I did not complete this guide.

System

Member since: 09/24/09

2,562 Guides authored

0 Guide Comments

Add Comment

View Statistics:

Past 24 Hours: 0

Past 7 Days: 2

Past 30 Days: 4

All Time: 35