PSP Go Bottom Plate Replacement

What you need

  1. PSP Go Bottom Plate Replacement, PSP Go Bottom Plate Replacement: step 1, image 1 of 2 PSP Go Bottom Plate Replacement, PSP Go Bottom Plate Replacement: step 1, image 2 of 2
    • Unscrew the four Phillips screws on the back of the PSP Go.

    • Rotate the PSP so you can see the top of the device.

    • Unscrew the two Phillips screws next to the volume buttons.

  2. PSP Go Bottom Plate Replacement: step 2, image 1 of 2 PSP Go Bottom Plate Replacement: step 2, image 2 of 2
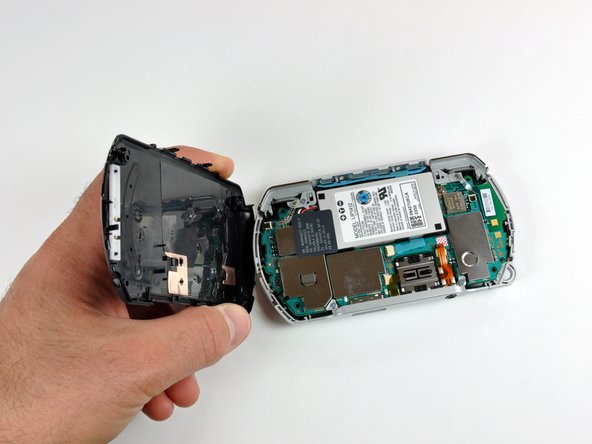
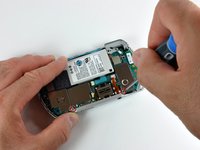
    • Use a plastic opening tool around the perimeter of the back cover to loosen it on all sides.

    • Open the back cover by gently lifting the right side, and rotating it to the left side (as if you were opening a book).

    • Be careful not to rotate the back cover from the bottom, as you will break the plastic screw holes on top of the device.

  3. PSP Go Bottom Plate Replacement: step 3, image 1 of 1
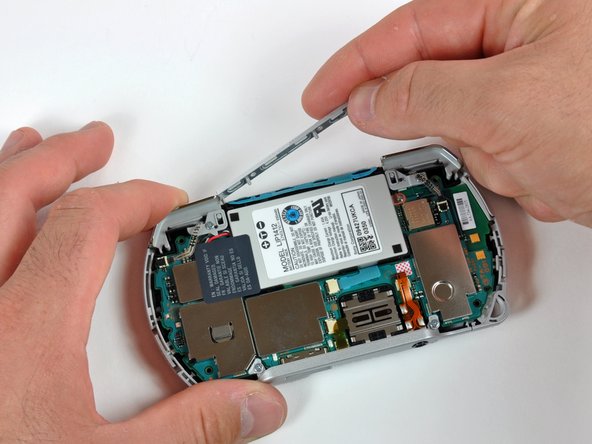
    • Pull the top cover upwards gently from its housing.

  4. PSP Go Bottom Plate Replacement: step 4, image 1 of 2 PSP Go Bottom Plate Replacement: step 4, image 2 of 2
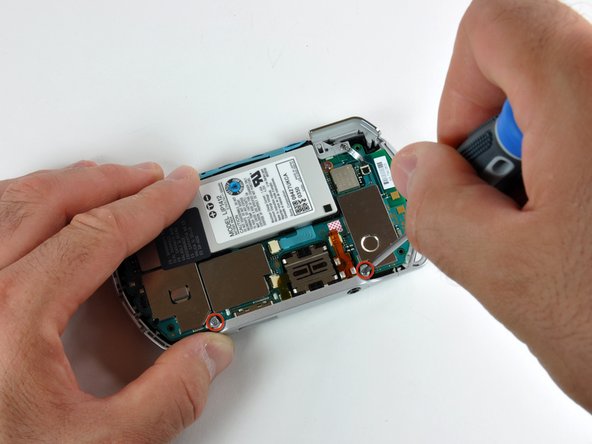
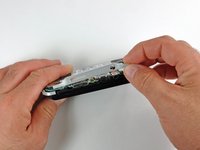
    • Remove the two Phillips screws holding the bottom plate.

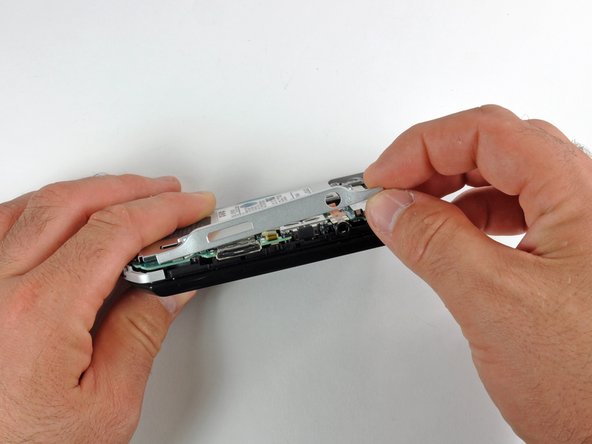
    • Gently lift the bottom plate away from the device.

Conclusion

To reassemble your device, follow these instructions in reverse order.

System

Member since: 09/24/09

2,562 Guides authored

0 Comments

Add Comment

View Statistics:

Past 24 Hours: 0

Past 7 Days: 0

Past 30 Days: 0

All Time: 8