Panasonic Lumix DMC-TZ5 LCD Screen Replacement

What you need

    1. Panasonic Lumix DMC-TZ5 LCD Screen Replacement, Panasonic Lumix DMC-TZ5 LCD Screen Replacement: step 1, image 1 of 1
      • Remove the battery and memory card from the device.

      Add Comment

    2. Panasonic Lumix DMC-TZ5 LCD Screen Replacement: step 2, image 1 of 1
      • Remove 4 screws from the right side of the camera.

      • There are two 3.4mm screws at the top.

      • There are two 2.2mm screws at the bottom.

      Add Comment

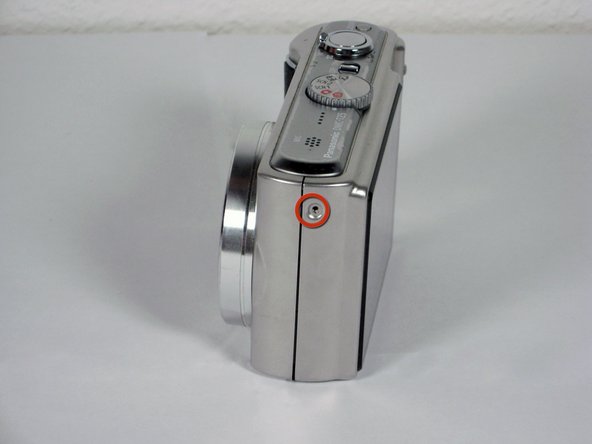
    3. Panasonic Lumix DMC-TZ5 LCD Screen Replacement: step 3, image 1 of 1
      • Remove the single 3.4mm screw on the left side of the camera.

      Add Comment

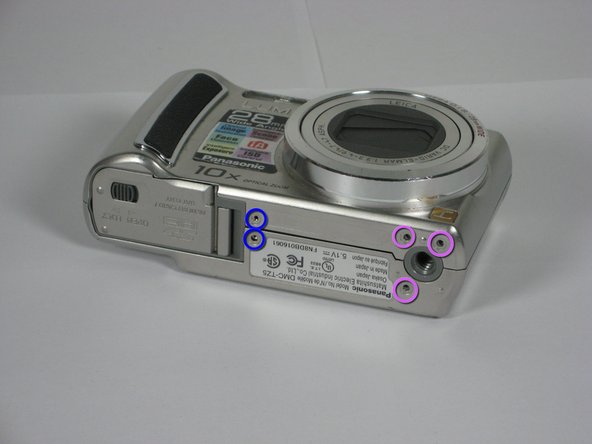
    4. Panasonic Lumix DMC-TZ5 LCD Screen Replacement: step 4, image 1 of 1
      • Remove 5 screws from the base of the camera.

      • There are two 2.2mm screws next to the battery compartment.

      • There are three 4mm screws around the tripod mount.

      Add Comment

    5. Panasonic Lumix DMC-TZ5 LCD Screen Replacement: step 5, image 1 of 1
      • Slowly slide the back cover away from the device

      • The back casing is held in place by two ribbon cables. Do not pull the back cover too far from the camera.

      Add Comment

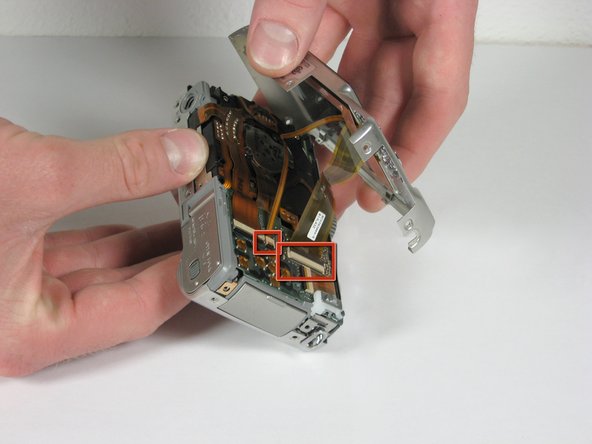
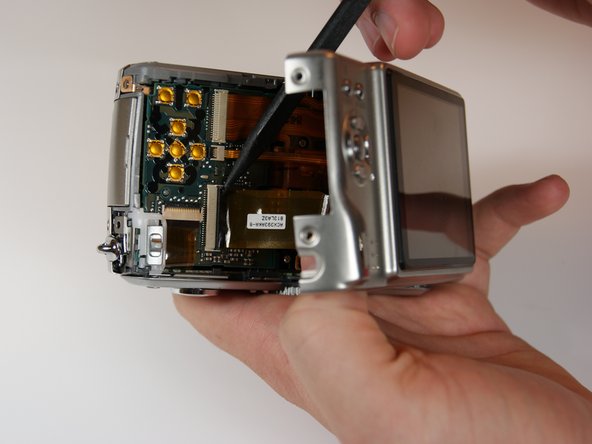
    6. Panasonic Lumix DMC-TZ5 LCD Screen Replacement: step 6, image 1 of 2 Panasonic Lumix DMC-TZ5 LCD Screen Replacement: step 6, image 2 of 2
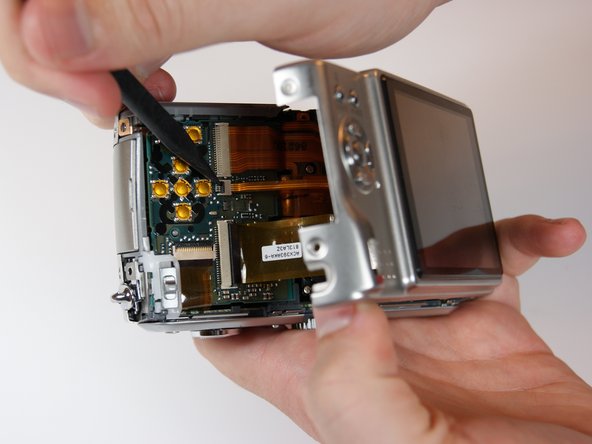
      • Detach both ribbon cables using a spudger.

      • Use the tip of the spudger to lift the black clip upward, unlocking the ribbon cable.

      Add Comment

    7. Panasonic Lumix DMC-TZ5 LCD Screen Replacement: step 7, image 1 of 1
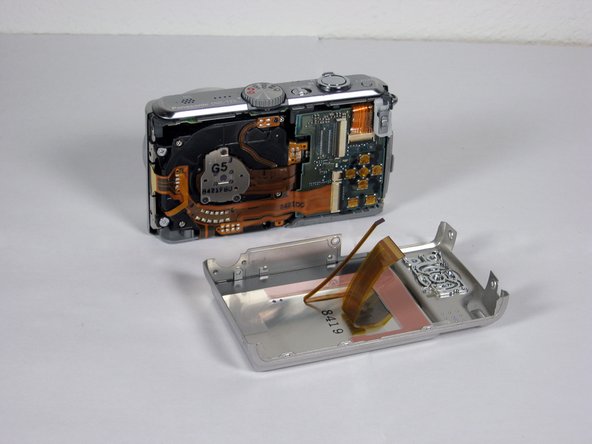
      • Remove the back casing from the camera.

      Add Comment

    8. Panasonic Lumix DMC-TZ5 LCD Screen Replacement: step 8, image 1 of 2 Panasonic Lumix DMC-TZ5 LCD Screen Replacement: step 8, image 2 of 2
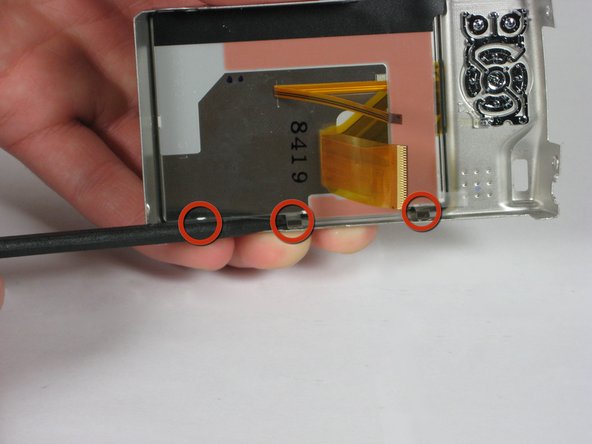
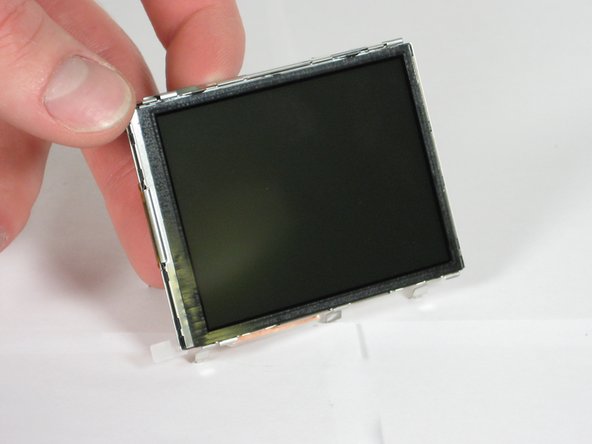
      • Use a spudger to release the 3 clips between the LCD case and housing.

      • Put the tip of the spudger in the gap between the clip and housing, then lift up gently to unclip.

      • Gently lift the LCD from the case, making sure none of the 3 clips reattach.

      Add Comment

Conclusion

To reassemble your device, follow these instructions in reverse order.

Cancel: I did not complete this guide.

System

Member since: 09/24/09

2,562 Guides authored

0 Guide Comments

Add Comment

View Statistics:

Past 24 Hours: 0

Past 7 Days: 0

Past 30 Days: 1

All Time: 25