PlayStation 3 Power Supply Replacement

What you need

    1. PlayStation 3 Power Supply Replacement, PlayStation 3 Power Supply Replacement: step 1, image 1 of 2 PlayStation 3 Power Supply Replacement, PlayStation 3 Power Supply Replacement: step 1, image 2 of 2
      • Use the tip of a spudger to remove the black rubber screw cover from the side of the PS3.

      • The screw cover may be underneath a warranty sticker. This sticker will change appearance, and show "VOID" after it has been removed.

      Add Comment

    2. PlayStation 3 Power Supply Replacement: step 2, image 1 of 1
      • Remove the single 8.5 mm T10 Security Torx screw from the smart plate.

      Add Comment

    3. PlayStation 3 Power Supply Replacement: step 3, image 1 of 3 PlayStation 3 Power Supply Replacement: step 3, image 2 of 3 PlayStation 3 Power Supply Replacement: step 3, image 3 of 3
      • Pull the smart plate toward the hard drive bay, then lift it off the body of the PS3.

      Add Comment

    4. PlayStation 3 Power Supply Replacement: step 4, image 1 of 1
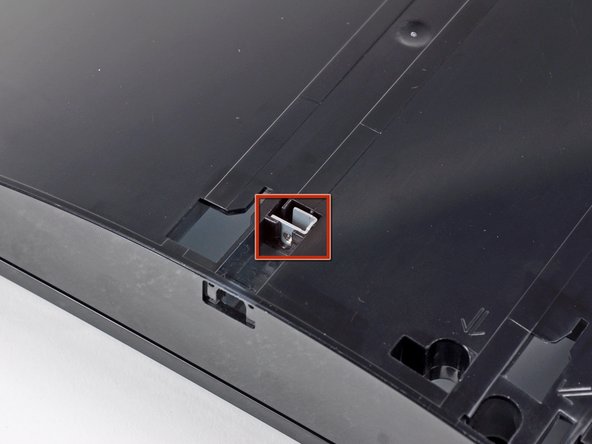
      • Be sure to keep track of the small metal bracket loosely held in the top cover, if equipped.

      Add Comment

    5. PlayStation 3 Power Supply Replacement: step 5, image 1 of 1
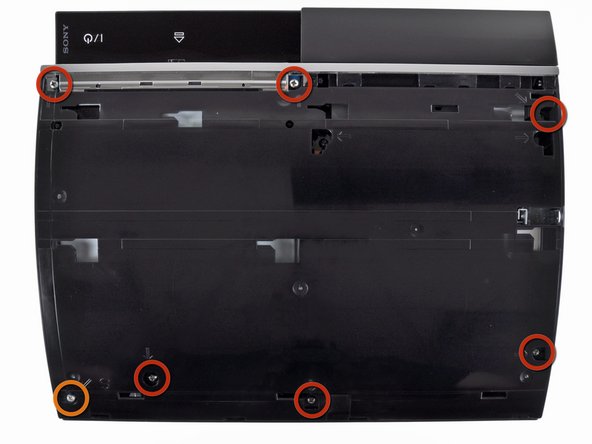
      • Remove the following seven screws:

      • Six 52 mm Phillips screws

      • One 30 mm Phillips screw

      Add Comment

    6. PlayStation 3 Power Supply Replacement: step 6, image 1 of 1
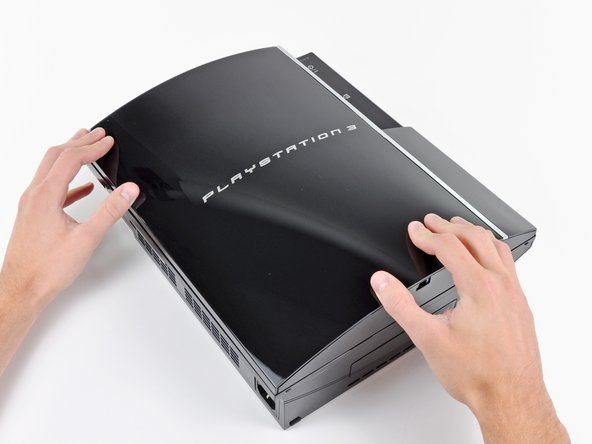
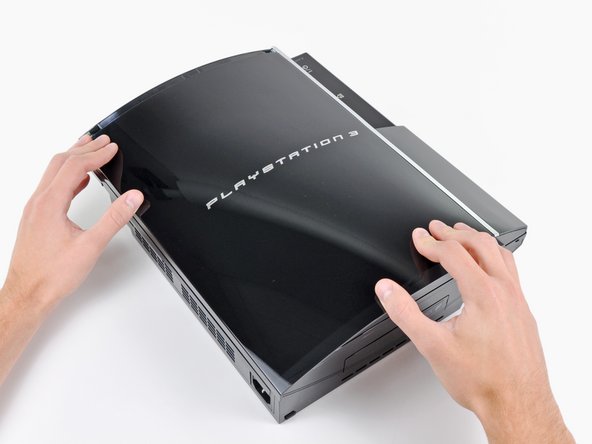
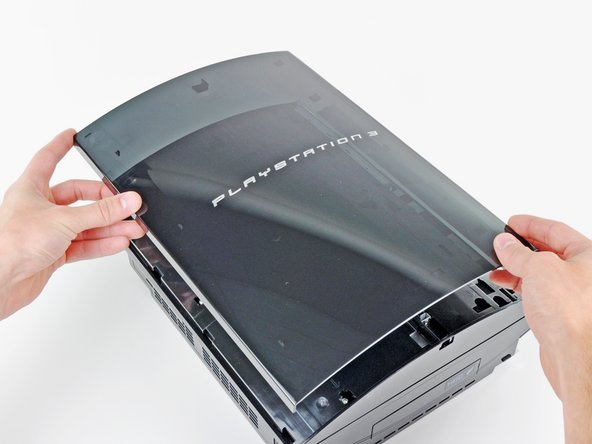
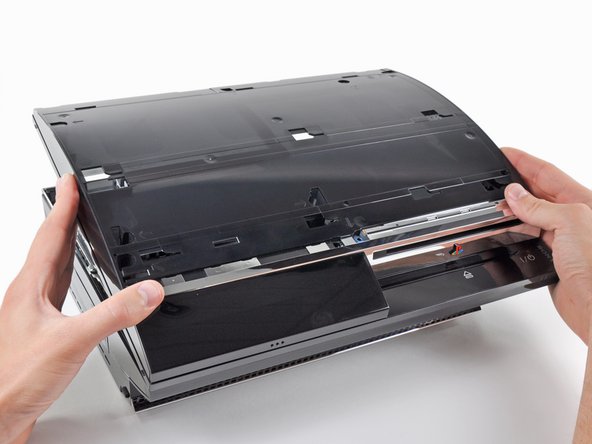
      • Lift the top cover from its rear edge and rotate it toward the front of the PS3.

      • Remove the top cover.

      Add Comment

    7. PlayStation 3 Power Supply Replacement: step 7, image 1 of 1
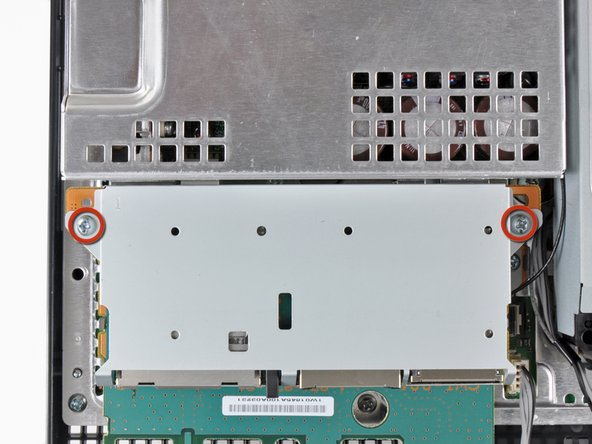
      • Remove the two 9 mm Phillips screws securing the memory card reader to the chassis.

      Add Comment

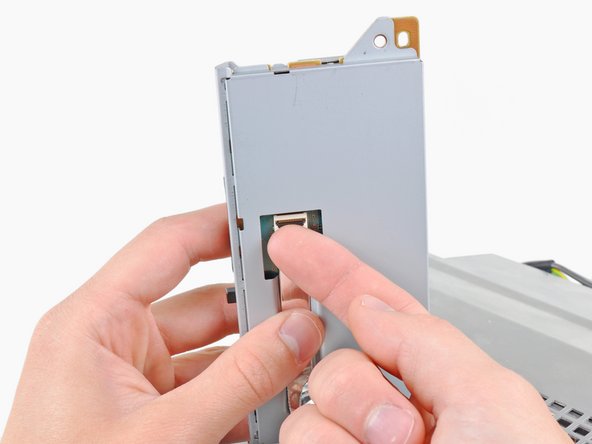
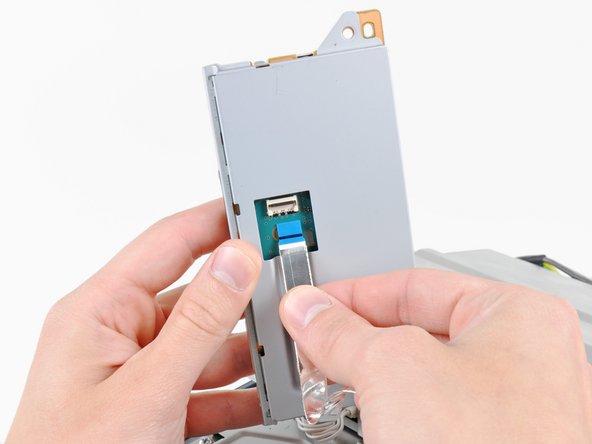
    8. PlayStation 3 Power Supply Replacement: step 8, image 1 of 2 PlayStation 3 Power Supply Replacement: step 8, image 2 of 2
      • Lift the memory card reader out of the PS3 enough to access its cable.

      • Flip up the retaining flap on the memory card reader ribbon cable socket.

      • Be sure you are prying up on the retaining flap, not the socket itself.

      • Pull the ribbon cable out of its socket.

      • Remove the memory card reader from the PS3.

      Add Comment

    9. PlayStation 3 Power Supply Replacement: step 9, image 1 of 1
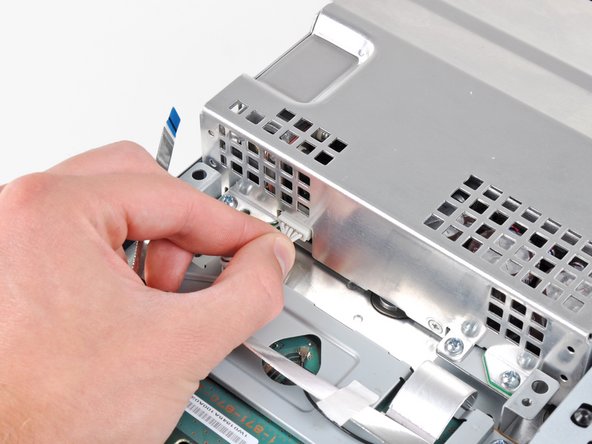
      • Pull the DC-In cables toward the front of the PS3 to disconnect them from the power supply.

      Add Comment

    10. PlayStation 3 Power Supply Replacement: step 10, image 1 of 1
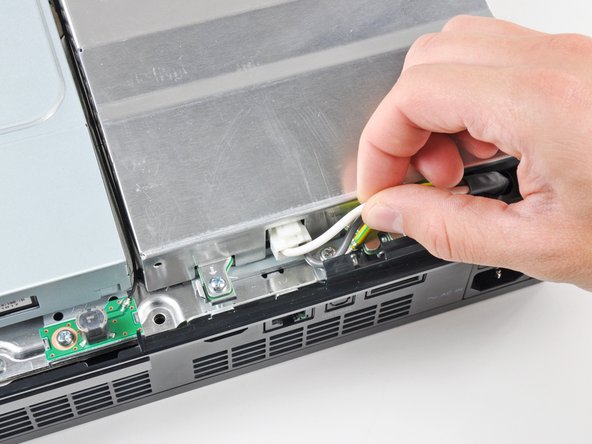
      • Lift the AC-In cables slightly away from the rear cover for clearance to access the AC-In connector.

      Add Comment

    11. PlayStation 3 Power Supply Replacement: step 11, image 1 of 1
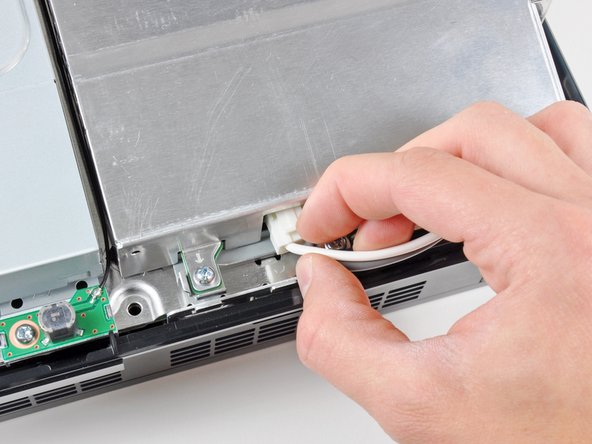
      • While depressing its locking mechanism, pull the AC-In connector out of its socket on the power supply.

      Add Comment

    12. PlayStation 3 Power Supply Replacement: step 12, image 1 of 1
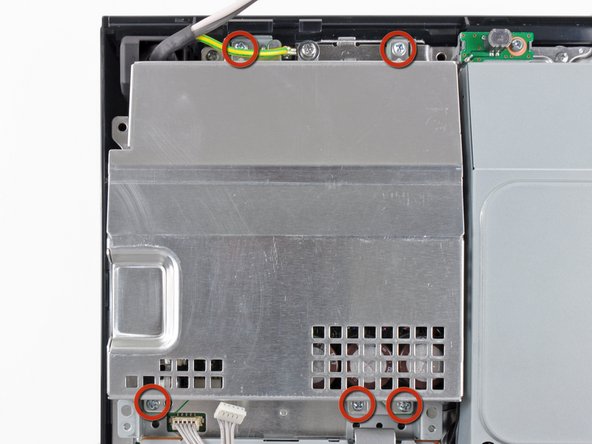
      • Remove the five 9 mm Phillips screws securing the power supply to the chassis.

      Add Comment

    13. PlayStation 3 Power Supply Replacement: step 13, image 1 of 1
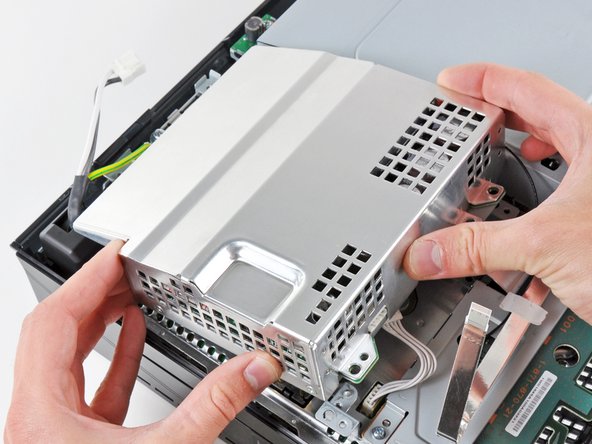
      • Lift the power supply upward from its front edge to disconnect it from the posts attached to the logic board.

      • Remove the power supply.

      Add Comment

Conclusion

To reassemble your device, follow these instructions in reverse order.

Cancel: I did not complete this guide.

System

Member since: 09/24/09

2,562 Guides authored

0 Guide Comments

Add Comment

View Statistics:

Past 24 Hours: 0

Past 7 Days: 0

Past 30 Days: 0

All Time: 39