
PlayStation 3 Slim Lower Case Replacement

What you need

  1. PlayStation 3 Slim Lower Case Replacement, PlayStation 3 Slim Lower Case Replacement: step 1, image 1 of 1
    • Turn the PS3 over and lay it on its backside.

    • Carefully peel the warranty sticker up off the lower case to reveal a hidden screw cover.

    • To avoid activating the VOID that may come up, heat the sticker carefully to remove and replace it cleanly.

    Add Comment

  2. PlayStation 3 Slim Lower Case Replacement: step 2, image 1 of 2 PlayStation 3 Slim Lower Case Replacement: step 2, image 2 of 2
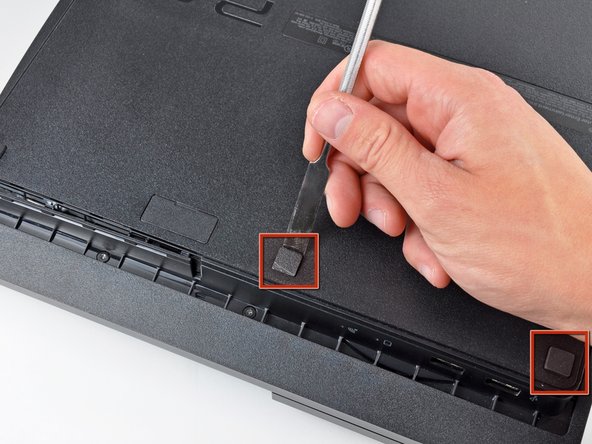
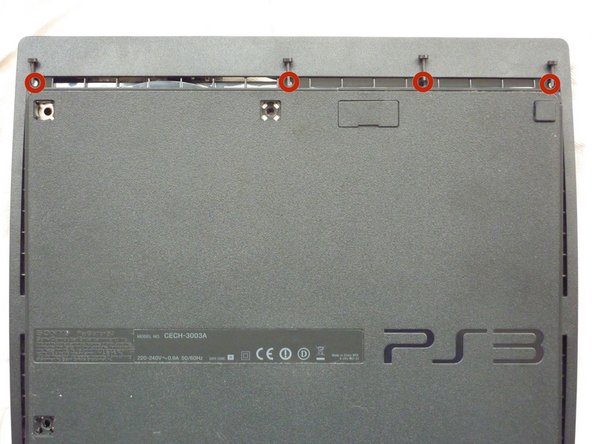
    • Use the flat end of a metal spudger to pry up the seven screw covers around the edge of the lower case.

    Add Comment

  3. PlayStation 3 Slim Lower Case Replacement: step 3, image 1 of 1
    • Remove the seven 37 mm Phillips screws securing the top cover to the lower case.

    Add Comment

  4. PlayStation 3 Slim Lower Case Replacement: step 4, image 1 of 1
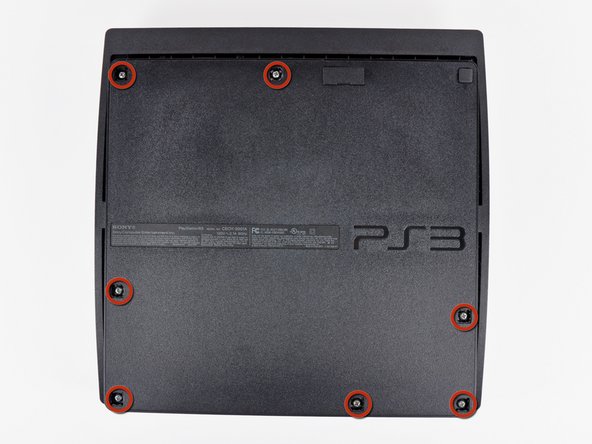
    • Remove the four 13.3 mm T8 security Torx screws beneath the Blu-ray drive opening. (Some models may only have three screws)

    Add Comment

  5. PlayStation 3 Slim Lower Case Replacement: step 5, image 1 of 2 PlayStation 3 Slim Lower Case Replacement: step 5, image 2 of 2
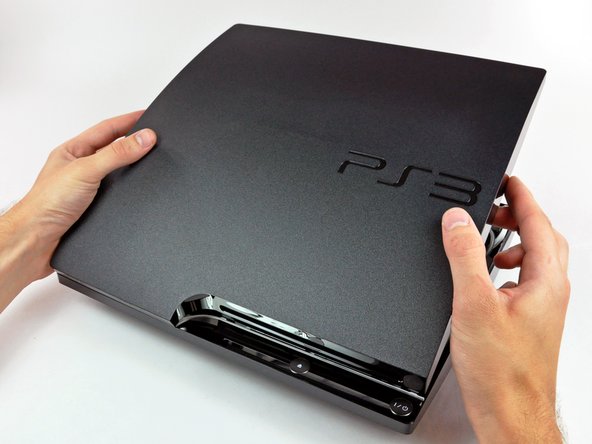
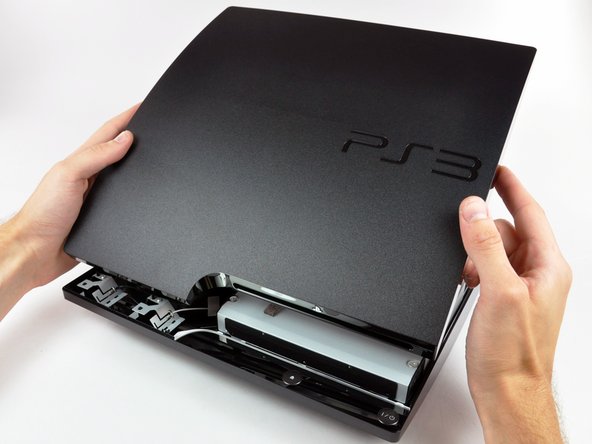
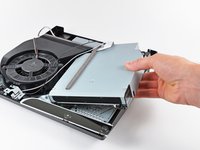
    • Lift the top cover from its rear edge and rotate it toward the front of the PS3.

    • Lift the top cover off the PS3.

    Add Comment

  6. PlayStation 3 Slim Lower Case Replacement: step 6, image 1 of 2 PlayStation 3 Slim Lower Case Replacement: step 6, image 2 of 2
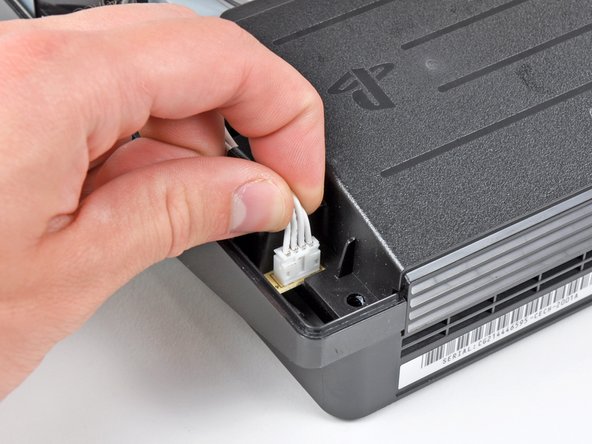
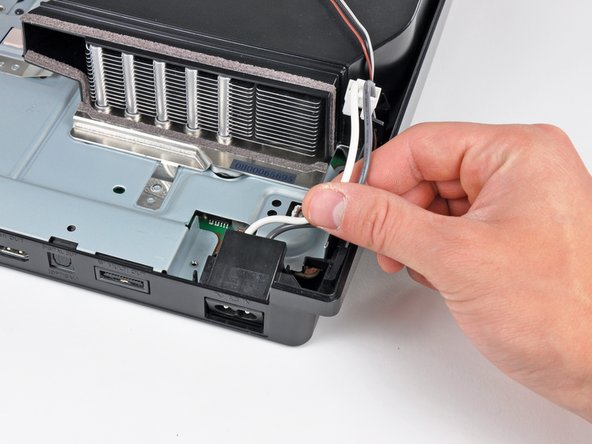
    • Squeeze the AC inlet connector's locking mechanism and pull straight up to disconnect it from the power supply.

    Add Comment

  7. PlayStation 3 Slim Lower Case Replacement: step 7, image 1 of 1
    • Pull the DC-Out cables straight up to lift their connector up and out of its socket on the power supply.

    Add Comment

  8. PlayStation 3 Slim Lower Case Replacement: step 8, image 1 of 1
    • Remove the two 7.6 mm Phillips screws securing the power supply to the lower case.

    Add Comment

  9. PlayStation 3 Slim Lower Case Replacement: step 9, image 1 of 1
    • Lift the power supply upward from its left edge as viewed from the front of the PS3.

    Add Comment

  10. PlayStation 3 Slim Lower Case Replacement: step 10, image 1 of 2 PlayStation 3 Slim Lower Case Replacement: step 10, image 2 of 2
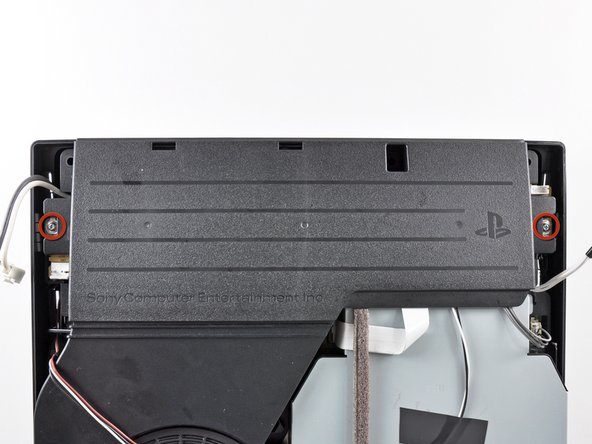
    • Continue to lift the left edge of the power supply until it lifts off the two metal posts shown in the second picture.

    • Remove the power supply from the PS3, minding any cables that may get caught.

    Add Comment

  11. PlayStation 3 Slim Lower Case Replacement: step 11, image 1 of 2 PlayStation 3 Slim Lower Case Replacement: step 11, image 2 of 2
    • If present, remove the pieces of tape securing the cables to the body of the Blu-ray drive.

    Add Comment

  12. PlayStation 3 Slim Lower Case Replacement: step 12, image 1 of 1
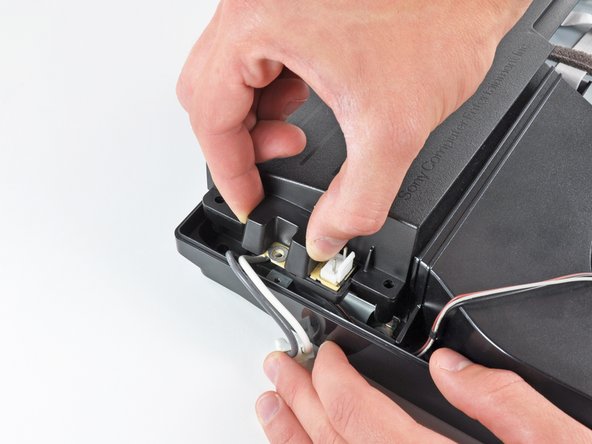
    • Use the flat end of a spudger or your fingernail to flip up the retaining flap on the Blu-ray ribbon cable socket.

    • Be sure you are prying up on the movable retaining flap, not the socket itself.

    Add Comment

  13. PlayStation 3 Slim Lower Case Replacement: step 13, image 1 of 1
    • Pull the Blu-ray ribbon cable straight up and out of its socket.

    Add Comment

  14. PlayStation 3 Slim Lower Case Replacement: step 14, image 1 of 1
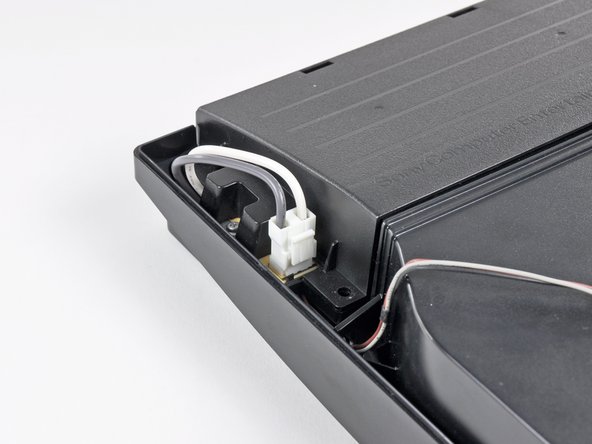
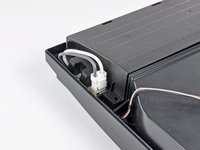
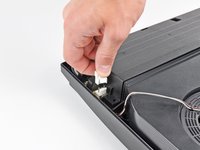
    • Pull the Blu-ray power cable straight up to lift its connector out of the socket on the Blu-ray drive.

    Add Comment

  15. PlayStation 3 Slim Lower Case Replacement: step 15, image 1 of 1
    • Remove the single 9.5 mm Phillips screw securing the Blu-ray drive to the lower case.

    Add Comment

  16. PlayStation 3 Slim Lower Case Replacement: step 16, image 1 of 2 PlayStation 3 Slim Lower Case Replacement: step 16, image 2 of 2
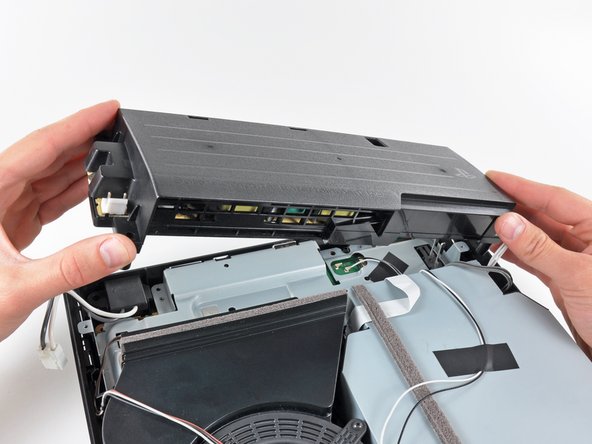
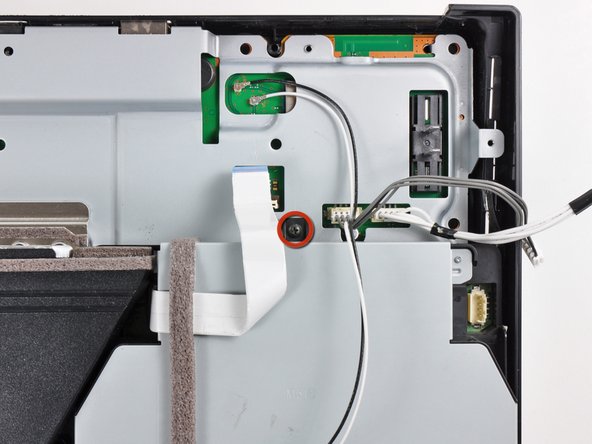
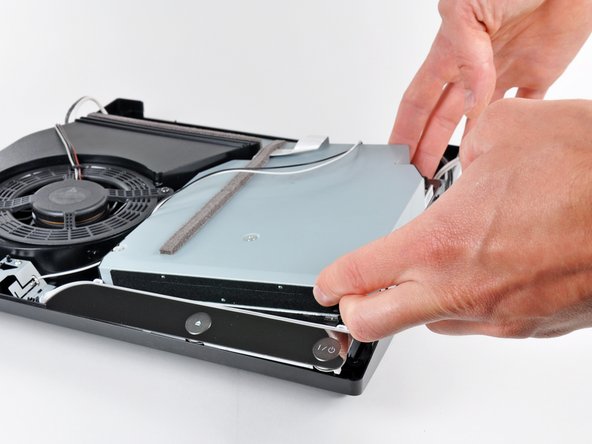
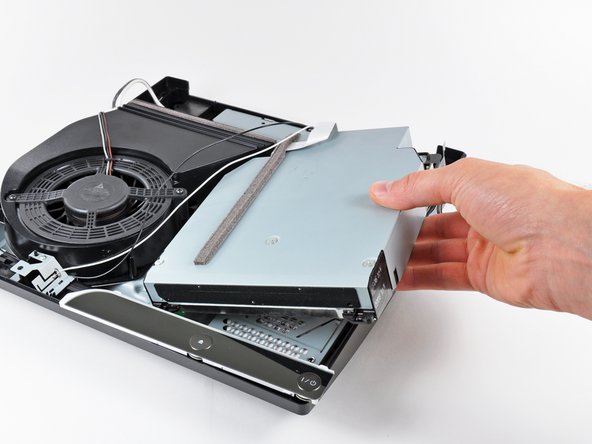
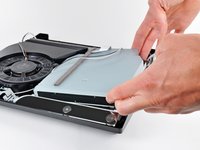
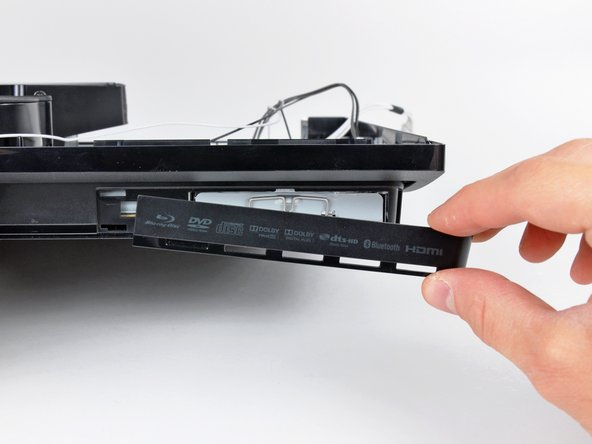
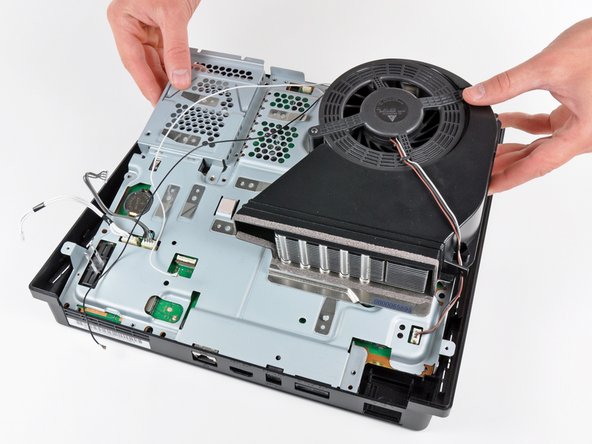
    • Lift the Blu-ray drive slightly by its right edge to dislodge the control board from its housing.

    • Remove the Blu-ray drive from the PS3.

    • After you reinstall the Blu-ray drive, be sure the control board is firmly seated in the lower case before proceeding.

    • If replacing the Blu-ray drive with a new drive, swap the circuit board from your old drive into the new drive.

    Add Comment

  17. PlayStation 3 Slim Lower Case Replacement: step 17, image 1 of 1
    • Pull the AC-In cables upward to remove the AC inlet from the lower case.

    Add Comment

  18. PlayStation 3 Slim Lower Case Replacement: step 18, image 1 of 2 PlayStation 3 Slim Lower Case Replacement: step 18, image 2 of 2
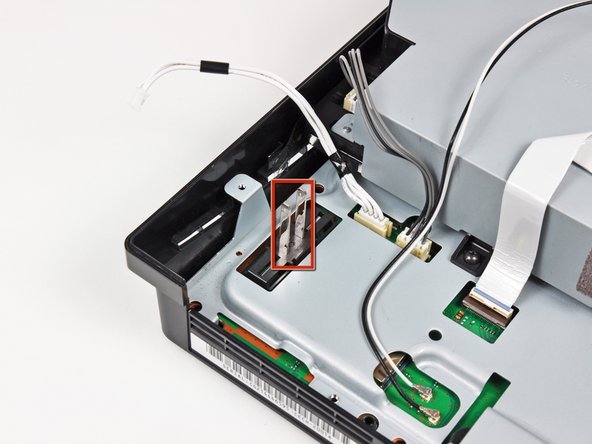
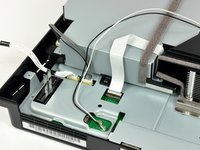
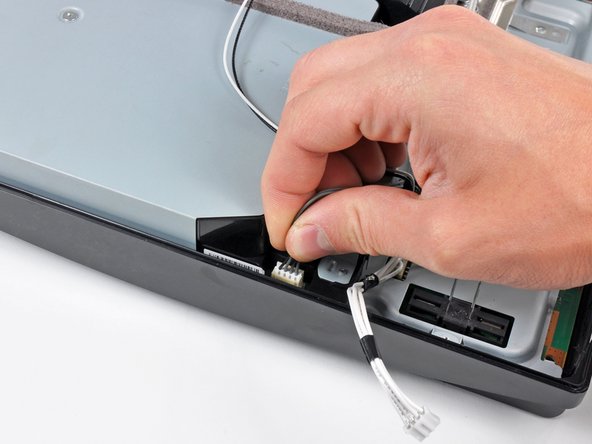
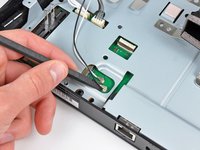
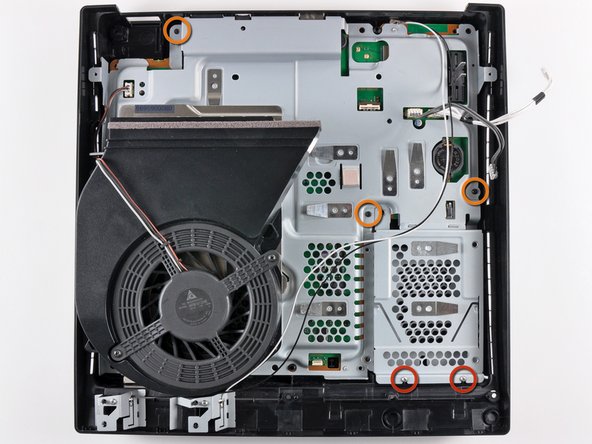
    • Use the flat end of a spudger to pry both antenna connectors up from their sockets on the motherboard.

    Add Comment

  19. PlayStation 3 Slim Lower Case Replacement: step 19, image 1 of 1
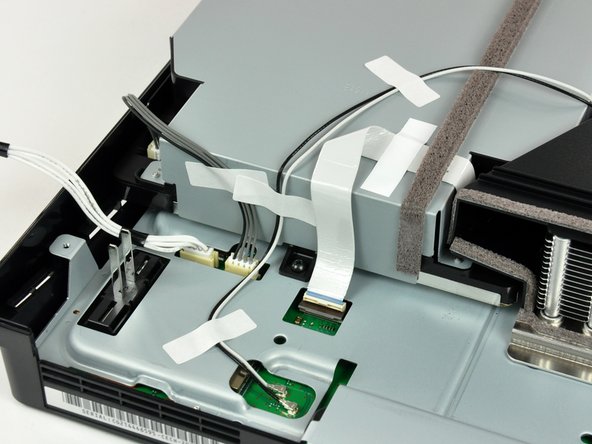
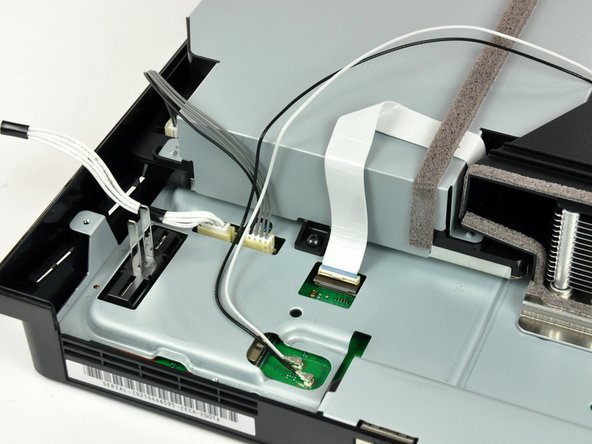
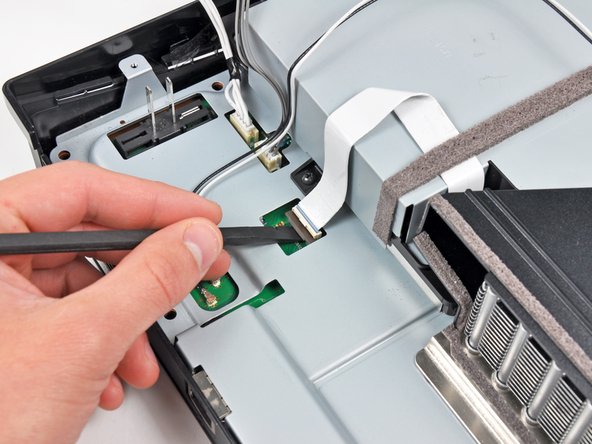
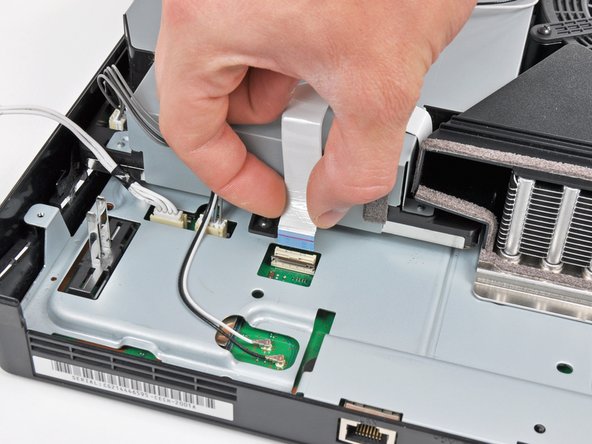
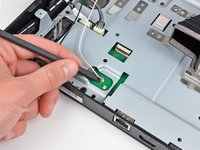
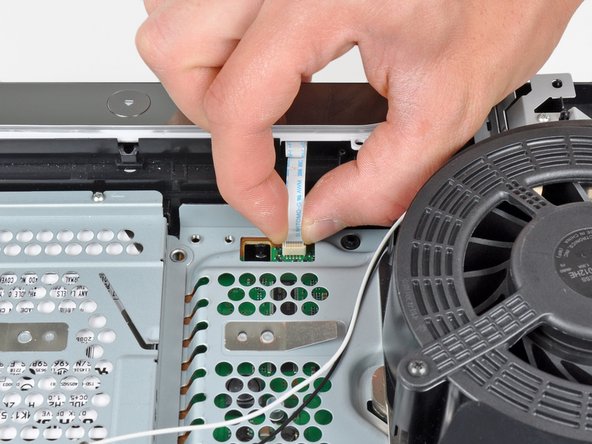
    • Pull the control board ribbon cable up and out of its socket on the motherboard.

    • Remove the control board.

    Add Comment

  20. PlayStation 3 Slim Lower Case Replacement: step 20, image 1 of 1
    • Turn the PS3 over and lay it on its backside.

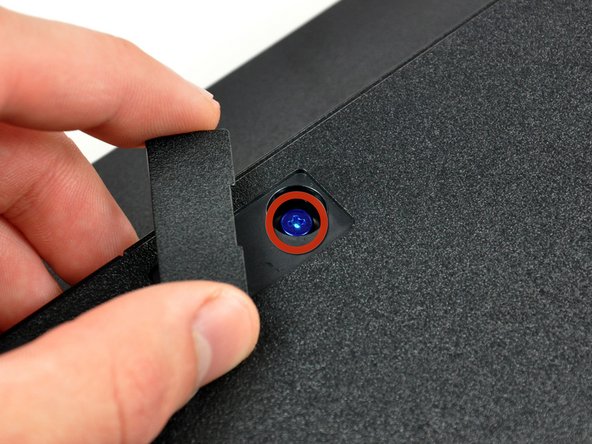
    • Use the flat edge of a metal spudger to pop up the small access door on the bottom cover near the front of the PS3.

    • Remove the blue Phillips screw hidden under the access door.

    Add Comment

  21. PlayStation 3 Slim Lower Case Replacement: step 21, image 1 of 1
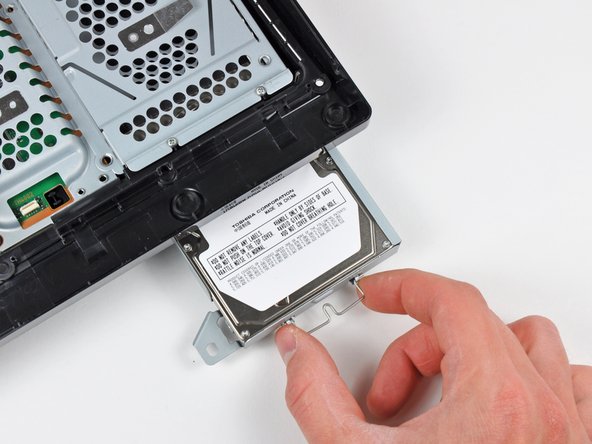
    • Slide the hard drive bay cover toward the right side of the lower case, then pull it away from the front edge to remove it from the PS3.

    Add Comment

  22. PlayStation 3 Slim Lower Case Replacement: step 22, image 1 of 1
    • Using its attached metal handle, pull the hard drive out of its bay.

    Add Comment

  23. PlayStation 3 Slim Lower Case Replacement: step 23, image 1 of 1
    • Remove the following five screws securing the motherboard assembly to the lower case:

    • Two silver 6 mm Phillips

    • Three black 8 mm Phillips

    Add Comment

  24. PlayStation 3 Slim Lower Case Replacement: step 24, image 1 of 1
    • Lift the motherboard assembly from its front edge and remove it from the lower case, minding the antenna cable still attached to the lower case.

    • Be careful not to bend the metal antenna bodies as you lift the motherboard assembly.

    Add Comment

  25. PlayStation 3 Slim Lower Case Replacement: step 25, image 1 of 1
    • Remove the two 6.2 mm Phillips screws securing the antennas to the lower case.

    Add Comment

  26. PlayStation 3 Slim Lower Case Replacement: step 26, image 1 of 2 PlayStation 3 Slim Lower Case Replacement: step 26, image 2 of 2
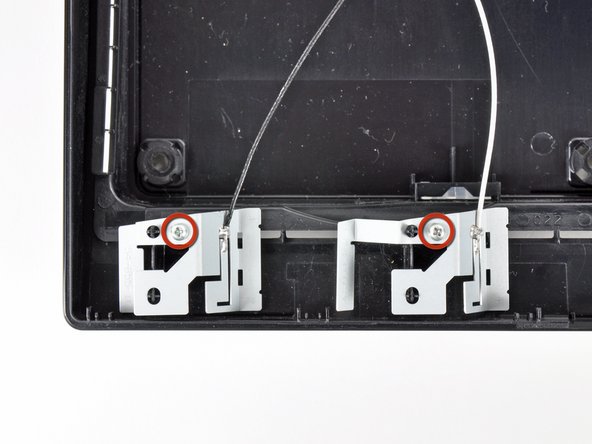
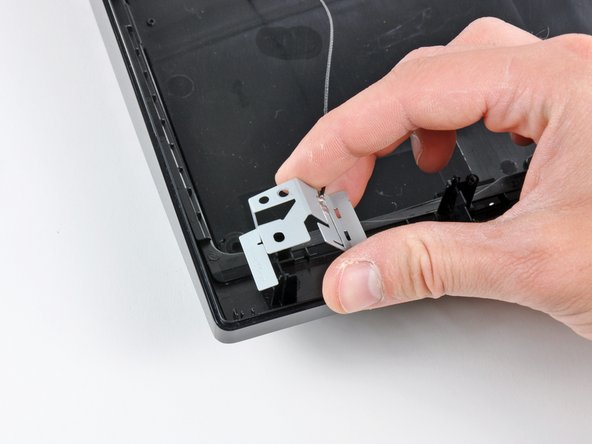
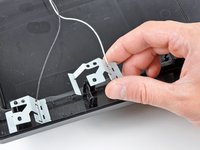
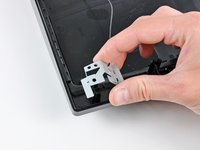
    • Lift the antennas off their plastic positioning posts and remove them from the lower case.

    • Lower case remains.

    Add Comment

Conclusion

To reassemble your device, follow these instructions in reverse order.

Cancel: I did not complete this guide.

System

Member since: 09/24/09

2,562 Guides authored

0 Guide Comments

Add Comment

View Statistics:

Past 24 Hours: 0

Past 7 Days: 1

Past 30 Days: 2

All Time: 46