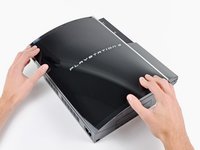
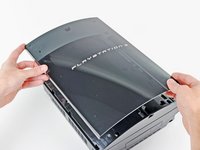
PlayStation 3 Smart Plate Replacement

What you need

  1. PlayStation 3 Smart Plate Replacement, PlayStation 3 Smart Plate Replacement: step 1, image 1 of 2 PlayStation 3 Smart Plate Replacement, PlayStation 3 Smart Plate Replacement: step 1, image 2 of 2
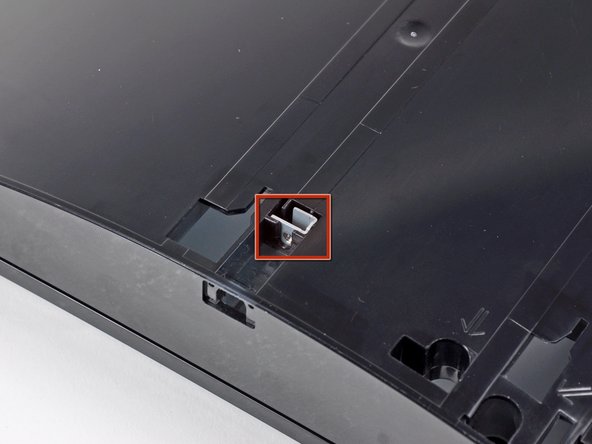
    • Use the tip of a spudger to remove the black rubber screw cover from the side of the PS3.

    • The screw cover may be underneath a warranty sticker. This sticker will change appearance, and show "VOID" after it has been removed.

    Add Comment

  2. PlayStation 3 Smart Plate Replacement: step 2, image 1 of 1
    • Remove the single 8.5 mm T10 Security Torx screw from the smart plate.

    Add Comment

  3. PlayStation 3 Smart Plate Replacement: step 3, image 1 of 3 PlayStation 3 Smart Plate Replacement: step 3, image 2 of 3 PlayStation 3 Smart Plate Replacement: step 3, image 3 of 3
    • Pull the smart plate toward the hard drive bay, then lift it off the body of the PS3.

    Add Comment

  4. PlayStation 3 Smart Plate Replacement: step 4, image 1 of 1
    • Be sure to keep track of the small metal bracket loosely held in the top cover, if equipped.

    Add Comment

Conclusion

To reassemble your device, follow these instructions in reverse order.

Cancel: I did not complete this guide.

System

Member since: 09/24/09

2,562 Guides authored

0 Guide Comments

Add Comment

View Statistics:

Past 24 Hours: 0

Past 7 Days: 0

Past 30 Days: 0

All Time: 25