/

PlayStation Logic Board Replacement

What you need

  1. PlayStation Logic Board Replacement, PlayStation Logic Board Replacement: step 1, image 1 of 1
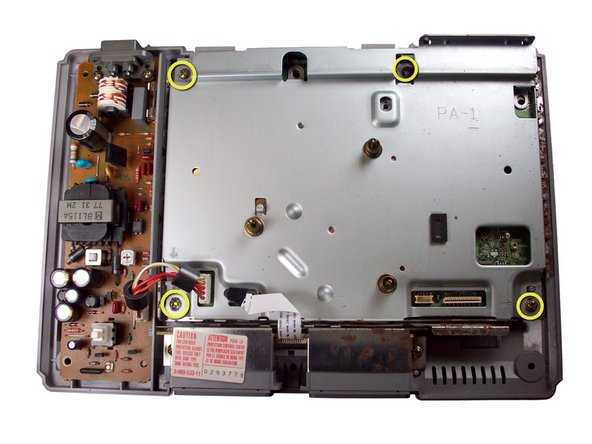
    • Remove the parallel port cover on the back of the PlayStation.

  2. PlayStation Logic Board Replacement: step 2, image 1 of 1
    • Flip over the PlayStation and remove the six screws from the bottom.

  3. PlayStation Logic Board Replacement: step 3, image 1 of 1
    • Turn the PlayStation upright. Remove the cover by lifting it up.

  4. PlayStation Logic Board Replacement: step 4, image 1 of 1
    • Carefully disconnect the gold-colored ribbon cable from it's connector.

    • To avoid damaging the cable, pull it by the white, reinforced tab.

  5. PlayStation Logic Board Replacement: step 5, image 1 of 1
    • Disconnect the second cable by pulling up on the plastic connector at the end.

  6. PlayStation Logic Board Replacement: step 6, image 1 of 1
    • Lift the optical drive off of the PlayStation.

  7. PlayStation Logic Board Replacement: step 7, image 1 of 1
    • Remove the four screws from the logic board's metal cover.

  8. PlayStation Logic Board Replacement: step 8, image 1 of 1
    • Detach power supply connector from logic board by pulling on the plastic tab.

  9. PlayStation Logic Board Replacement: step 9, image 1 of 1
    • Detach white ribbon cable from logic board by gently lifting on it.

  10. PlayStation Logic Board Replacement: step 10, image 1 of 1
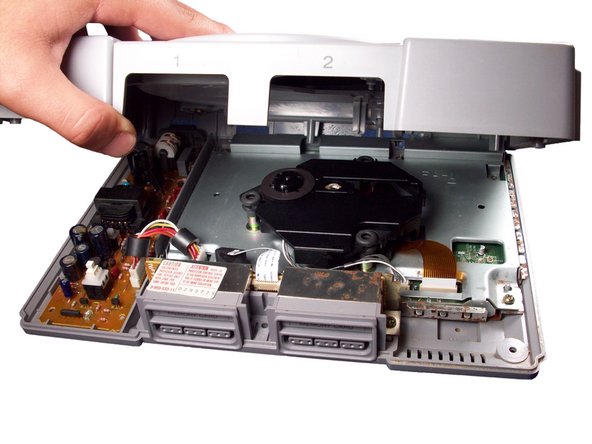
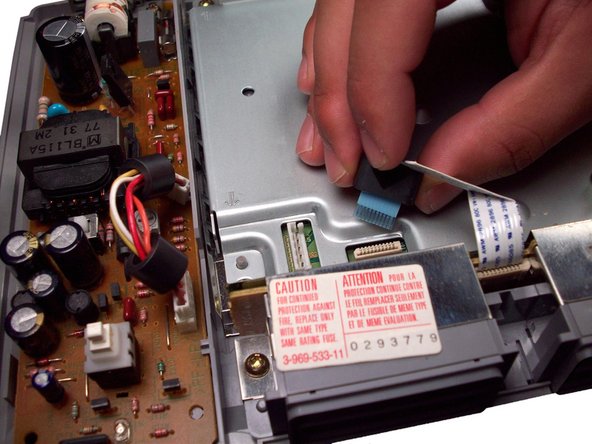
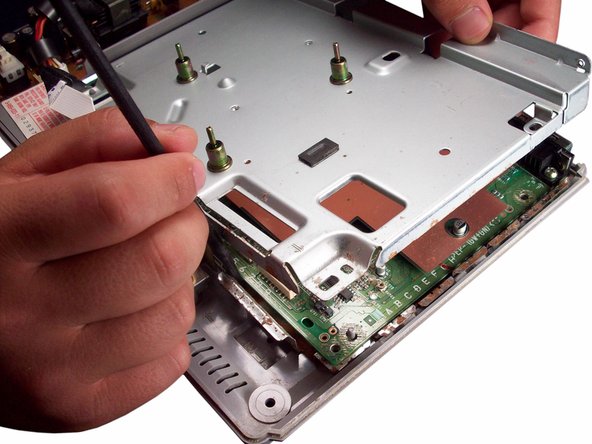
    • With one hand, hold the main board’s protective metal cover. With your other hand, wedge the spudger in between the right side of the protective cover and the thin metal clamps that surround it.

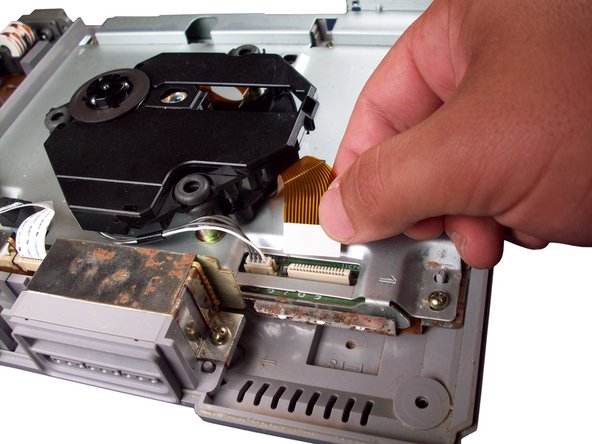
    • With the spudger in place, gently lift the upper portion of the metal cover. The cover should detach from the right side.

  11. PlayStation Logic Board Replacement: step 11, image 1 of 1
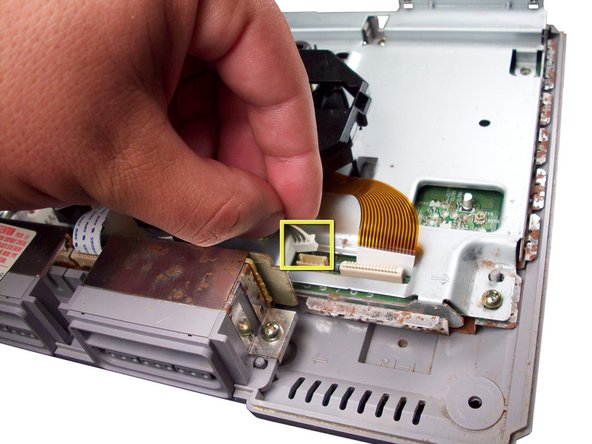
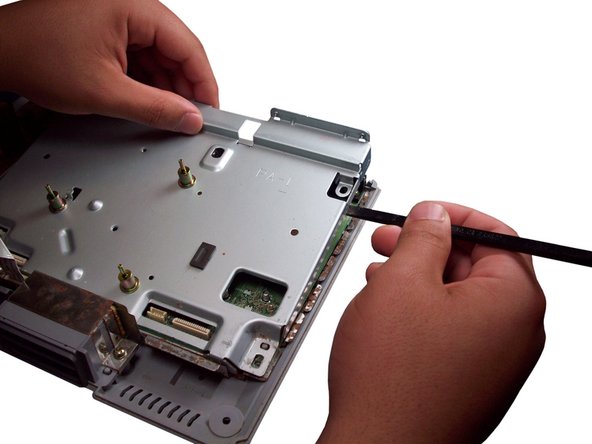
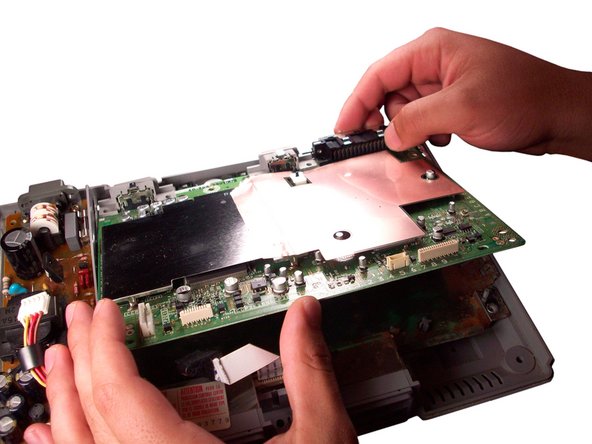
    • Using the same process from the previous step, wedge the spudger between the clamps and metal cover on the bottom side (as shown in the picture).

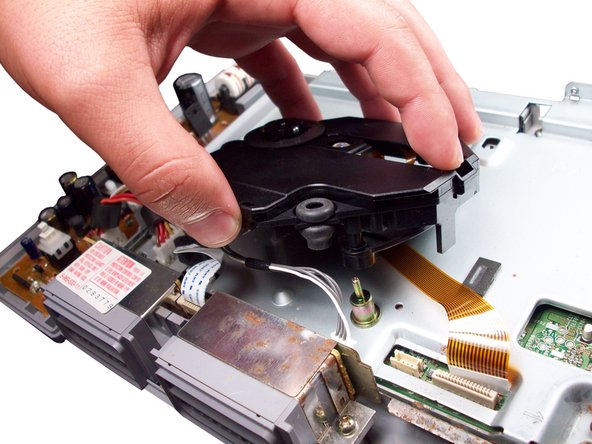
    • With your other hand, pull up on the top right corner of the metal cover to lift it off.

  12. PlayStation Logic Board Replacement: step 12, image 1 of 1
    • Remove the last four screws from the logic board.

  13. PlayStation Logic Board Replacement: step 13, image 1 of 1
    • Lift the logic board out of the PlayStation and replace with a new logic board.

Conclusion

To reassemble your device, follow these instructions in reverse order.

System

Member since: 09/24/09

2,562 Guides authored

0 Comments

Add Comment

View Statistics:

Past 24 Hours: 0

Past 7 Days: 0

Past 30 Days: 0

All Time: 9