/

Power Mac G4 Quicksilver Optical Drive Disassembly

What you need

  1. Power Mac G4 Quicksilver Optical Drive Disassembly, Power Mac G4 Quicksilver Optical Drive Disassembly: step 1, image 1 of 1
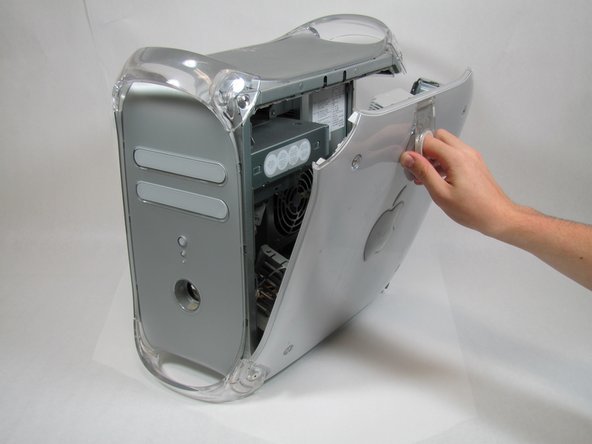
    • The handle to open your computer is located on top of the right side panel.

  2. Power Mac G4 Quicksilver Optical Drive Disassembly: step 2, image 1 of 2 Power Mac G4 Quicksilver Optical Drive Disassembly: step 2, image 2 of 2
    • Grab the circular handle and pull outward.

  3. Power Mac G4 Quicksilver Optical Drive Disassembly: step 3, image 1 of 1
    • Your computer is now open and ready for repair.

  4. Power Mac G4 Quicksilver Optical Drive Disassembly: step 4, image 1 of 1
    • The optical drive is in the top left corner of the case.

  5. Power Mac G4 Quicksilver Optical Drive Disassembly: step 5, image 1 of 2 Power Mac G4 Quicksilver Optical Drive Disassembly: step 5, image 2 of 2
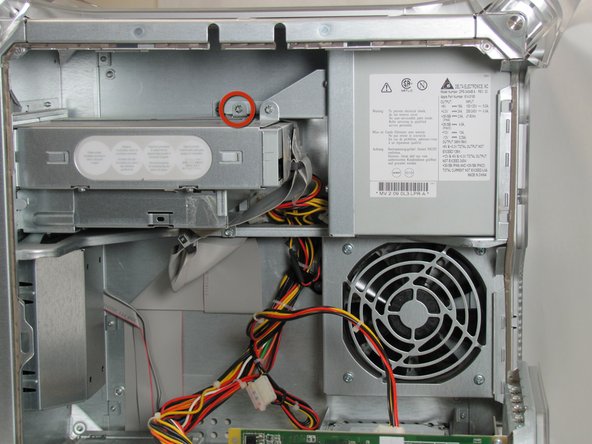
    • There are four screws to be removed.

    • The first screw can be seen in the first picture.

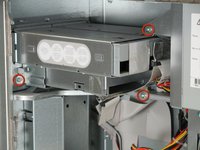
    • The remaining three screws can be seen in the second picture.

  6. Power Mac G4 Quicksilver Optical Drive Disassembly: step 6, image 1 of 1
    • Remove the optical drive by pulling the drive away from the front of the computer and out.

  7. Power Mac G4 Quicksilver Optical Drive Disassembly: step 7, image 1 of 1
    • Detach the two cables attached to the back of the drive.

    • The flat ribbon cable can be detached by pulling the silver tab. The multicolored cable can be removed by grasping the plastic connector on either side and pulling with substantial force.

Conclusion

To reassemble your device, follow these instructions in reverse order.

System

Member since: 09/24/09

2,562 Guides authored

0 Comments

Add Comment

View Statistics:

Past 24 Hours: 0

Past 7 Days: 0

Past 30 Days: 0

All Time: 17