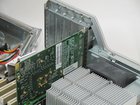
Power Mac G4 Quicksilver video adapter card replacement

Views: 21

View statistics:

Past 24 Hours:
0
Past 7 Days:
0
Past 30 Days:
3
All Time:
21
Comments: 0

No one has left comments on this guide. Will you be first?

Go to guide comments
Completed: 0

No one has marked this guide "completed." Will you be the first?

Favorites: 0

No one has favorited (and subscribed to) this guide. Will you be the first?

Time Required: No estimate
Difficulty: Easy
Power Mac G4 Quicksilver video adapter card replacement

Introduction

Go to step 1 ↓

This is hidden prereq.

What you need

    1. Power Mac G4 Quicksilver video adapter card replacement, Power Mac G4 Quicksilver video adapter card replacement: step 1, image 1 of 1
      • The handle to open your computer is located on top of the right side panel.

      Add Comment

    2. Power Mac G4 Quicksilver video adapter card replacement: step 2, image 1 of 2 Power Mac G4 Quicksilver video adapter card replacement: step 2, image 2 of 2
      • Grab the circular handle and pull outward.

      Add Comment

    3. Power Mac G4 Quicksilver video adapter card replacement: step 3, image 1 of 1
      • Your computer is now open and ready for repair.

      Add Comment

    4. Power Mac G4 Quicksilver video adapter card replacement: step 4, image 1 of 1
      • This is your Power Mac G4's video adapter.

      Add Comment

    5. Power Mac G4 Quicksilver video adapter card replacement: step 5, image 1 of 1
      • Start by removing the screw holding the card to the chassis as shown.

      Add Comment

    6. Power Mac G4 Quicksilver video adapter card replacement: step 6, image 1 of 1
      • Before lifting the card out, this small plastic tab needs to be pulled back there by releasing it entirely.

      Add Comment

    7. Power Mac G4 Quicksilver video adapter card replacement: step 7, image 1 of 2 Power Mac G4 Quicksilver video adapter card replacement: step 7, image 2 of 2
      • With the tab and screw removed, lift the card straight out.

      • When putting the card back in, take care to apply even pressure across the top with your thumbs. This will avoid damaging the card.

      Add Comment

Conclusion

To reassemble your device, follow these instructions in reverse order.

Cancel: I did not complete this guide.

System

Member since: 09/24/09

2,562 Guides authored

0 Guide Comments

Add Comment

View Statistics:

Past 24 Hours: 0

Past 7 Days: 0

Past 30 Days: 3

All Time: 21