
PowerBook G3 Pismo Clutch Cover Replacement

What you need

  1. PowerBook G3 Pismo Clutch Cover Replacement, PowerBook G3 Pismo Clutch Cover Replacement: step 1, image 1 of 1
    • Turn the keyboard locking screw so that it is parallel to the space bar.

    • Pull the keyboard release tabs toward you and lift up on the keyboard until it pops free.

    • Lift the keyboard out by pulling it up and away from you. Rest the keyboard, face down, on top of the track pad.

    Add Comment

  2. PowerBook G3 Pismo Clutch Cover Replacement: step 2, image 1 of 1
    • Pull the keyboard ribbon straight up from the logic board. Place the keyboard aside.

    • The connector may be tight. Gently rock the connector from side to side while pulling directly upward to free it. You can use this technique on many of the cards and cables you'll be disconnecting.

    • Make sure you have removed the laptop battery and CD/DVD modules from the expansion bays before proceeding.

    Add Comment

  3. PowerBook G3 Pismo Clutch Cover Replacement: step 3, image 1 of 1
    • Your laptop should look approximately like this.

    Add Comment

  4. PowerBook G3 Pismo Clutch Cover Replacement: step 4, image 1 of 1
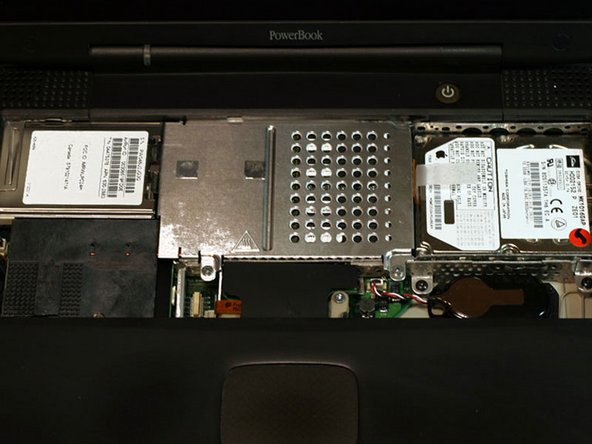
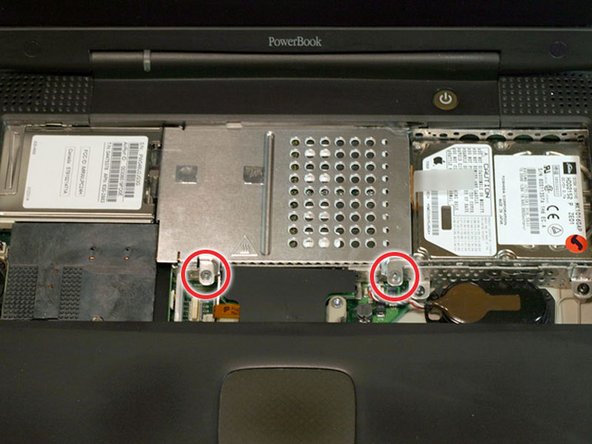
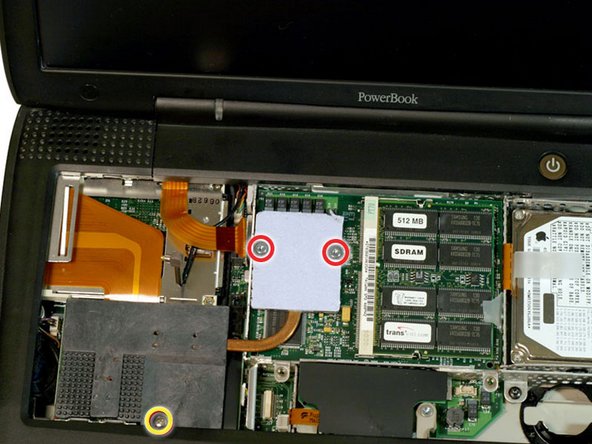
    • Remove the two silver Phillips #1 screws that attach the heat shield to the internal metal framework.

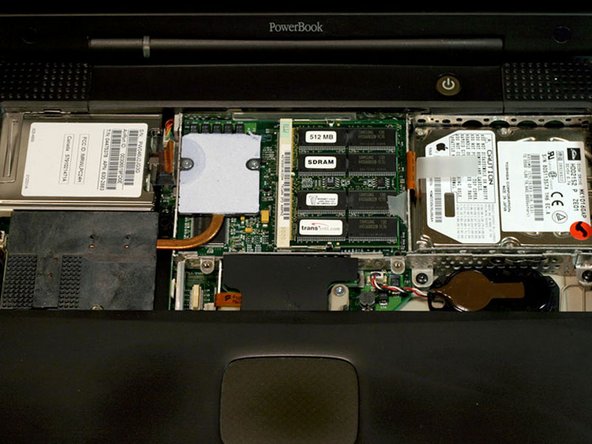
    • Lift the heat shield up and pull it toward you.

    Add Comment

  5. PowerBook G3 Pismo Clutch Cover Replacement: step 5, image 1 of 1
    • Your laptop should look approximately like this.

    Add Comment

  6. PowerBook G3 Pismo Clutch Cover Replacement: step 6, image 1 of 1
    • Skip this step if your computer does not have an Airport card installed.

    • Firmly grasp the plastic tab attached to the Airport card and pull up and then to the right.

    • The Airport card is still attached to the antenna cable, so don't just yank it out of the slot.

    Add Comment

  7. PowerBook G3 Pismo Clutch Cover Replacement: step 7, image 1 of 1
    • Disconnect the antenna cable from the Airport card.

    Add Comment

  8. PowerBook G3 Pismo Clutch Cover Replacement: step 8, image 1 of 1
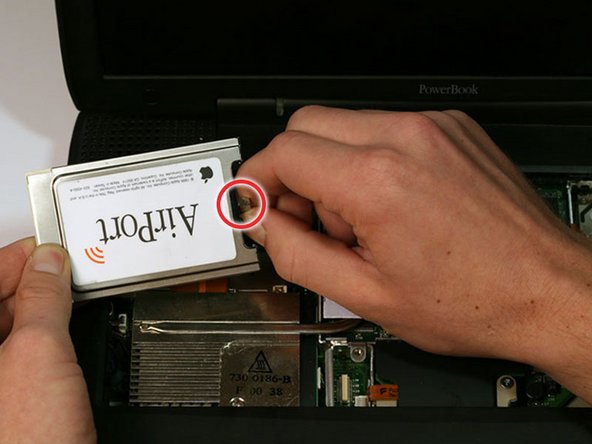
    • Pull the battery cable directly up from the logic board.

    • Remove the battery from its holder by pulling up and to the left.

    Add Comment

  9. PowerBook G3 Pismo Clutch Cover Replacement: step 9, image 1 of 1
    • Your laptop should look approximately like this.

    Add Comment

  10. PowerBook G3 Pismo Clutch Cover Replacement: step 10, image 1 of 1
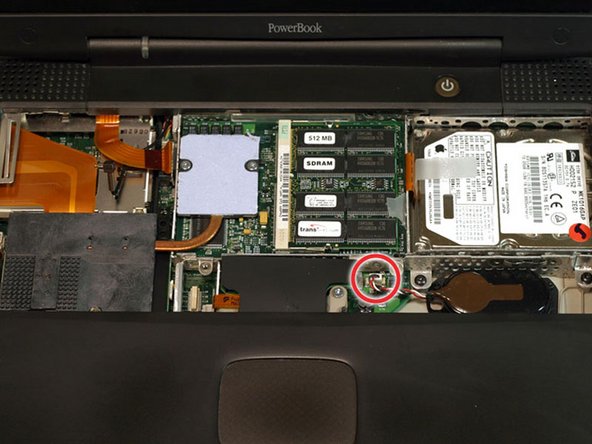
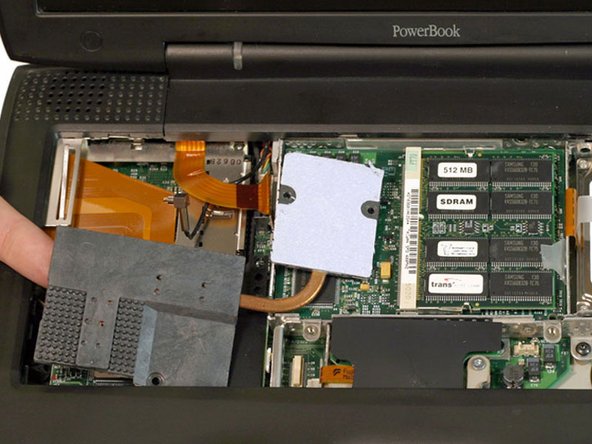
    • Remove the long silver Phillips #1 screw from the heat sink.

    • Remove the two T8 Torx screws that attach the heat sink to the processor.

    Add Comment

  11. PowerBook G3 Pismo Clutch Cover Replacement: step 11, image 1 of 1
    • Lift the heat sink up from the left side and pull it out.

    • If you need to mount the heat sink back into the laptop, we have a thermal paste guide that makes replacing the thermal compound easy.

    Add Comment

  12. PowerBook G3 Pismo Clutch Cover Replacement: step 12, image 1 of 1
    • Grasp the plastic tab on the processor's right side and pull it directly up.

    • Some processors may be missing the plastic pull tab. In this case, we suggest using a non-metal tool to gently pry up the processor. Slip the tool's thin edge under the front right corner of the processor and carefully pry it up.

    Add Comment

  13. PowerBook G3 Pismo Clutch Cover Replacement: step 13, image 1 of 1
    • Your laptop should look approximately like this.

    Add Comment

  14. PowerBook G3 Pismo Clutch Cover Replacement: step 14, image 1 of 1
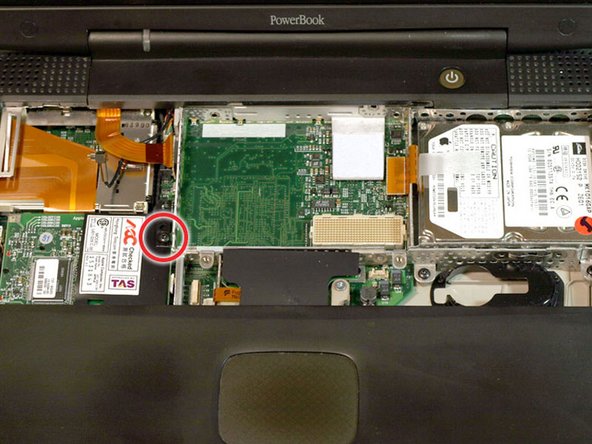
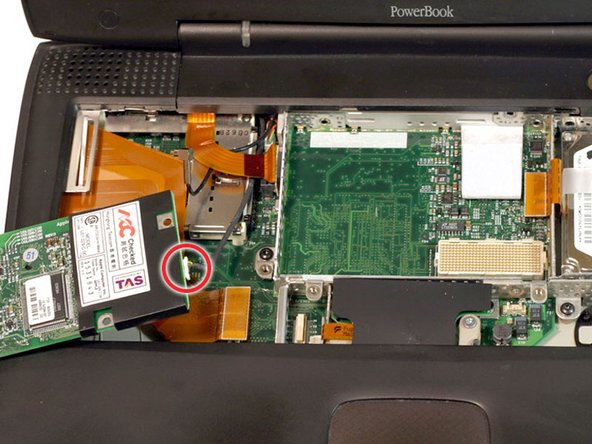
    • Remove the black Torx screw from the right side of the modem.

    • Remove the small black plastic rectangle with four holes.

    Add Comment

  15. PowerBook G3 Pismo Clutch Cover Replacement: step 15, image 1 of 1
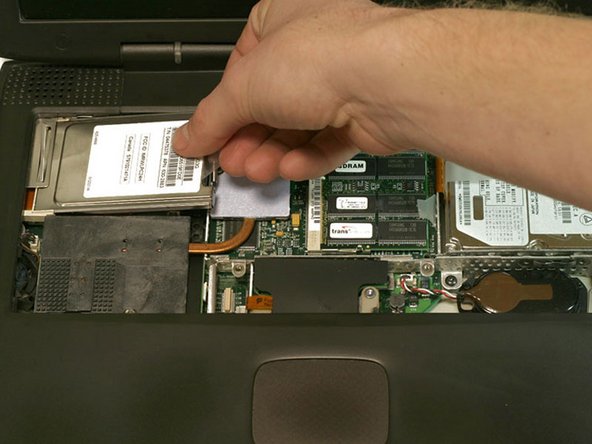
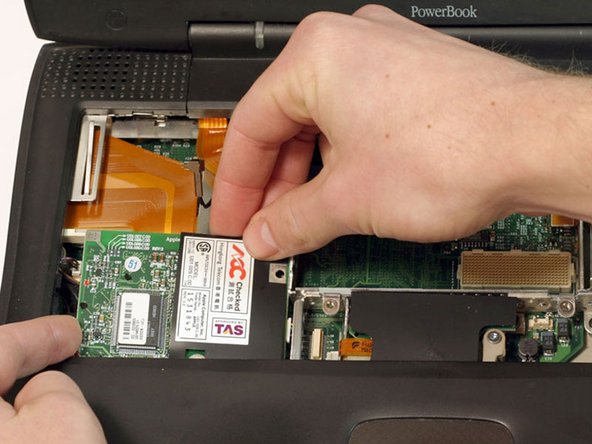
    • Use the tips of your fingers, a spudger, or a flat non-metal tool to get under the modem's edge and pry it up from its socket.

    Add Comment

  16. PowerBook G3 Pismo Clutch Cover Replacement: step 16, image 1 of 1
    • Disconnect the cable from the right side of the modem.

    Add Comment

  17. PowerBook G3 Pismo Clutch Cover Replacement: step 17, image 1 of 1
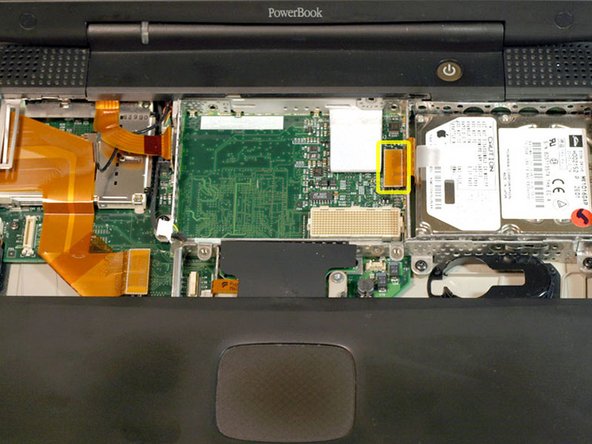
    • Grasp the orange cable at the left end of the hard drive and disconnect it from the logic board.

    • Try to grasp the cable on the plastic connector rather than on the flexible cable section.

    Add Comment

  18. PowerBook G3 Pismo Clutch Cover Replacement: step 18, image 1 of 1
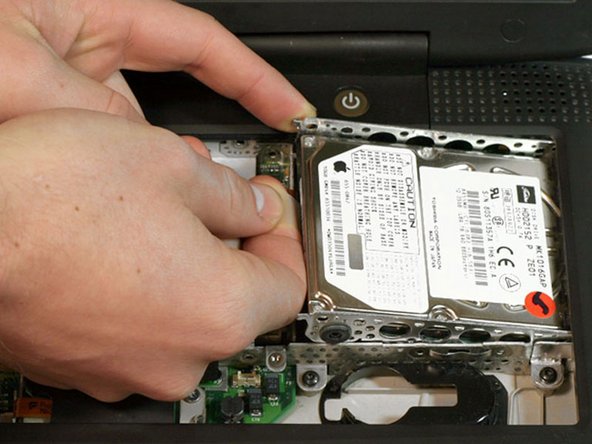
    • Grasp the plastic tab and pull the hard drive up and to the left, making sure that the metal bracket doesn't catch on the black plastic casing.

    Add Comment

  19. PowerBook G3 Pismo Clutch Cover Replacement: step 19, image 1 of 1
    • Your laptop should look approximately like this.

    Add Comment

  20. PowerBook G3 Pismo Clutch Cover Replacement: step 20, image 1 of 1
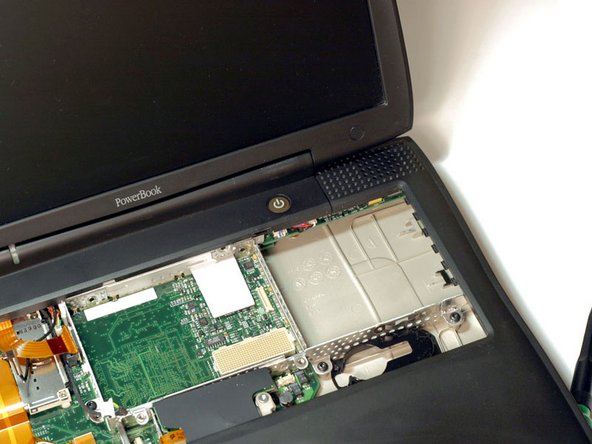
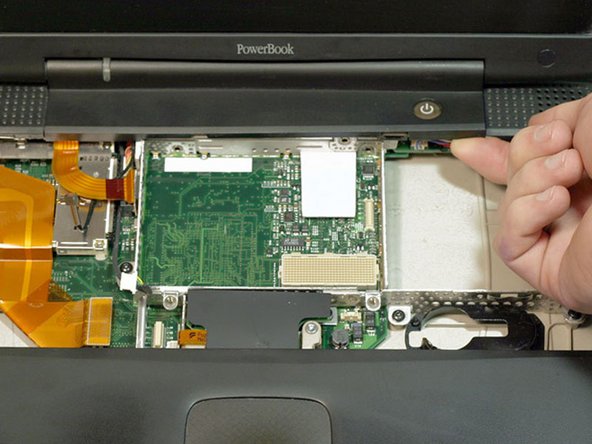
    • Push the display back so that it lies flat.

    • Slip your index finger or a nylon tool under the clutch cover near the power button and pull gently upward until you feel it come free.

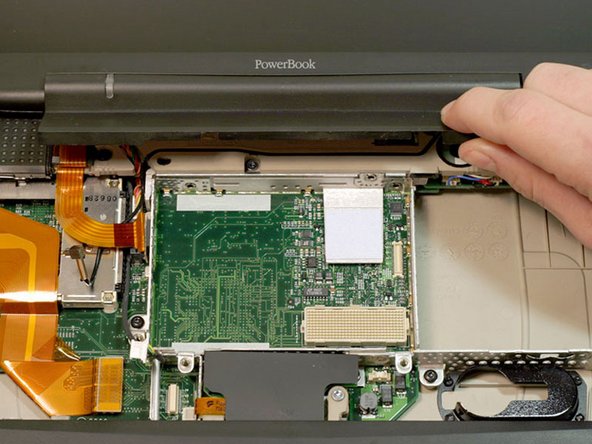
    • Repeat the previous step on the left side.

    Add Comment

  21. PowerBook G3 Pismo Clutch Cover Replacement: step 21, image 1 of 1
    • Lift the clutch cover up and off, rotating it toward yourself.

    Add Comment

Conclusion

To reassemble your device, follow these instructions in reverse order.

Cancel: I did not complete this guide.

System

Member since: 09/24/09

2,562 Guides authored

0 Guide Comments

Add Comment

View Statistics:

Past 24 Hours: 0

Past 7 Days: 0

Past 30 Days: 0

All Time: 11