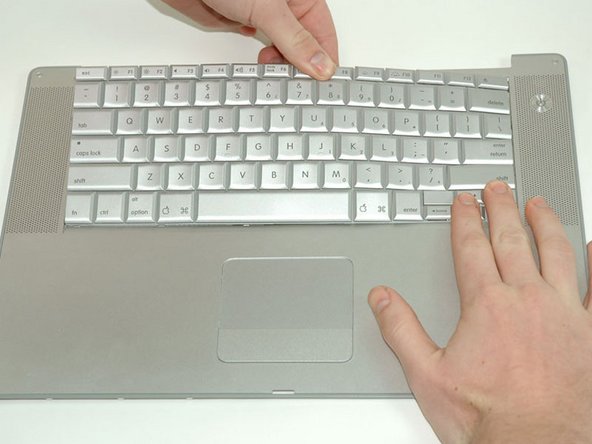
PowerBook G4 Aluminum 15" 1.5-1.67 GHz Keyboard Replacement

What you need

    1. PowerBook G4 Aluminum 15" 1.5-1.67 GHz Keyboard Replacement, PowerBook G4 Aluminum 15" 1.5-1.67 GHz Keyboard Replacement: step 1, image 1 of 1
      • Use a coin to turn the battery locking screw 90 degrees clockwise.

      • Lift the battery out of the computer.

      Add Comment

    2. PowerBook G4 Aluminum 15" 1.5-1.67 GHz Keyboard Replacement: step 2, image 1 of 1
      • Remove the four Phillips screws from the memory door.

      • Slide the memory door away from the memory compartment.

      Add Comment

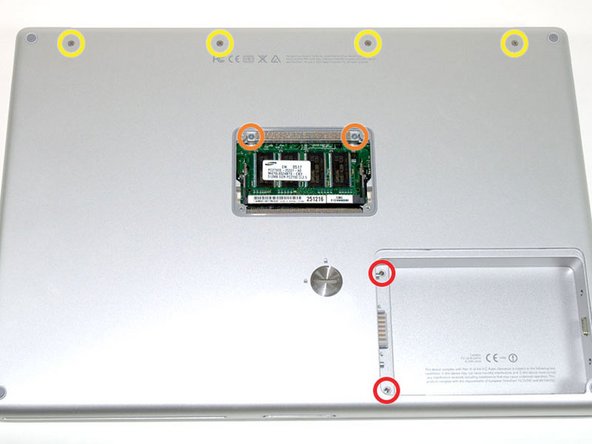
    3. PowerBook G4 Aluminum 15" 1.5-1.67 GHz Keyboard Replacement: step 3, image 1 of 1
      • Remove the following 8 screws:

      • Two 3 mm Phillips in the battery compartment, on either side of the battery contacts.

      • Two 12 mm Phillips on either side of the memory compartment.

      • Four 16 mm Phillips along the hinge.

      Add Comment

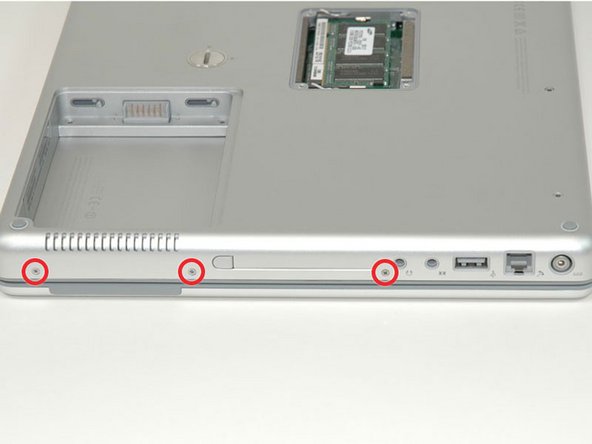
    4. PowerBook G4 Aluminum 15" 1.5-1.67 GHz Keyboard Replacement: step 4, image 1 of 1
      • Rotate the computer 90 degrees clockwise, so that the power receptacle faces you.

      • Remove the three 3 mm Phillips screws.

      • When replacing these screws, you must place each screw in the correct order. Begin by installing the screw closest to the display hinge, and go out from there.

      Add Comment

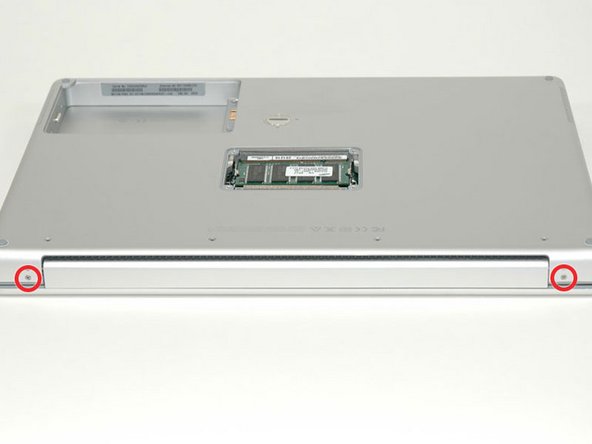
    5. PowerBook G4 Aluminum 15" 1.5-1.67 GHz Keyboard Replacement: step 5, image 1 of 1
      • Turn the computer 90 degrees clockwise so that the hinge faces you.

      • Remove the bottom 5 mm Phillips screw on either side of the hinge (two total).

      Add Comment

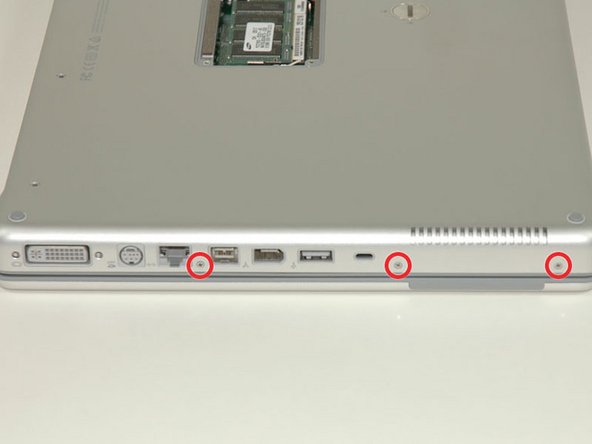
    6. PowerBook G4 Aluminum 15" 1.5-1.67 GHz Keyboard Replacement: step 6, image 1 of 1
      • Rotate the computer 90 degrees clockwise, so that the ports face you.

      • Remove the three 3 mm Phillips screws.

      • When replacing these screws, you must place each screw in the correct order. Begin by installing the screw closest to the display hinge, and go out from there.

      Add Comment

    7. PowerBook G4 Aluminum 15" 1.5-1.67 GHz Keyboard Replacement: step 7, image 1 of 1
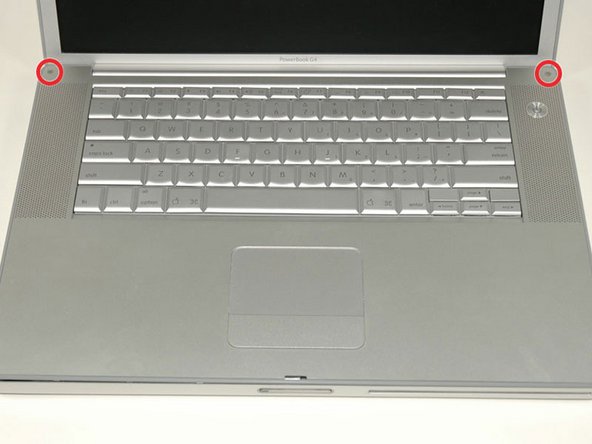
      • Turn the computer over and open the display.

      • Remove the two 1.5 mm hex screws in either corner, next to the display (a T6 Torx driver will work, but repeated use will strip the screws).

      Add Comment

    8. PowerBook G4 Aluminum 15" 1.5-1.67 GHz Keyboard Replacement: step 8, image 1 of 1
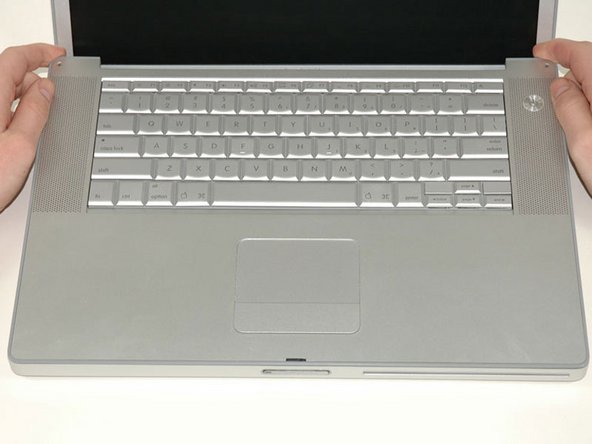
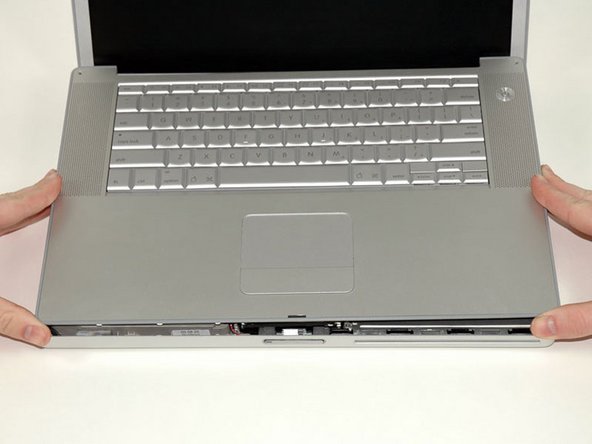
      • Grasp the back corners of the upper case and pull up. Do not pull the upper case off yet; you still need to disconnect the keyboard and trackpad cable.

      • Lift the back of the case up and work your fingers along the sides, freeing the case as you go. Once you have freed the sides, you may need to rock the case up and down to free the front of the upper case.

      Add Comment

    9. PowerBook G4 Aluminum 15" 1.5-1.67 GHz Keyboard Replacement: step 9, image 1 of 1
      • Rotate the upper case up and toward the screen, so that the upper case rests against it.

      Add Comment

    10. PowerBook G4 Aluminum 15" 1.5-1.67 GHz Keyboard Replacement: step 10, image 1 of 1
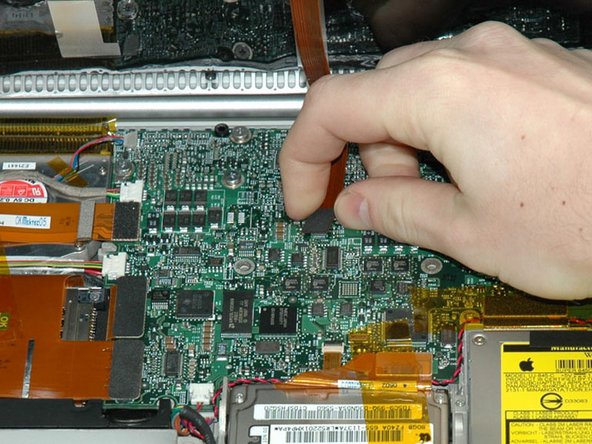
      • Remove the orange tape securing the trackpad ribbon to the logic board.

      • Disconnect the trackpad ribbon from the logic board.

      • Remove the upper case from the computer.

      Add Comment

    11. PowerBook G4 Aluminum 15" 1.5-1.67 GHz Keyboard Replacement: step 11, image 1 of 1
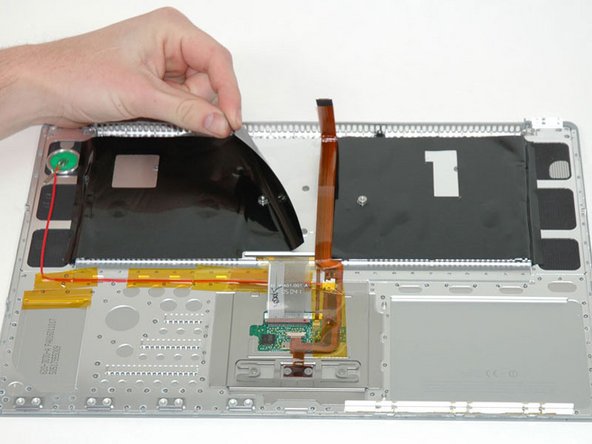
      • On the following step, be careful with the tape on the side of the keyboard with the green power button, as the tape may stick and tear.

      • Peel back the black plastic shielding on either side of the keyboard (there are two pieces).

      Add Comment

    12. PowerBook G4 Aluminum 15" 1.5-1.67 GHz Keyboard Replacement: step 12, image 1 of 1
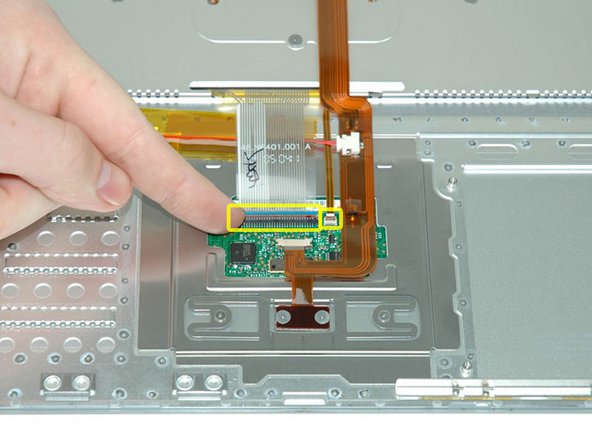
      • Use your fingernail to flip up the plastic flaps locking down the keyboard and keyboard backlight ribbon cables (in the picture, both flaps are already up).

      • Slide the cables from their connectors.

      Add Comment

    13. PowerBook G4 Aluminum 15" 1.5-1.67 GHz Keyboard Replacement: step 13, image 1 of 1
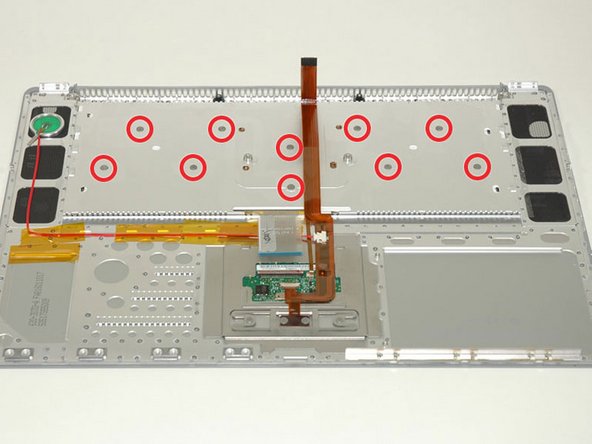
      • Remove the 10 identical Phillips screws attaching the keyboard to the casing.

      Add Comment

    14. PowerBook G4 Aluminum 15" 1.5-1.67 GHz Keyboard Replacement: step 14, image 1 of 1
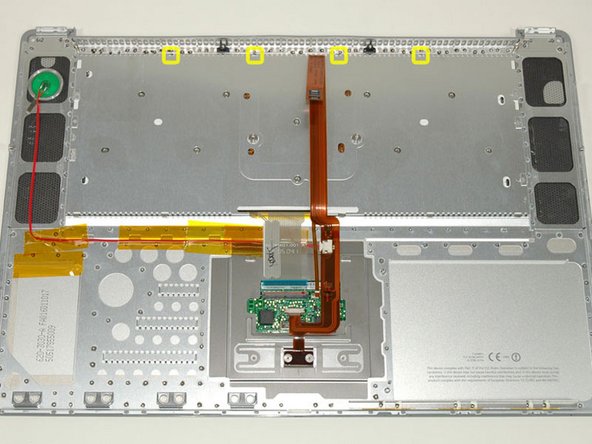
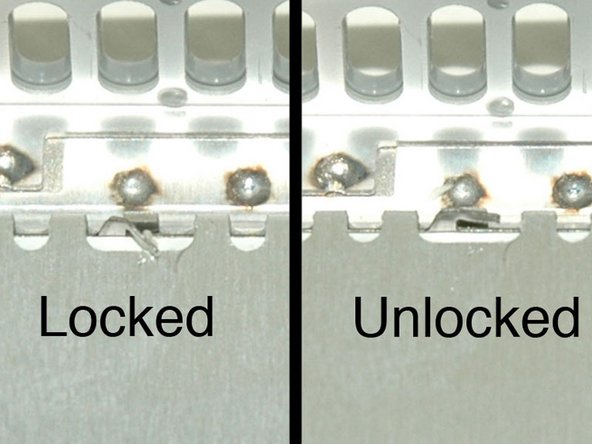
      • There are four locking tabs along the back edge of the keyboard holding it in place. These tabs must be straightened before you can remove the keyboard.

      Add Comment

    15. PowerBook G4 Aluminum 15" 1.5-1.67 GHz Keyboard Replacement: step 15, image 1 of 1
      • The first frame shows a tab in the "locked" position and the second frame shows the same tab in the "unlocked" position.

      • Use needlenose pliers to bend each of the four tabs so that they are all in the "unlocked" position.

      Add Comment

    16. PowerBook G4 Aluminum 15" 1.5-1.67 GHz Keyboard Replacement: step 16, image 1 of 1
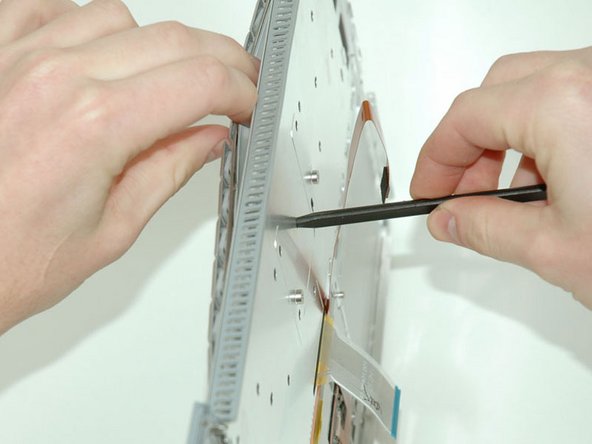
      • Place the upper casing on edge and use a spudger to push the keyboard away from the casing, poking the spudger through the central keyboard screw hole. Grasp the keyboard as it separates from the casing.

      Add Comment

    17. PowerBook G4 Aluminum 15" 1.5-1.67 GHz Keyboard Replacement: step 17, image 1 of 1
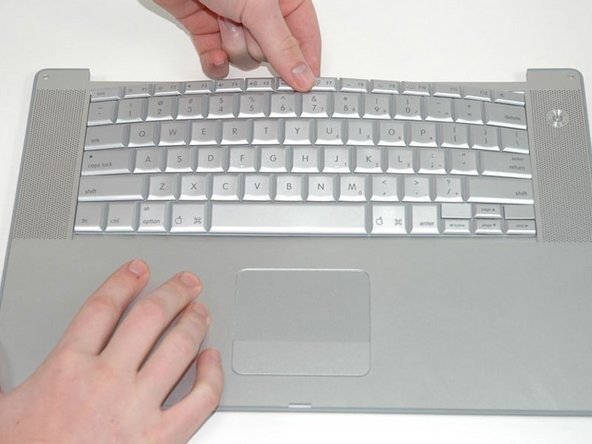
      • Maintaining your hold on the keyboard, lay the casing flat and gently bow the keyboard until the two tabs on either side of the keyboard come free.

      Add Comment

    18. PowerBook G4 Aluminum 15" 1.5-1.67 GHz Keyboard Replacement: step 18, image 1 of 1
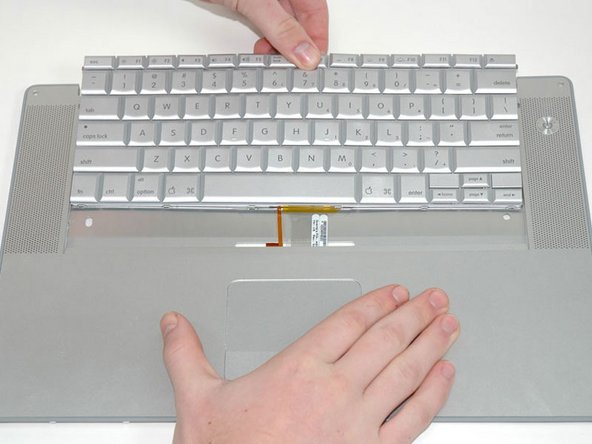
      • Slide the keyboard away from the trackpad and out of the upper case.

      Add Comment

    19. PowerBook G4 Aluminum 15" 1.5-1.67 GHz Keyboard Replacement: step 19, image 1 of 1
      • To replace the keyboard, first slide the bottom tabs in, then bow the keyboard out and slide in first the tabs on the right side of the keyboard and then the tabs on the left side.

      Add Comment

Conclusion

To reassemble your device, follow these instructions in reverse order.

Cancel: I did not complete this guide.

System

Member since: 09/24/09

2,562 Guides authored

0 Guide Comments

Add Comment

View Statistics:

Past 24 Hours: 1

Past 7 Days: 1

Past 30 Days: 1

All Time: 29